When you’re typing February, do you say FEB-RU-AR-Y in your head? Yeah, me either. Why would anyone do that?
A lot of life has happened in the last six and a half months, my friends.
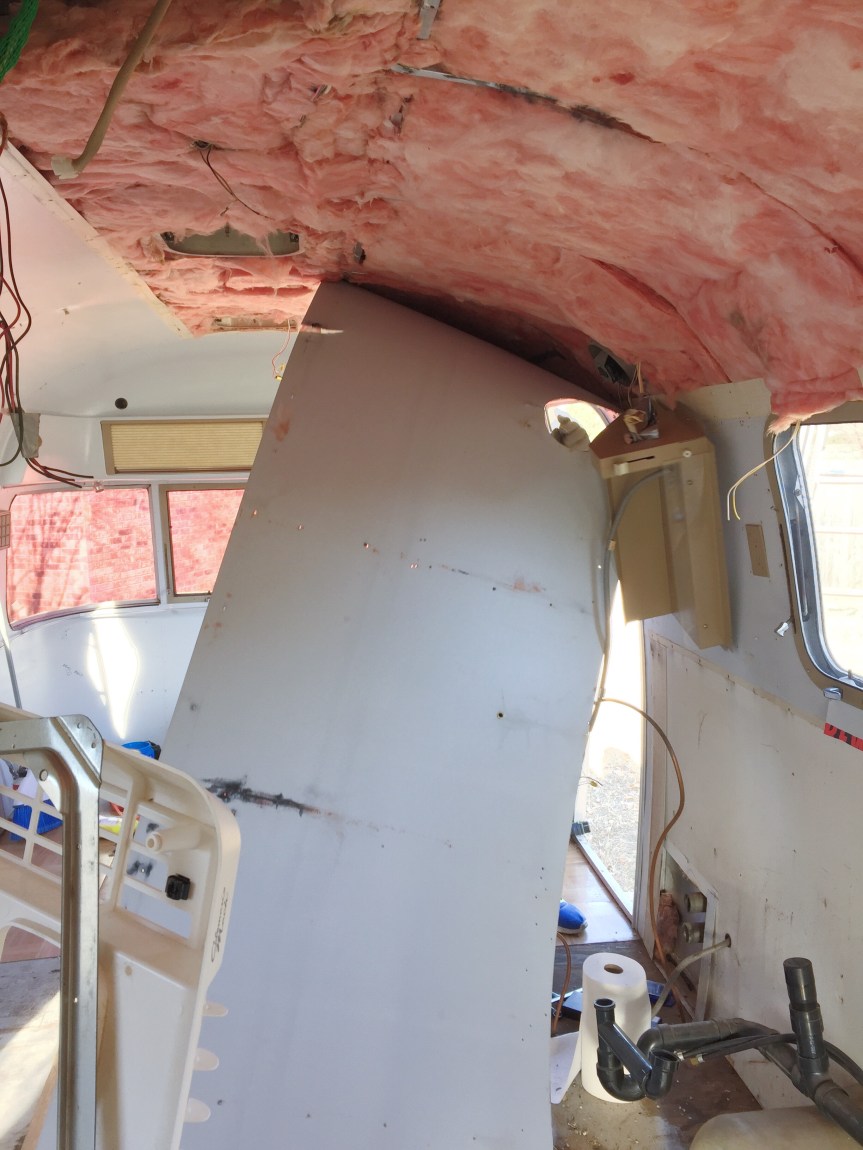
Our beloved trailer wasn’t ready for us to move into as we planned, but our lease was up in March, so we moved. Luckily, we live where Rosy lives, now. Having immediate access to her has been great! As time and budget allows, we are building her to our specs, and we are SO eager to get her done ASAP and move in! I’ll do a full update post on Rosy soon, I promise. Here are some semi-recent pics that I’ll explain in later posts.
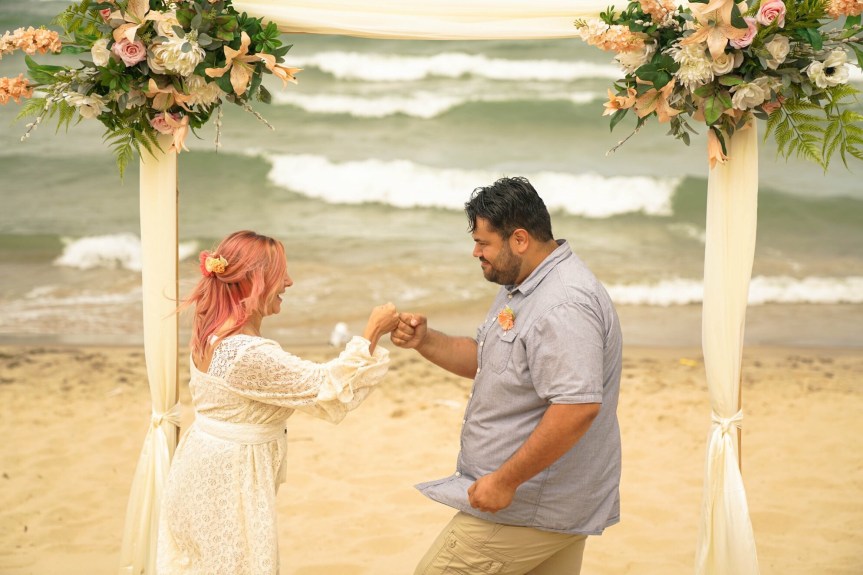
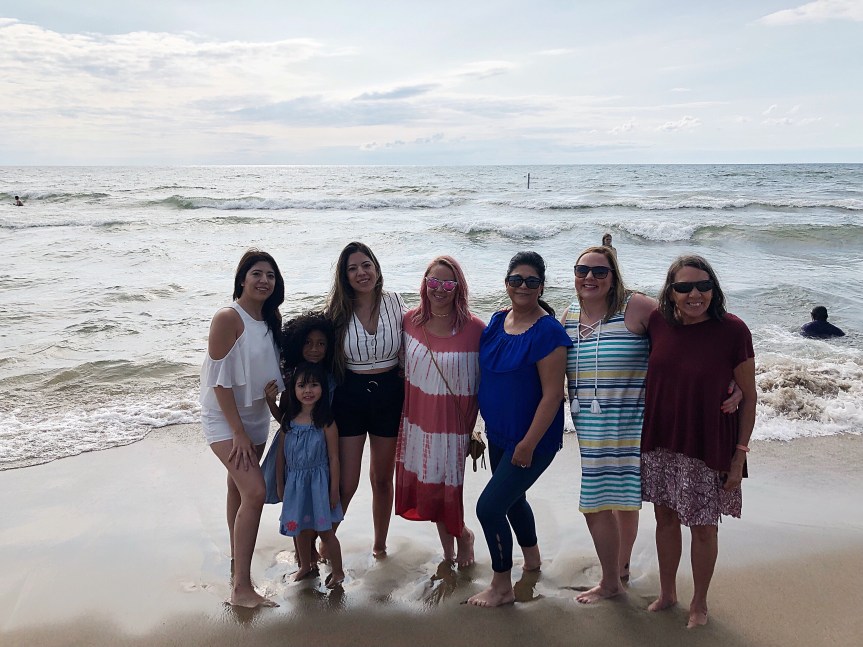
We got married! Once we hit the point with the trailer where we didn’t yet have the right equipment to keep going, we put renovations on pause and shifted our focus to finalizing all the wedding things. We got married on the beach at Tunnel Park on Lake Michigan. It was everything I’ve ever dreamed of! Hope the same goes for him too 🤣. Yes, we did our secret handshake just before our first kiss as a married couple. That’s just how we do.
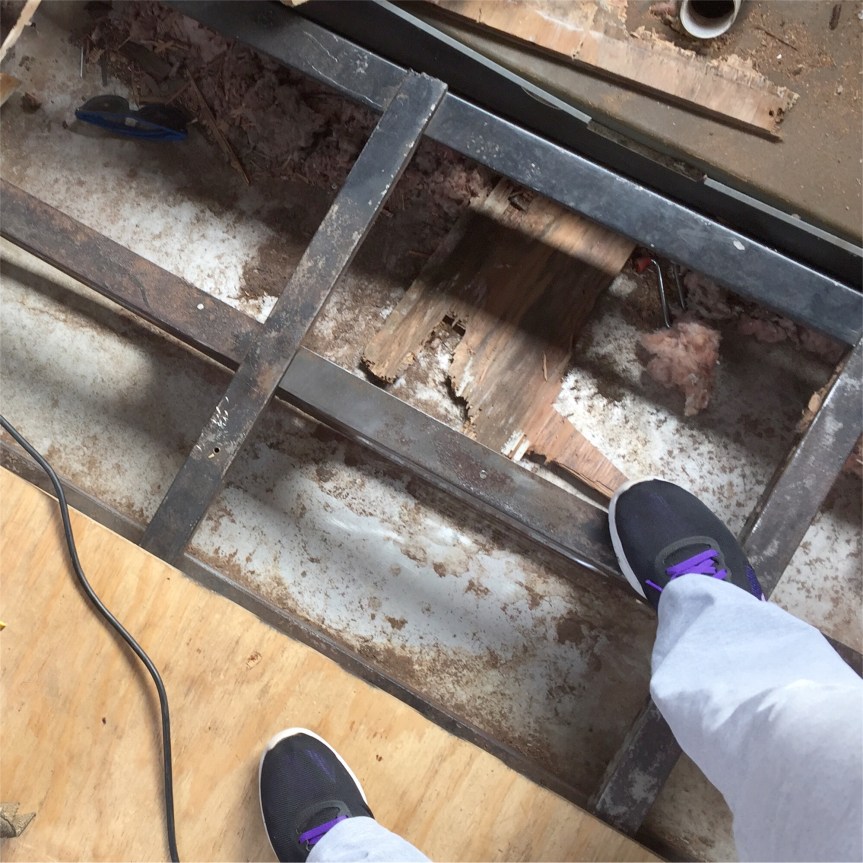
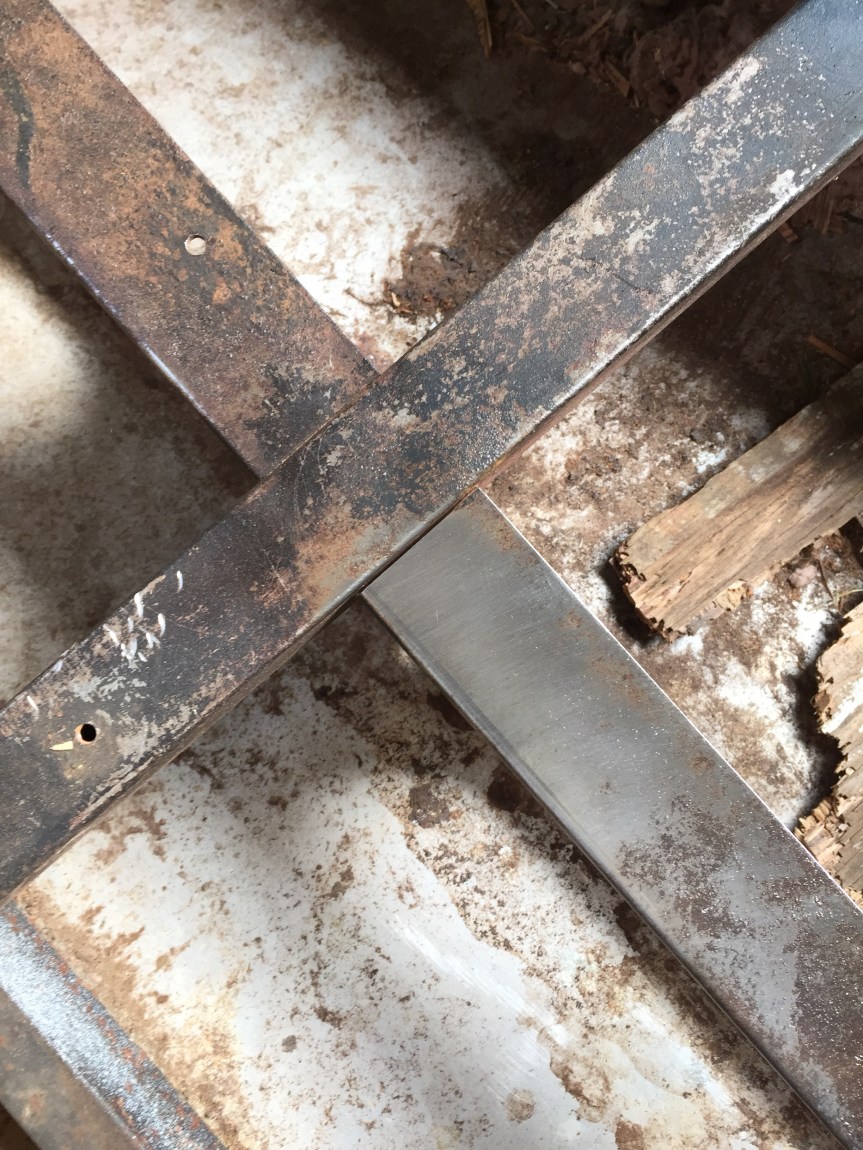
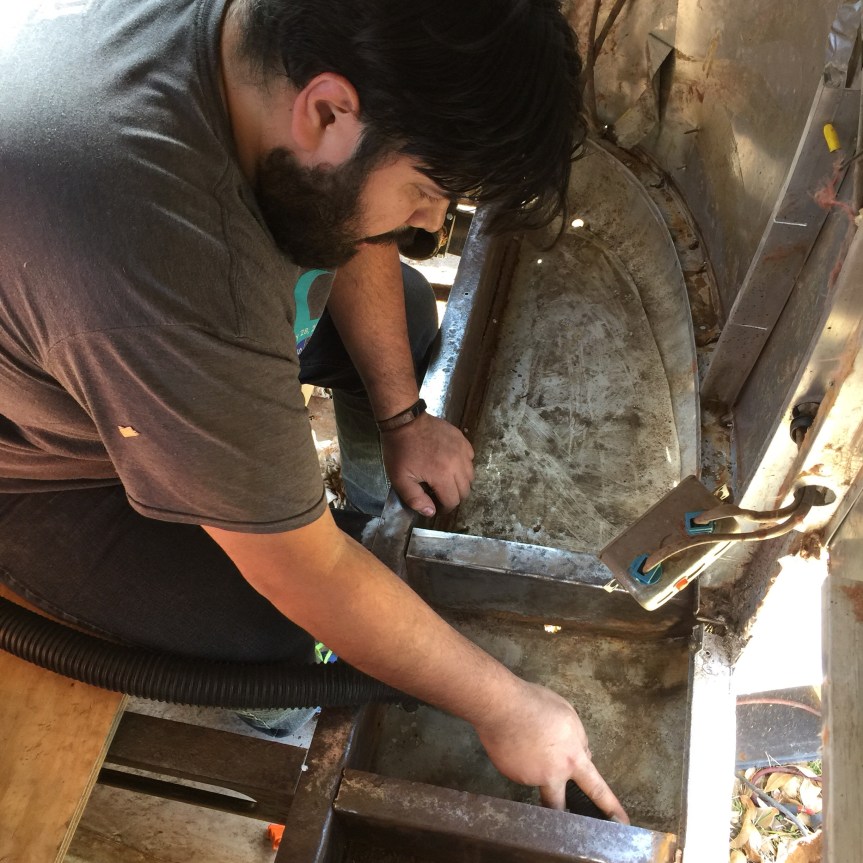
This is what stopped us in our tracks about a month before the wedding. A chewed up, salt-corroded, cancerous rusty frame.
That’s all from the front end of the trailer. Because the back end was in great condition for its age, having only minor surface rust, we thought the front end would be good to go. Nope. So now, we’re in the business of welding. And when I say we, I mean Arnavick, because I’ve done nothing but supervise so far, though I realllly want to try welding at least once! 👩🏼🏭
Anyway, back to where we started… I haven’t been on here since Feb! That makes me so sad! I really love blogging. Before I was here, I spent a couple of years writing Jamie’s Home blog where I chronicled my decor and diy adventures. Blogging is a fun outlet for me, and I like being able to stretch my writing legs in a casual setting!
I work full time and then some, go to school four nights a week, and we’re renovating Rosy, so I find myself thinking that I don’t have time to blog. But really, I could spend a heck of a lot less time on Facebook and Insta and take those efforts over here at the teamjamavick.com hq, so that’s what I think I’ll do. Or try to do. Homework comes first. Actually I’m supposed to be doing homework right now! Oops. Baby steps.
So here’s to more blogging! My next posts will likely be a recap of what we’ve done on the trailer, a nice lil’ wedding post, and a recap of some of the fun stuff we did while we were up in West Michigan for our wedding and honeymoon. Talk soon!
I’m a few days late, but here I am with the February progress report! It’ll be short and sweet, because LORT we are busy. Feb is awful in Texas because WEATHER, and it’s also busy busy because it’s my birth month, and my amazing nephew’s birth month, and it’s short. So between family time and work and school schedules, and working on the Rosy, I dunno how we had time to breathe… But breathe and work and study and party and renovate, we did… and here’s where we’re at on the whole reno process…
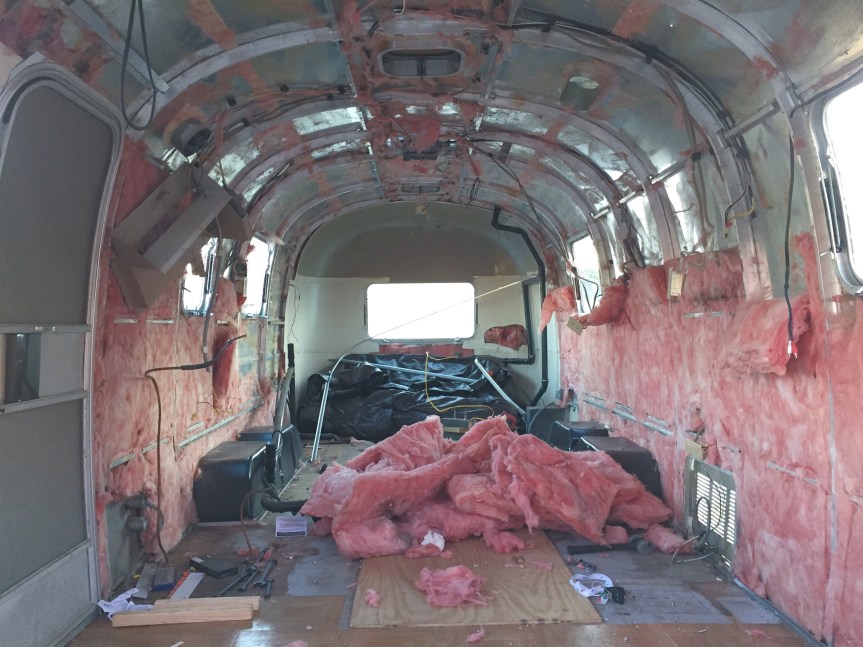
Basically, the current status is that we’ve got frame exposed, interior skins out, insulation gone, and a mess EVERYWHERE. We only have March to get this gal ready to sleep in without danger (more on that later), but thanks to some touching generosity of our friends we have a place to crash if sleeping in Rosy is still a health hazard come April 1. Here she is in her icky glory.
It feels like we’ve worked on her a ton with no visual difference. Okay, slight visual difference. I’ll be so glad to put all of this rust brushing and muck cleaning behind us! Today we’re going to make a first attempt at using POR15 to cover the rust on the frame and protect it from damage. Neither of us have used this product before but I’ve done a lot of research over the last week or so and have gotten some good advice from some of our little renovation village. Fingers crossed it goes well!
This is our last month in the apartment. I’ve paid the final rent payment, which felt really, REALLY good. We have just a few weeks to get Rosy what I call “minimally livable”. We define minimally livable as subfloor in, new insulation in, new interior skins in, and said skins painted. If we can get that far along, we’ll toss our mattress in the subfloor and “rough it” (if you can call it that) while we continue on with construction. If we can’t get that far along, we have a back up plan consisting of our very kind and generous friends’ guest room on the same property where we keep the camper. The hardest part in all of this has been packing.
We procrastinated too much, and have now put ourselves in a really tight spot. I work around 52 hours a week between my full time job and freelance work, and I go to school two nights each week for a total of about five hours. Vick pulls long hours in a warehouse all week. We are TIRED in our free time. At this point we are donating or trashing everything we are sure we don’t want, and we’re boxing up everything we do want or are unsure of. It’s hard to say what we’ll need until we’re in the thick of living the lifestyle, so we’ll just pull stuff from storage as the need comes up, which will help us determine what else we can get rid of. Well, we’re off to go do all the things! Happy camping, everyone!
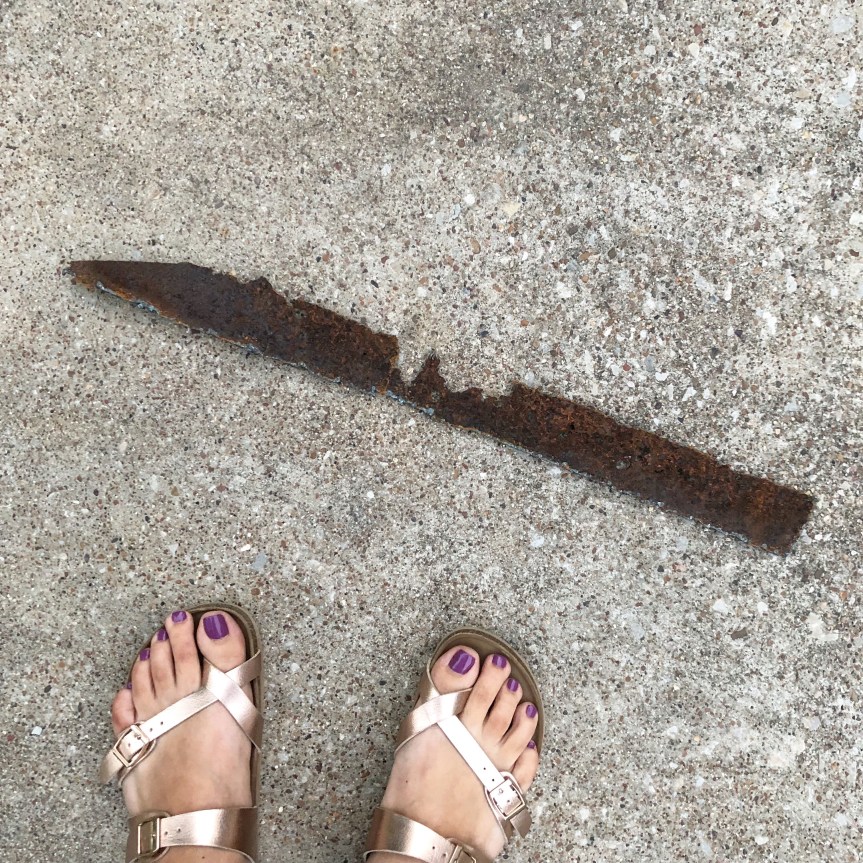
January has been a tough month for measurable progress. It’s been cold (like, for Texas, anyway). So cold, that we iced up one day!
I’ve been taking care of some wedding stuff, and some work stuff, and some school stuff, and I had some friends in town this weekend… And hanging with them was much more fun than donning a respirator mask and safety goggles to sweat and play in the rust. I’m feeling a little down right now because we haven’t made the progress that I thought we would have by now. The last two times we’ve been out to the trailer, we arrived several hours behind schedule, and hit what felt like a hundred roadblocks that prevented us from reaching our end goal for the day. Trailer reno is hard, dudes. But… I’m gonna throw down a little progress report, in the hopes that it will lift my spirits, and bring into my focus all of the accomplishments we’ve achieved since my last update. Let’s get started, shall we?
So, the last time I shared our progress, it was really short blurb with a lot of pics. And reviewing that post just now as I prep to write out today’s post, I can see that we have in fact gotten a TON done. We are still far off from being able to even hang out in the trailer for too long without respirators on, but we’re getting there.
A month ago, we still had interior skins. We had just started taking them down. Boy, that feels like a lifetime ago.
Since then we’ve popped out at least a couple hundred or so rivets, and away went the interior skins.
We started by taking the cover of the AC unit down and removing all of the light fixtures so we could take down the ceiling. It was all one long skinny strip of metal skin, which was pretty satisfying to pull down. It was also a little nerve-wracking because, well, that’s it. Once you start pulling those puppies down, you’re full on committed to redoing your insulation and skins. Say bye bye to painting that 70s era vinyl wallpapered (??) metal and let ‘er rip, potato chip!
After that, we then worked our way down the sides, leaving the end caps for last.
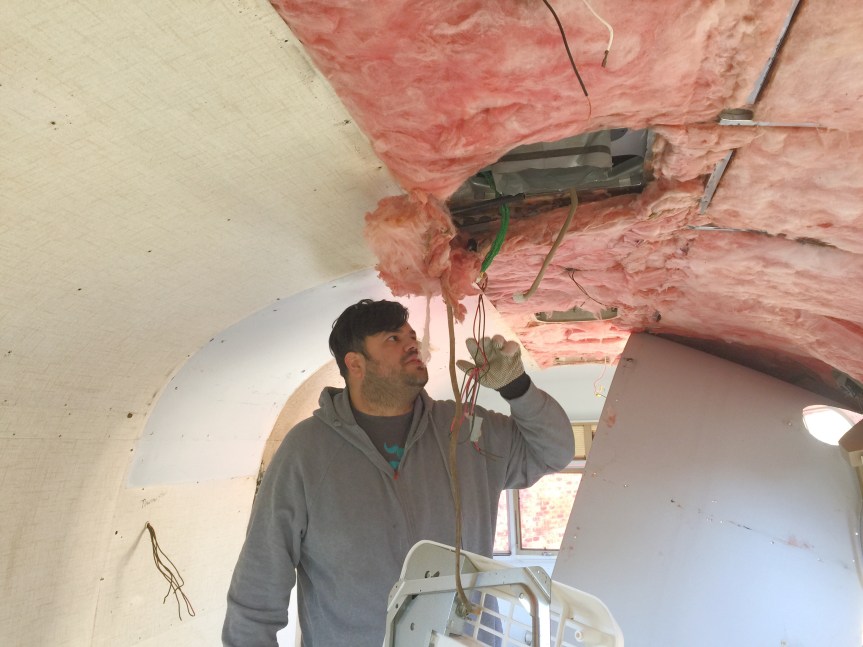
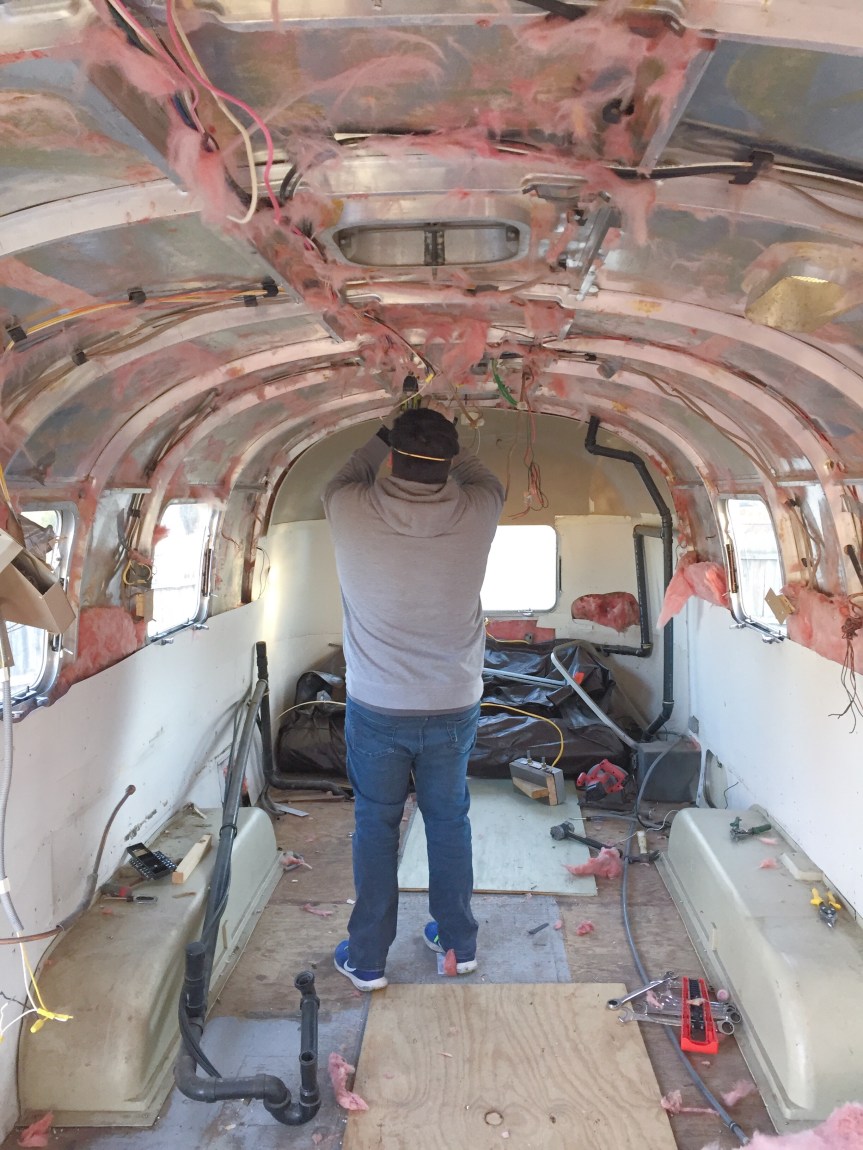
Then we started to pull out the ol pink stuff…
We had several sessions of pulling this stuff down, and going home incredibly itchy – ugh – despite taking precautions to keep it off of our skin. Super annoying!
The end caps were a little scary to take off. Not because it was difficult, it wasn’t. It was just the same as taking off all the other skins… But taking the end caps off and trashing them meant that we for certain were going to have to make new ones at some point, on our own, and have to account for that beautiful, dreaded, iconic, amazing, terrifying Airstream curve. If I haven’t already mentioned it, Vick and I met in remedial math class. We-no-likey-the-maths. But we did what we do, sucked it up and pulled them off, and vowed to figure that out when we got there. Thankfully, we’re not “there” just yet.
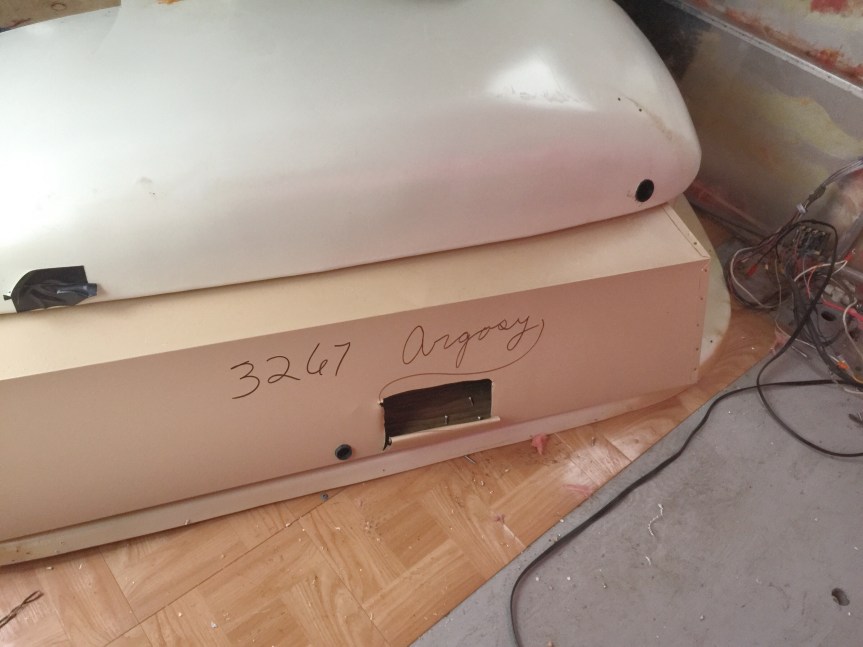
The back side of our front interior endcap had 3267 Argosy written on it in permanent marker. I’m not sure what that means, but it’s cool to think that the last time anyone laid eyes on that was probably in the 70s at the factory. I’ll have to google it one of these days to see what I can find… unless anyone reading this knows what it means? Help a sister out!
Once all of the interior skins were done, we were left with a big pile of scraps, tons of bags of the pink stuff, and a lot of little particles to shop vac up.
At that point we were ready to get going on the floor. We had already cut up a small section of it over the gray tank several weeks ago and realized that it’d be better to remove all of the skins first, since the subfloor is bolted in behind them in several places.
We’ve since gotten up most of the floor, with a circular saw, vise grips, a lot of muscle, and a lot of determination. Let me use this opportunity to say – I had several moments while removing the skins where I stopped to say to myself: “Why are we doing this? The insulation isn’t so bad and the electrical works. Is this really necessary?”. Seeing what we had under our floor had me vehemently answering YES YES YES.
Definite evidence of rodents, moisture, and other general nastiness. GROSSGROSSGROSSGROSS.
Had we just said “eh, it’s probably okay” and painted over it with no investigation, we would never truly know what we were living on top of, which would have been a nasty cesspool of icky.
Right now, we have a makeshift plywood “floor” so we’re not walking around on the frame, which needs a few minor welds and a LOT of rust removal and POR-15 (not necessarily in that order).
We still have about a third of the floor to take off, but we’re handling all the stuff in the c-channel and the bolts on the frame first. We’ve been twisting the bolts out with vise grips, which seems to work well enough and not take too terribly long.
Folks keep suggesting an angle grinder, which I know will also do the trick, but I wonder how careful you have to be to protect the frame, opposed to just using a little muscle to pull them out with the vise grips? Anyone have an opinion? Put it in the comments!
My lease is up in 61 days. The tentative plan is to get her as far along as we can so we can move in April 1st. Bare minimum, we need the insulation done and the interior skins up, and the sub down and sealed, and the interior fully painted, and only then we are willing to move in and sleep on our mattress on the floor while we finish up the rest. By April, Texas is warm enough that we won’t have the cold to worry about, and hey, with all that rent and utility money freed up, we just might get a lot done in a relatively short amount of time to get her road ready faster! A girl can Airstream Dream, right? Right now, here’s how she looks (with the mess cleaned up for the pic, of course):
Anyone else out there feeling the reno blues? That feeling that everything takes forever plus a day, and that you’re running way behind? We can do this, right?! Camper People Power! ✊🏽
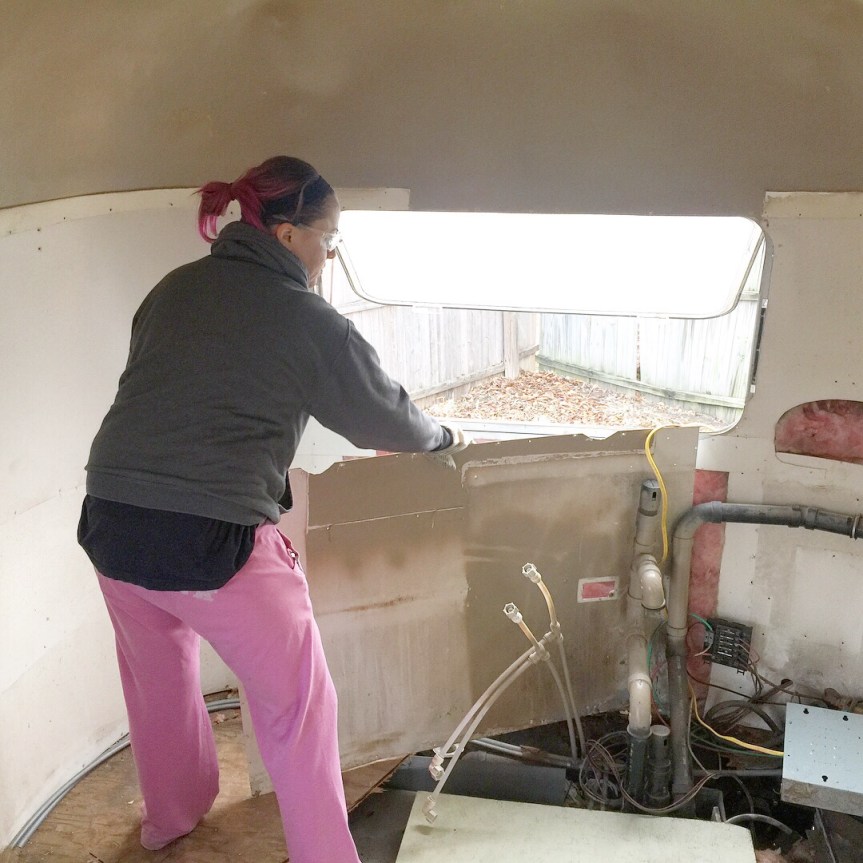
There are so, so, SO many things to pull out of an Airstream in order to get to the subfloor.
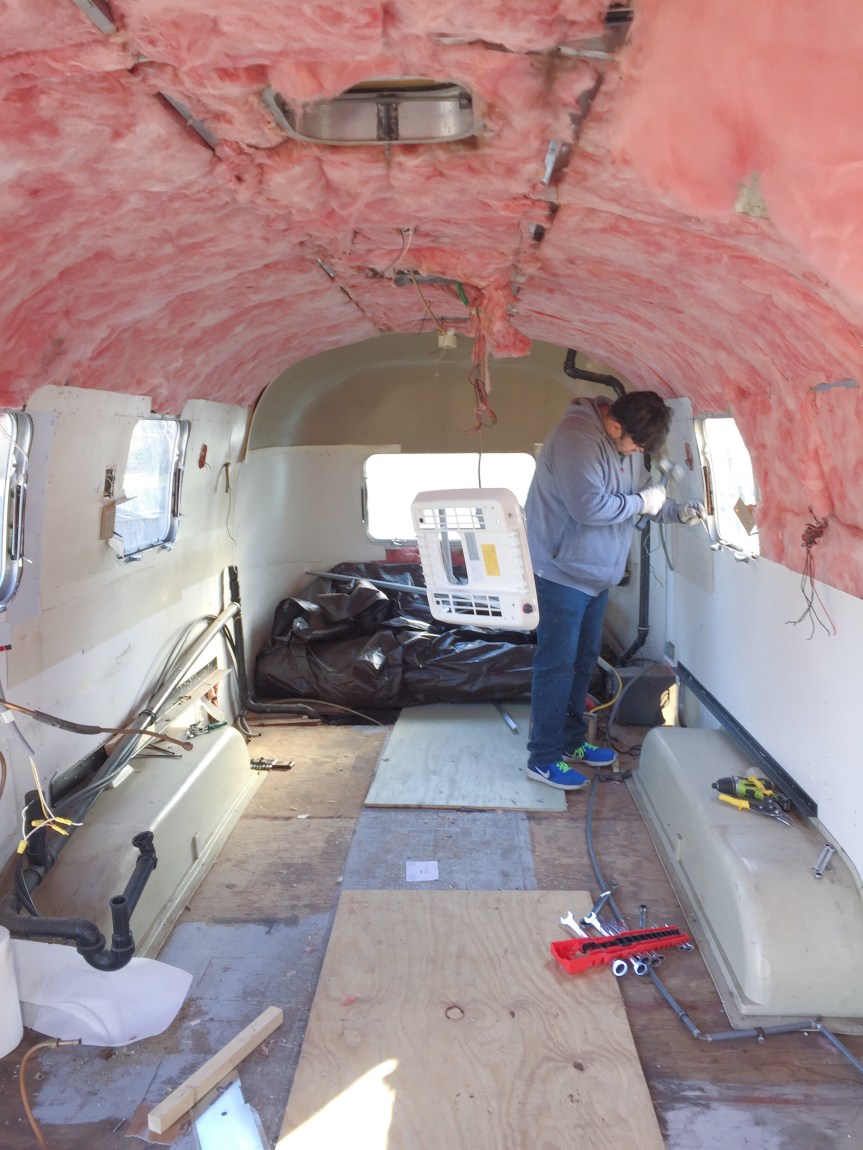
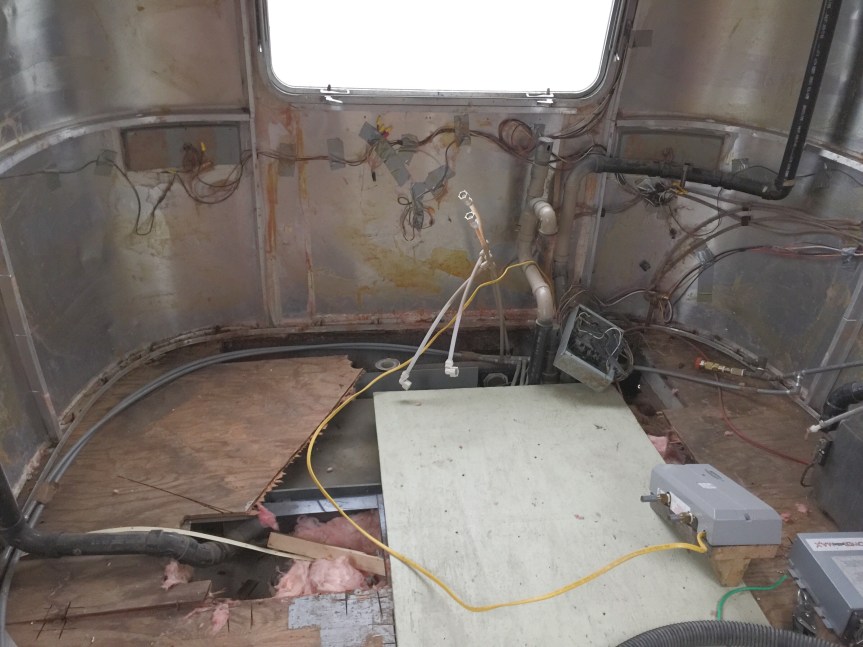
The plan for today was to loosen or remove everything in the way of the floor. That means the fresh water tank, water pump, furnace, on-demand water heater, and the toilet. In the three-ish hours we were there, I pulled out the fresh tank, and Vick handled the furnace, and then both of us pulled out the ductwork. Because if you’re going to pull out the furnace, you might as well pull out the ductwork too. We aren’t totally sure we’re going to keep the furnace, anyway. It’s older and takes up a ton of valuable storage space. If anyone has any recommendations on space and energy saving alternatives, we are all ears!
Before pulling ductwork:
After pulling ductwork:
We did have to go primitive with standard hand tools for a bit for some hard to reach screws and bolts on the ductwork. We are so spoiled on power tools!
I also loosened the on-demand water heater, which was affixed to the floor with a few three inch long screws.
Once all of that was taken care of, the trailer was an absolute mess, and I didn’t want to proceed any further until we tidied things up a bit.
We swept up as much debris as we could, except for what’s in the little nooks and crannies that are hard to reach – which is why we still have dozens of pop rivet mandrels left behind by Rosy’s previous owner (the little metal rods pictured below). They’ll get swept out eventually.
Our toolbox desperately needed organizing, so we took care of that as well. We are typically so focused on whatever we’re working on, that once we’re done for the day at our worksite, tools are everywhere. We’re normally leaving the worksite in a rush to get home before Cowboys kickoff, so we usually just gather the tools as fast as we can and dump them wherever they fit in the box. This had gone too far, so I’m glad Arnavick instigated a toolbox organizing sesh – we were overdue.
We also sifted some trash out of our can o’ hardware – can you believe that all of these screws and hose clamps and such came out of our little 27-foot trailer? There are so many of them! And we still have more to go…
Suffice to say, after all that cleaning, we didn’t get to cross everything off of our list of items keeping us from getting to the subfloor. BUT, progress is progress, so we’re satisfied with that. We are a tad bit nervous about disconnecting the water pump and surrounding wires. Arnavick thinks some of the wires may be for the DVD/sound system our previous owner installed. To me, it just looks like a bunch of colorful cords. We have a friend that knows electrician things, so hopefully, we can get him out to take a look and give his expert advice.
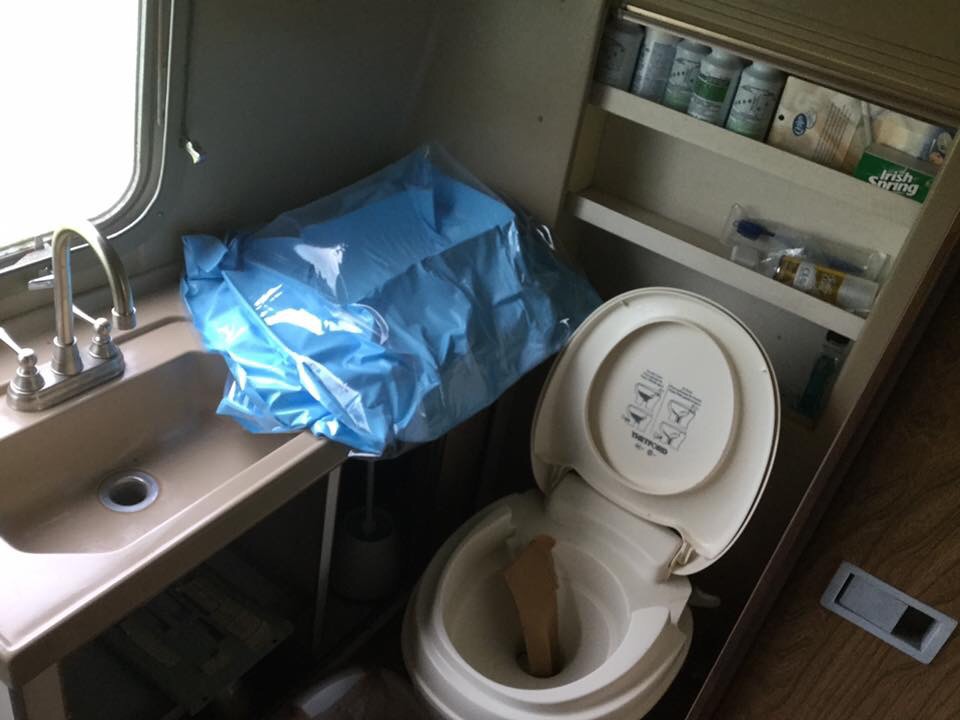
We also didn’t get the toilet out. We’ve been talking about this for weeks, but have been saving it for last. I feel like it’s best to pull out the ol’ pot just before handling the subfloor, just in case there are some icky fumes or minor biohazard situations that arise. We’ll already have everything else out of the way at that point, so it should minimize the impact of any potential issues.
Now’s a good time for a before and after, don’tcha think?
When we got the trailer:
Current status:
Now I feel much better, after seeing what a difference we’ve made in just under three months. After all, we both work full time (and then some), and I go to school and am active in school organizations, which leaves us only one day per week to work on the rig. Progress is progress, right?
So who has hot tips on a space-saving furnace (pun always intended)? Or even full HVAC options? I’d love to get rid of the roof AC unit, too! Advice in the comments – go!
Okay, let’s get a couple of quickie things out of the way:
This is not a sponsored or partner post (not that I’m not into that, wink). This is just a recap of an experience.
Sorry in advance for the photo quality. These are mostly snaps that I saved in the moment. I was way too jazzed to get perfectly framed shots. #shrugemoji
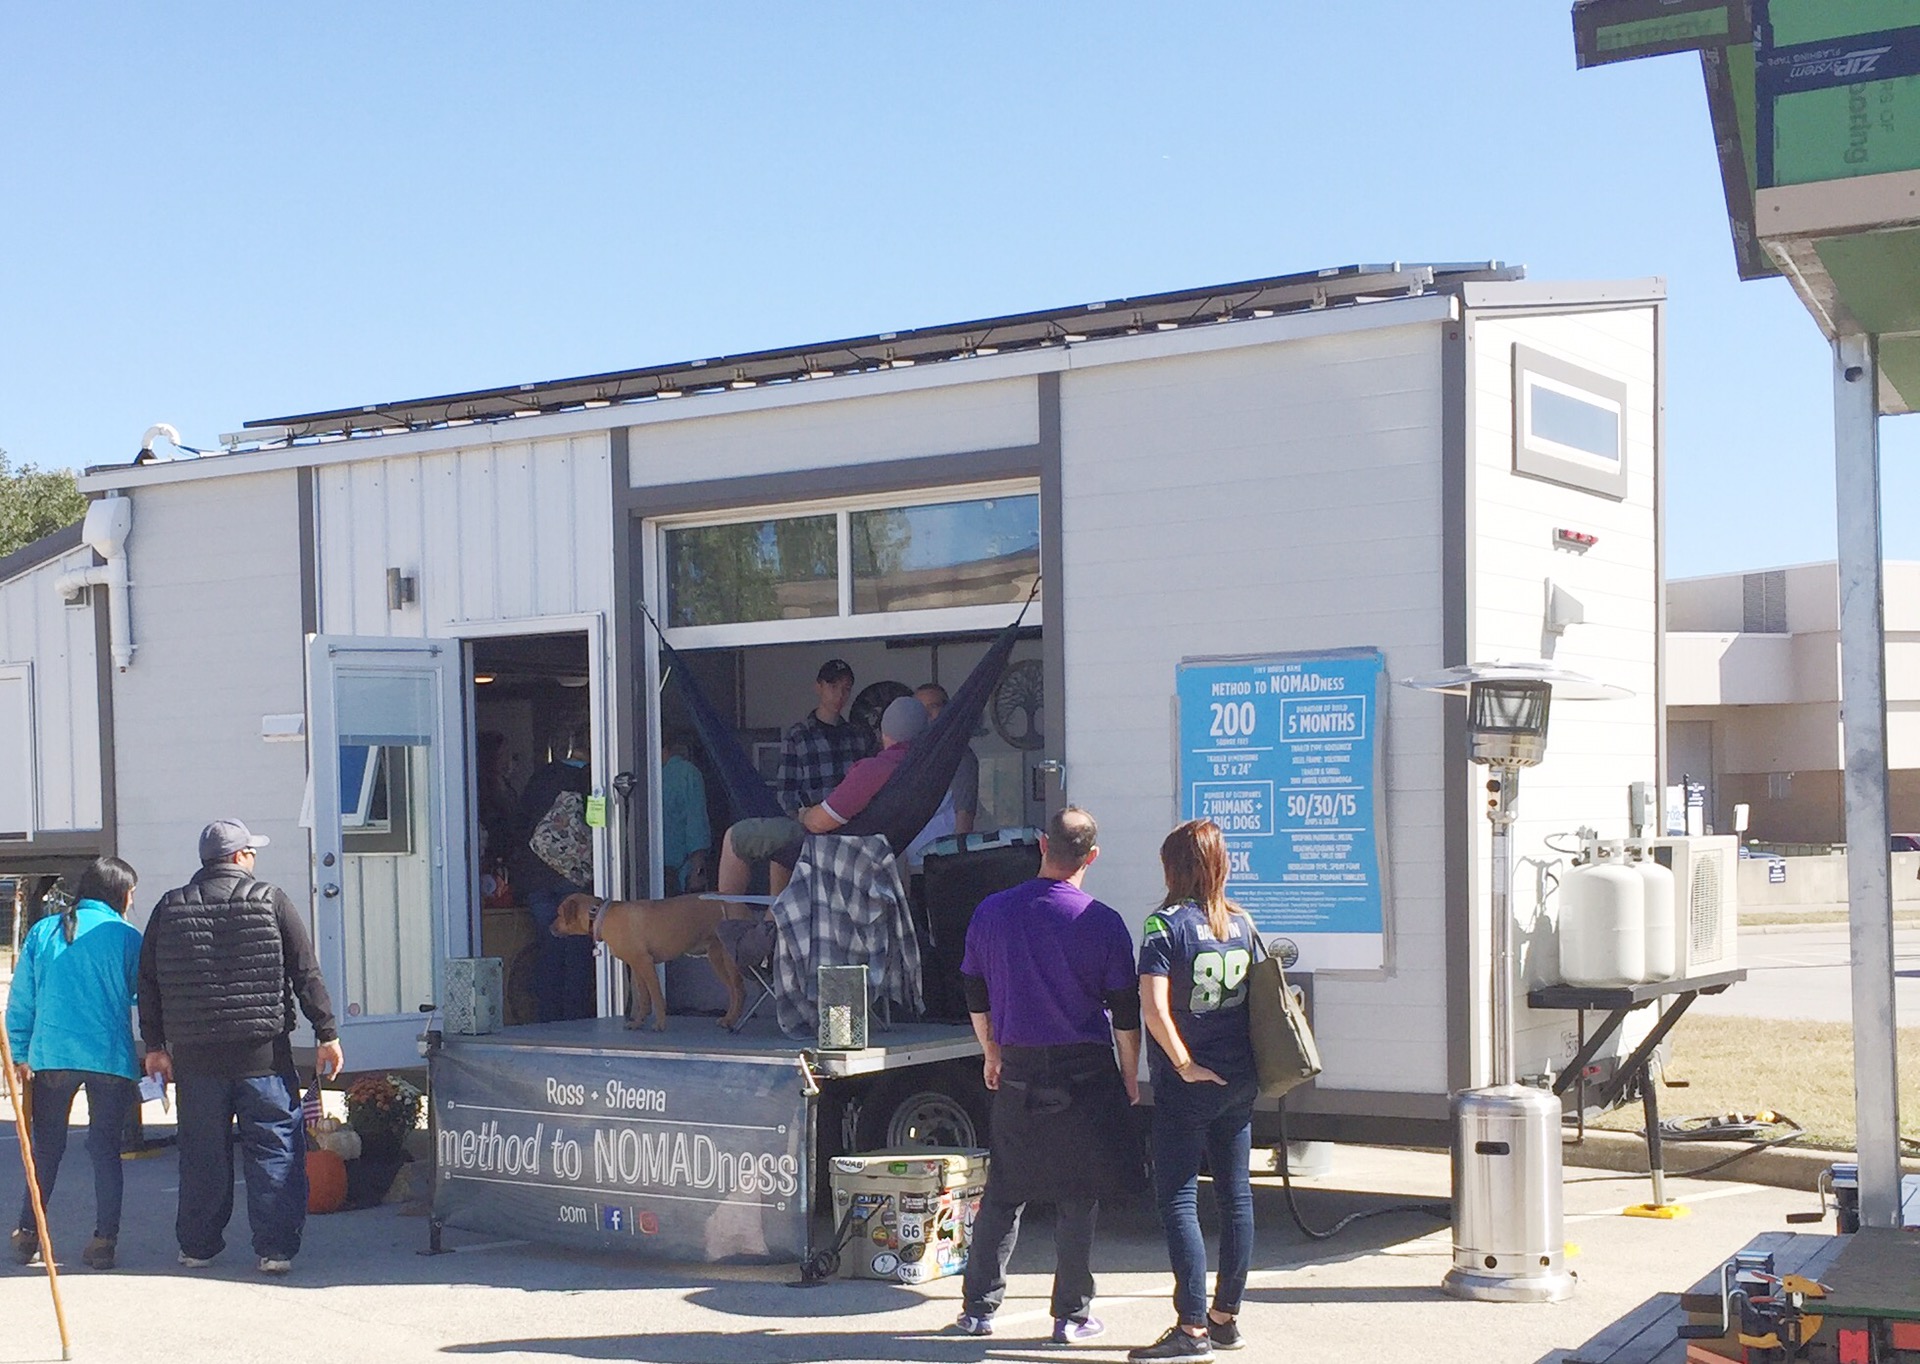
Now that we’ve done that… OH. EM. GEE. you guys. The Tiny House & Simple Living Jamboree was so much fun! I really loved being around so many like-minded people, and everyone we talked to was really helpful and encouraging.
We went for most of the day Sunday, and in hindsight, we should have done a full three day pass. We didn’t really get the opportunity to sit in on any of the programs, which I know would have been really insightful and inspiring for us. But, we still got to tour all kinds of Skoolies, Tiny Houses, and Vans, and got some great advice from some truly amazing people.
I think what I love most about this Tiny Living community is the enthusiasm and willingness to give advice. Not only are people happy to talk about their journey, they’re eager to hear about ours, and ready to uplift us and cheer us on. For every time I’ve uttered “we’re not totally sure what we’re doing”, I’ve been met with “you’ll get there”, or “you can do it”. I am immeasurably grateful for this positive and helpful wanderer tribe to which we now belong!
Here are some shots I took of the event, and links where you can follow the fine folks behind these incredible dwellings! I wish I had taken more, but I’m still not so used to the idea of folks being eager for you to share pics of their homes on social media.
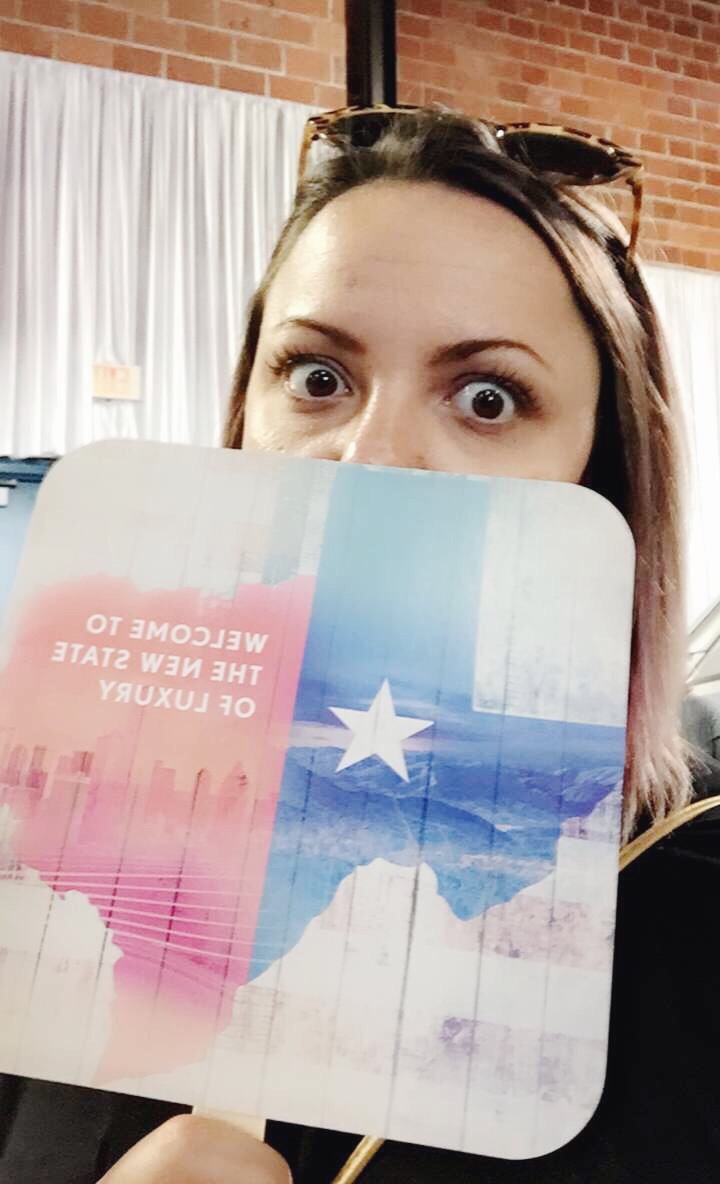
Okay, first off, they gave me a badge, which made me feel so official (even though everyone got one)!
Also, if you follow us on insta, you’ll know we made shirts. Arnavick did a Stranger Things theme and I did a more linear, color-blocked design.
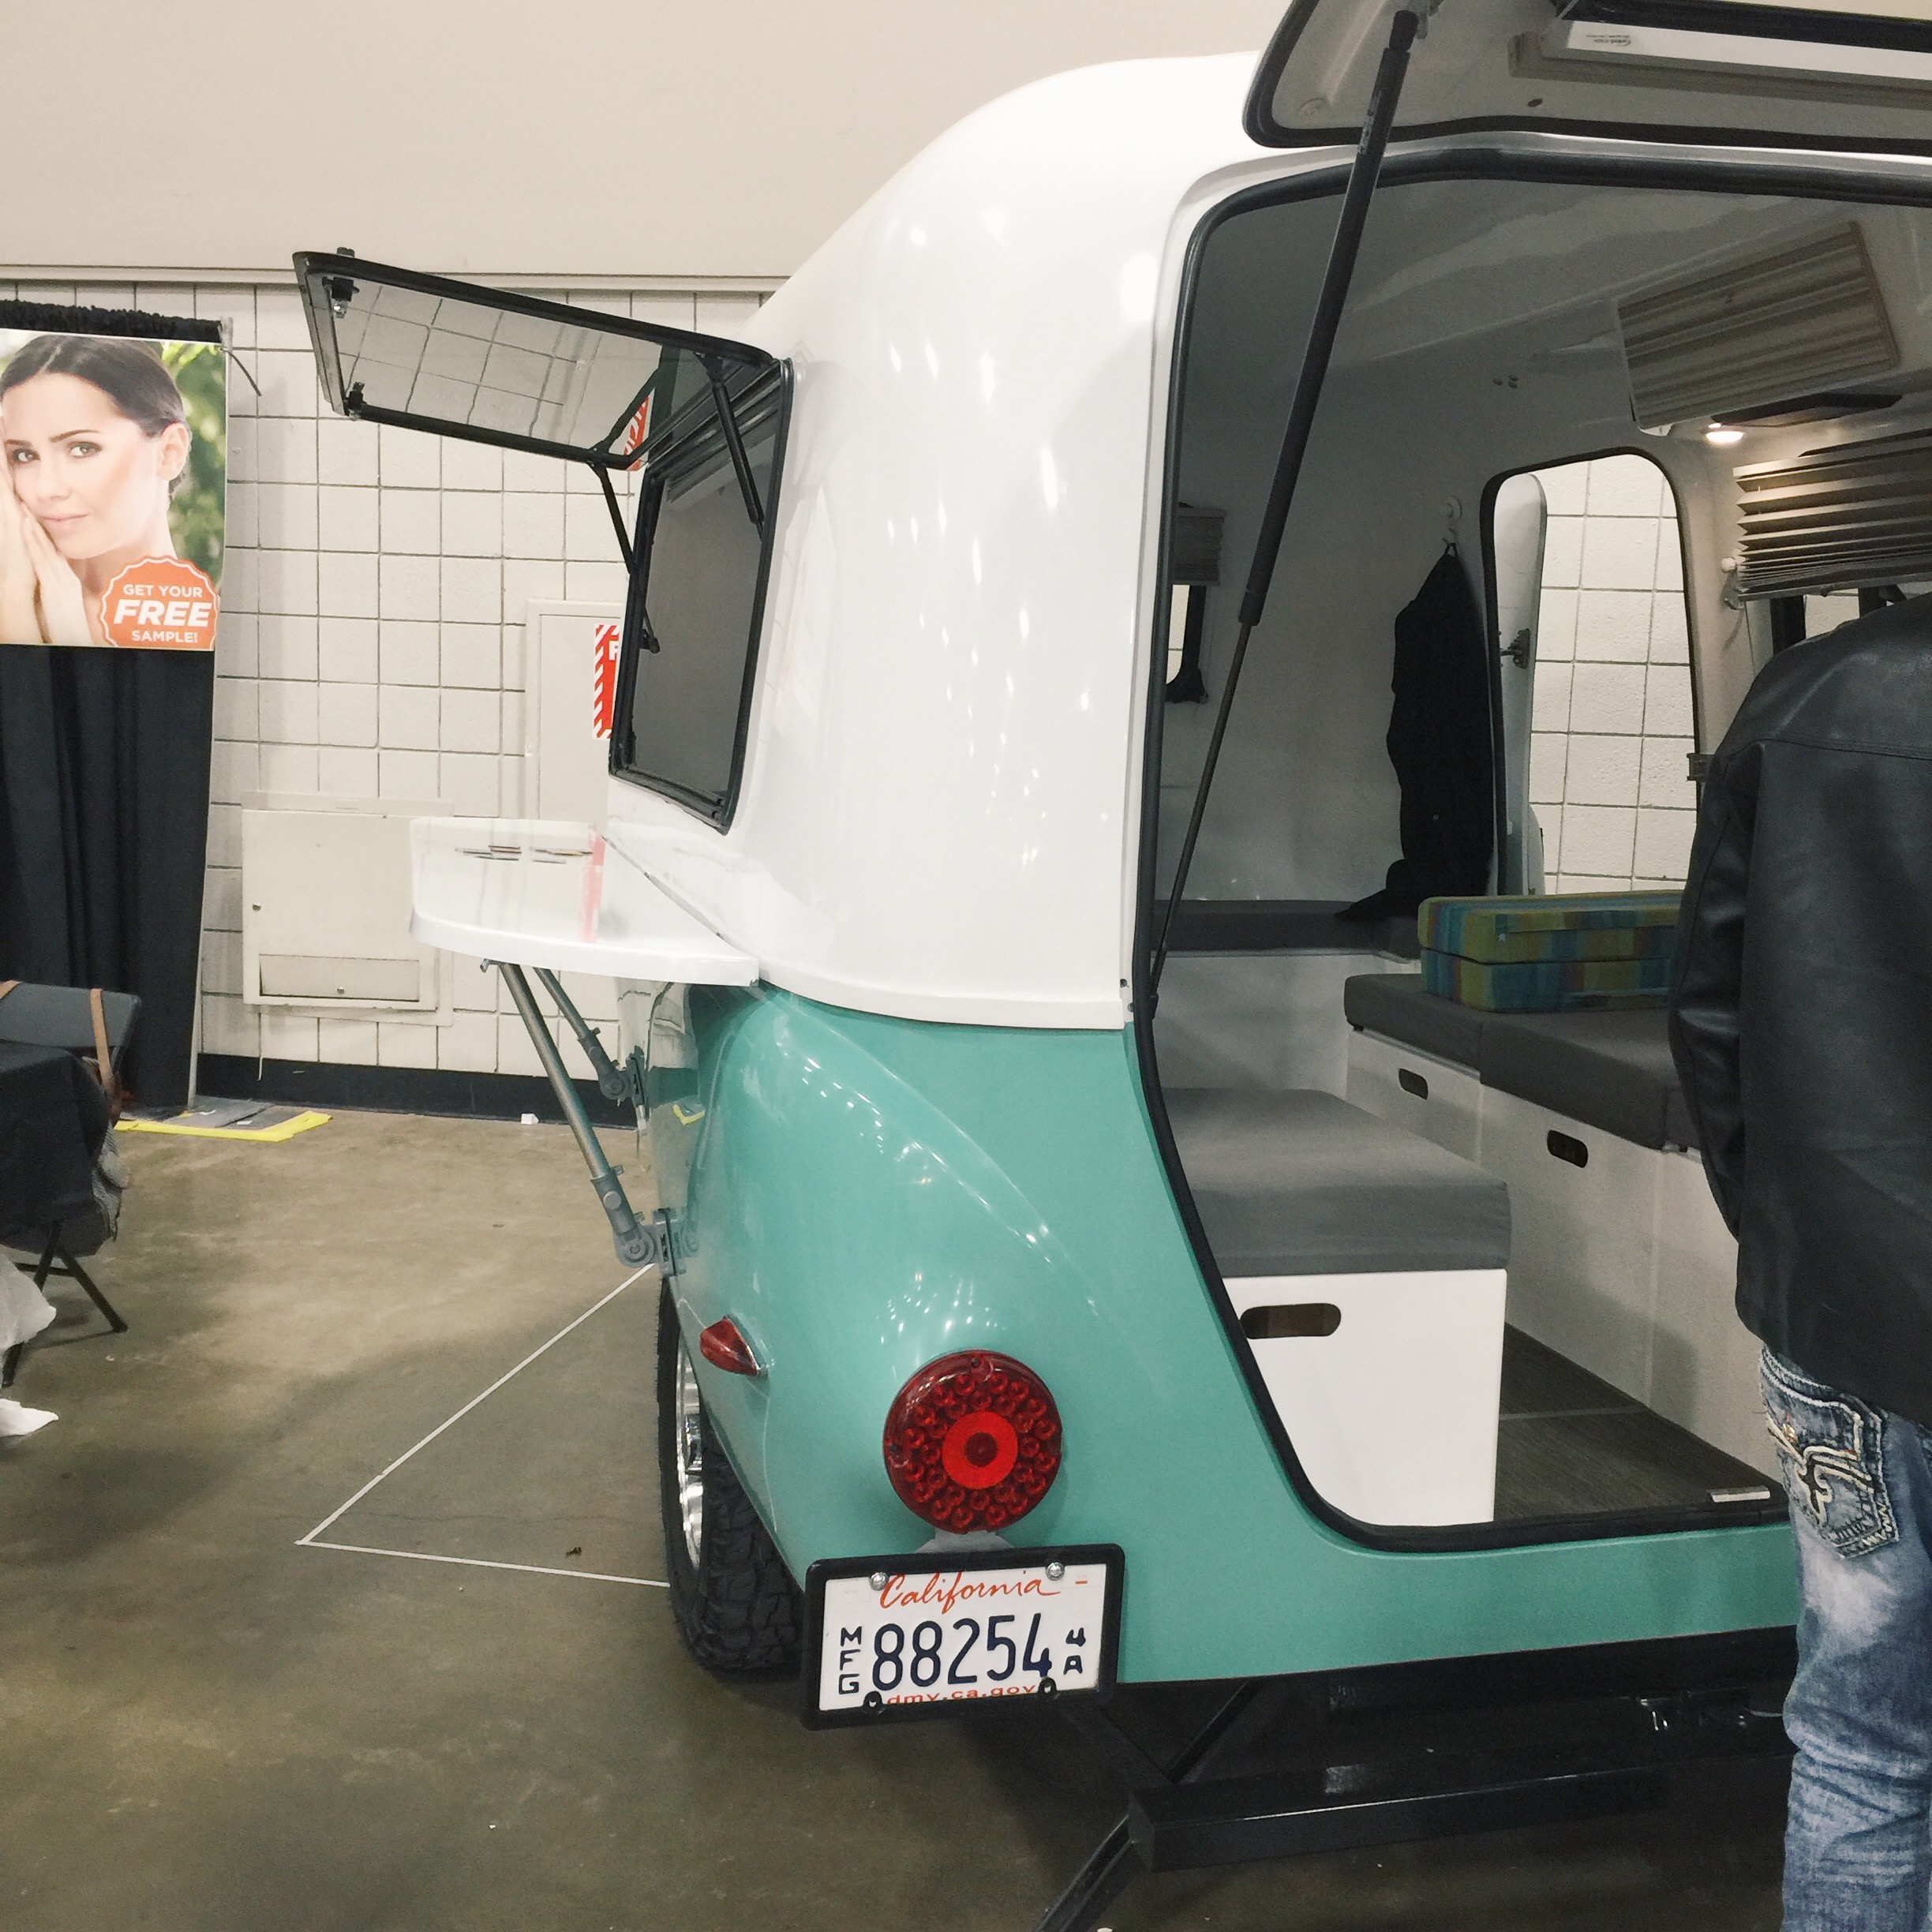
We got to see this little cutie by Happier Camper – super cute and great for small toy hauling. I, of course, loved all the color selections they offered.
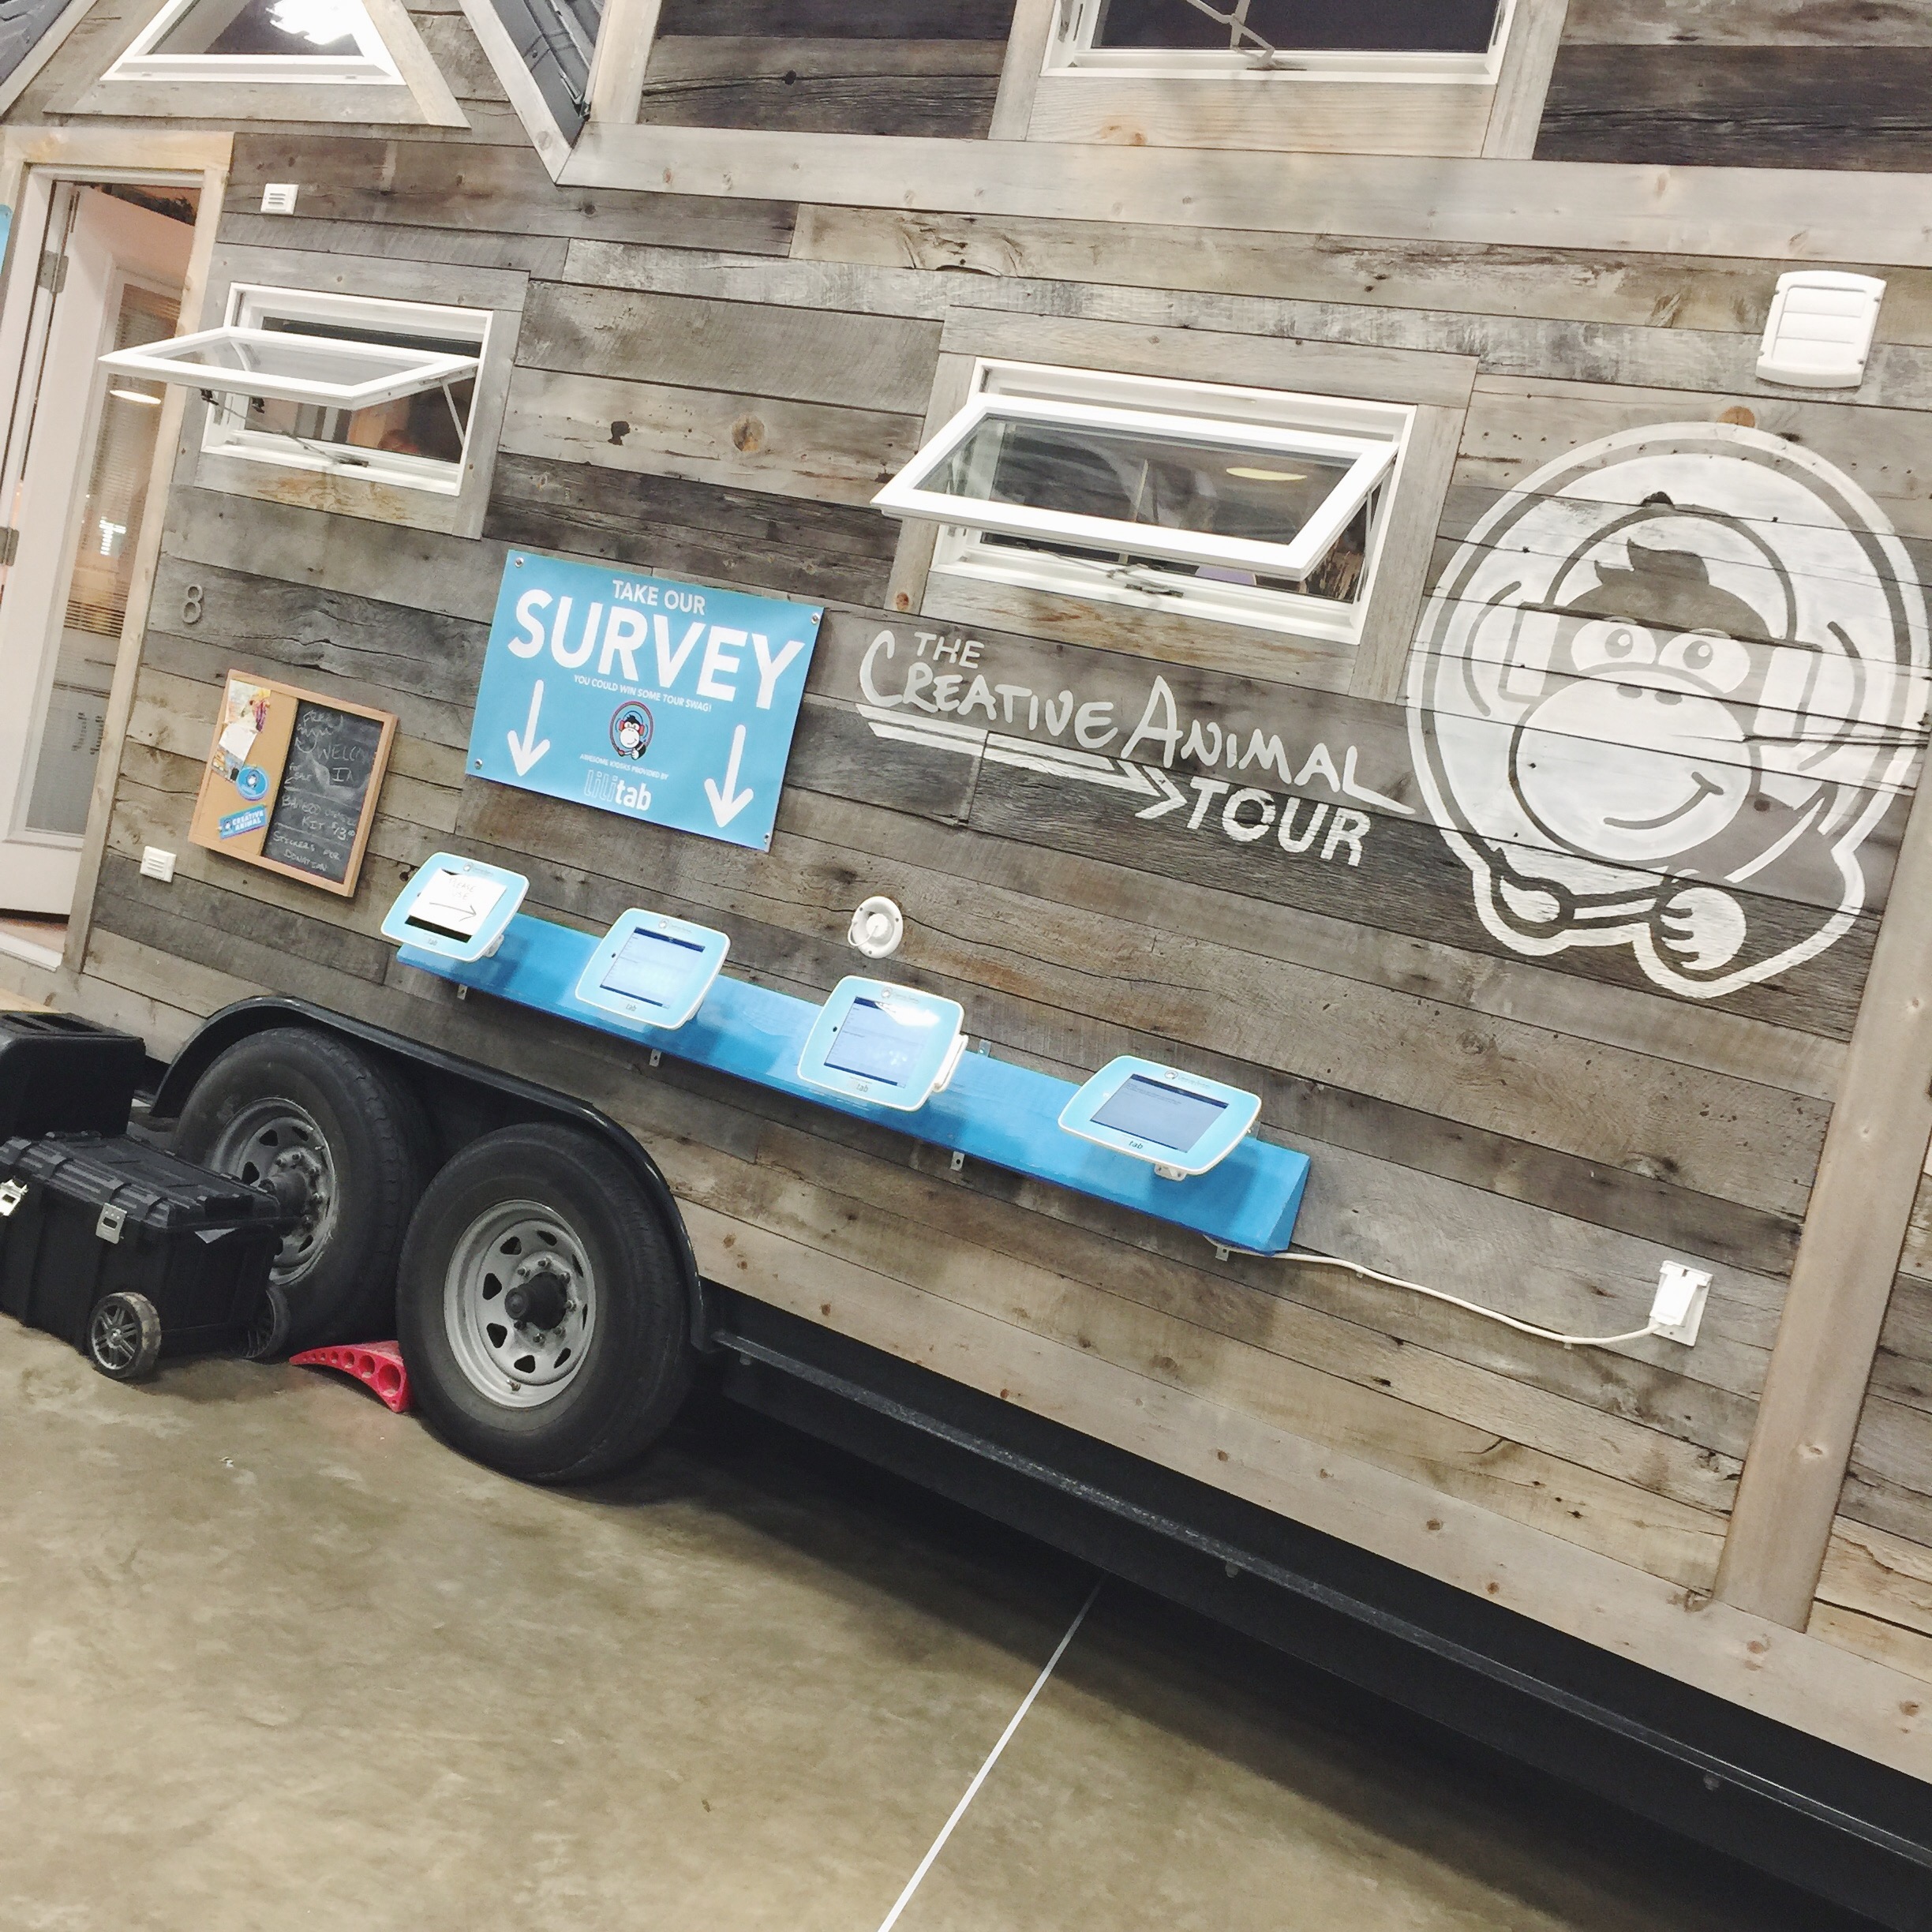
Our first tour was of The Creative Animal Tour Tiny House, which was awesome! You may recognize them from HGTV’s Tiny House Big Living. We chatted with Steph a bit (who did the blueprints for the house) and she showed us some super cool features, like trap door storage in the “ceiling” under their loft bed.
This tiny house looked like it could maybe be a super nice deer lease, if you’re into that kind of thing. Love that galvanized corrugated metal throughout!
Check out the windows on this guy:
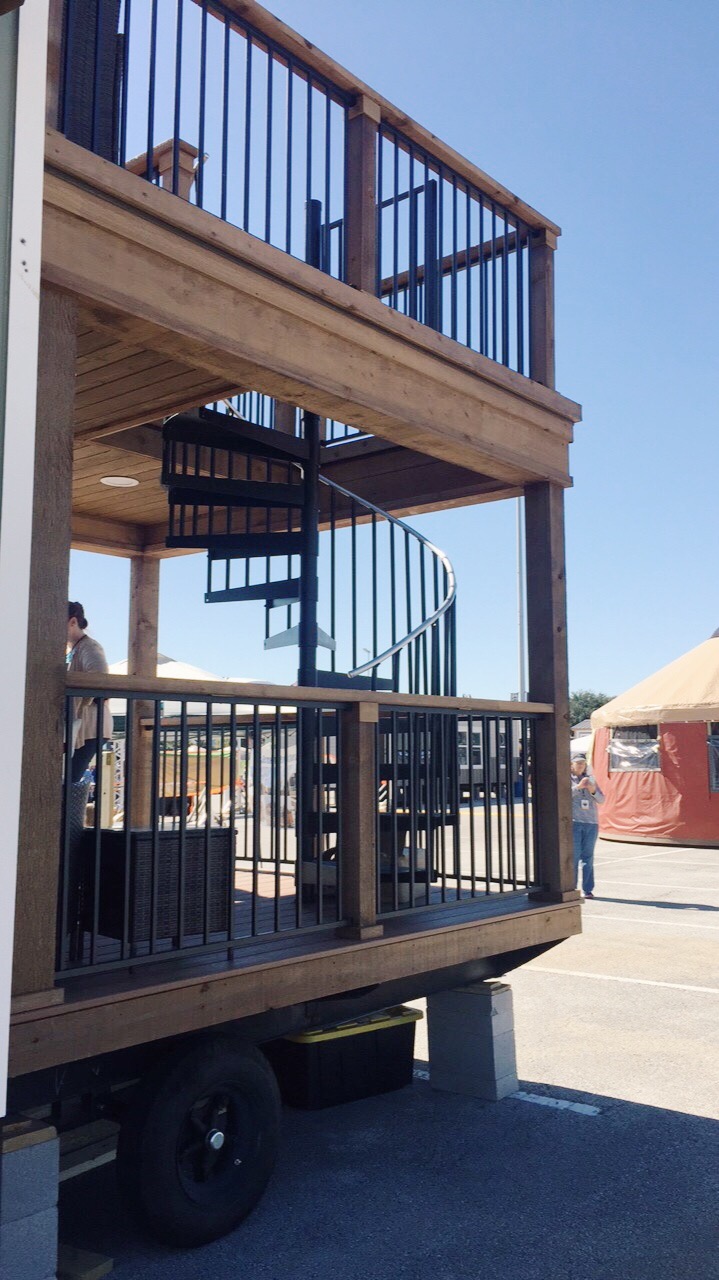
I was super impressed with this tiny house that had its very own spiral staircase and observation deck! The interior was pretty cute too.
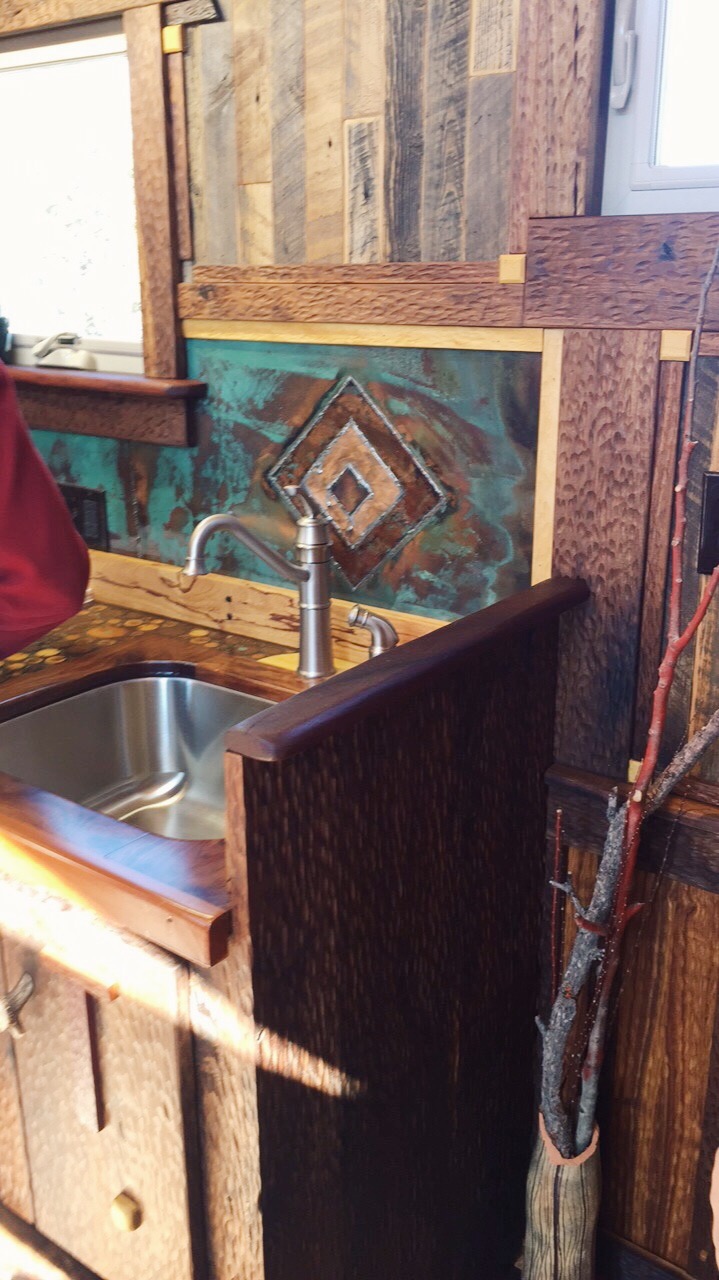
This tiny house by Red Deer Classics has insane hand carving and delicate woodwork, and the copper had a sick patina! I didn’t get an exterior pic – but you can check it out on their insta!
We got to see this sweet little Airstream, and Airstreams always make us happy!
We bought a 2×4 from 2x4s for Hope and wrote a special message for veterans on it. This organization is amazing – they build tiny homes for homeless veterans. This was just their exhibit, obviously, not an actual tiny house! Check out their website (linked above) for more info or to donate!
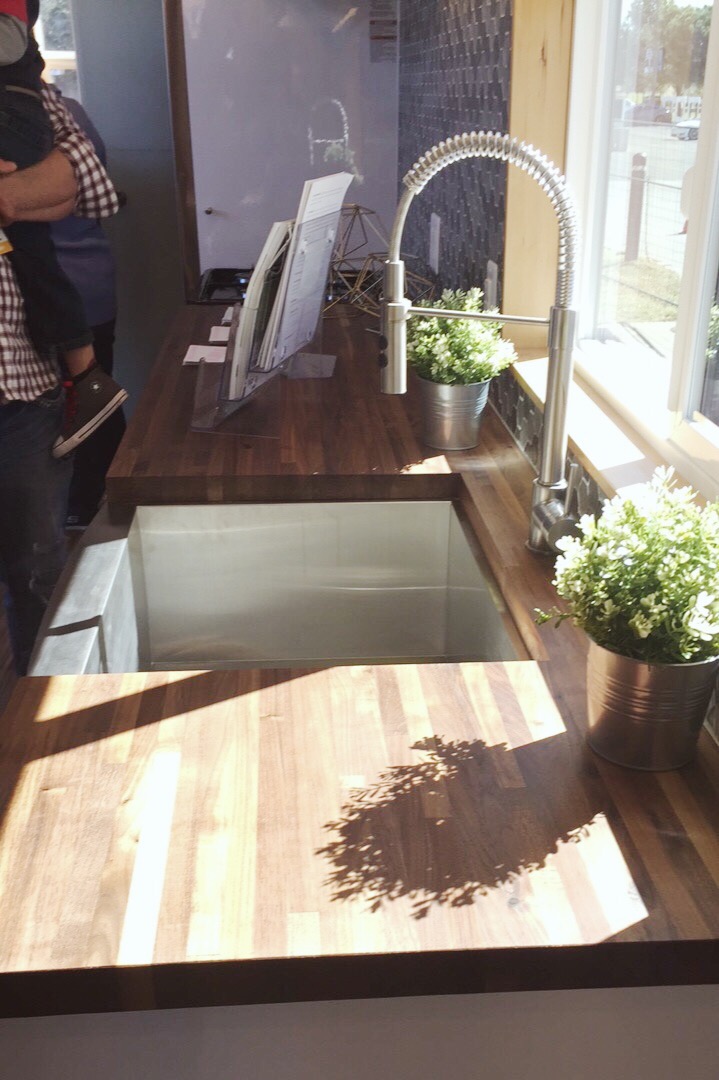
Arnavick really liked the look of this butcher block countertop. We’re considering this look for our little kitchen in the trailer.
I really, really, realllly loves all of the skoolies! I’ve been following Nomadic Millers for a little bit now, and I was so jazzed to see their bus in person! I only got one picture of the outside, and they were busy tending to kiddos while we toured, so I didn’t get the chance to tell them in person how cool their bus is, but it’s beautifully outfitted. Check out their Instagram – THAT KITCHEN! Love.
I hadn’t come across Trebventure on insta, but I’m really glad to be following them now. Not only was their home jaw-droppingly cool (excuse me they have a SKYLIGHT over their SHOWER), they were so sweet and encouraging! One of the questions I asked (which I’m sure they get a lot) is whether it was difficult to raise their kids on the road, since ‘Vick and I have hopes to start a family in the next few years. Ashley’s response was that having kids is just hard in general, but their simple lifestyle makes it easy, and that we can totally do it. It is so reassuring to see people living the way we’ve been dreaming of. Our crazy camper scheme isn’t so crazy after all.
We got a kick out of the #tinyfirehouse! It has a fireman’s pole in it. It looks like a short slide down the pole but probably fun all the same.
I’ve also been following tiny house expedition for a while now. Sadly, I didn’t get to see the inside, but I was glad to see the outside of this happy little house in person! Their website has some really helpful info on tiny house living – check it out if you’re interested!
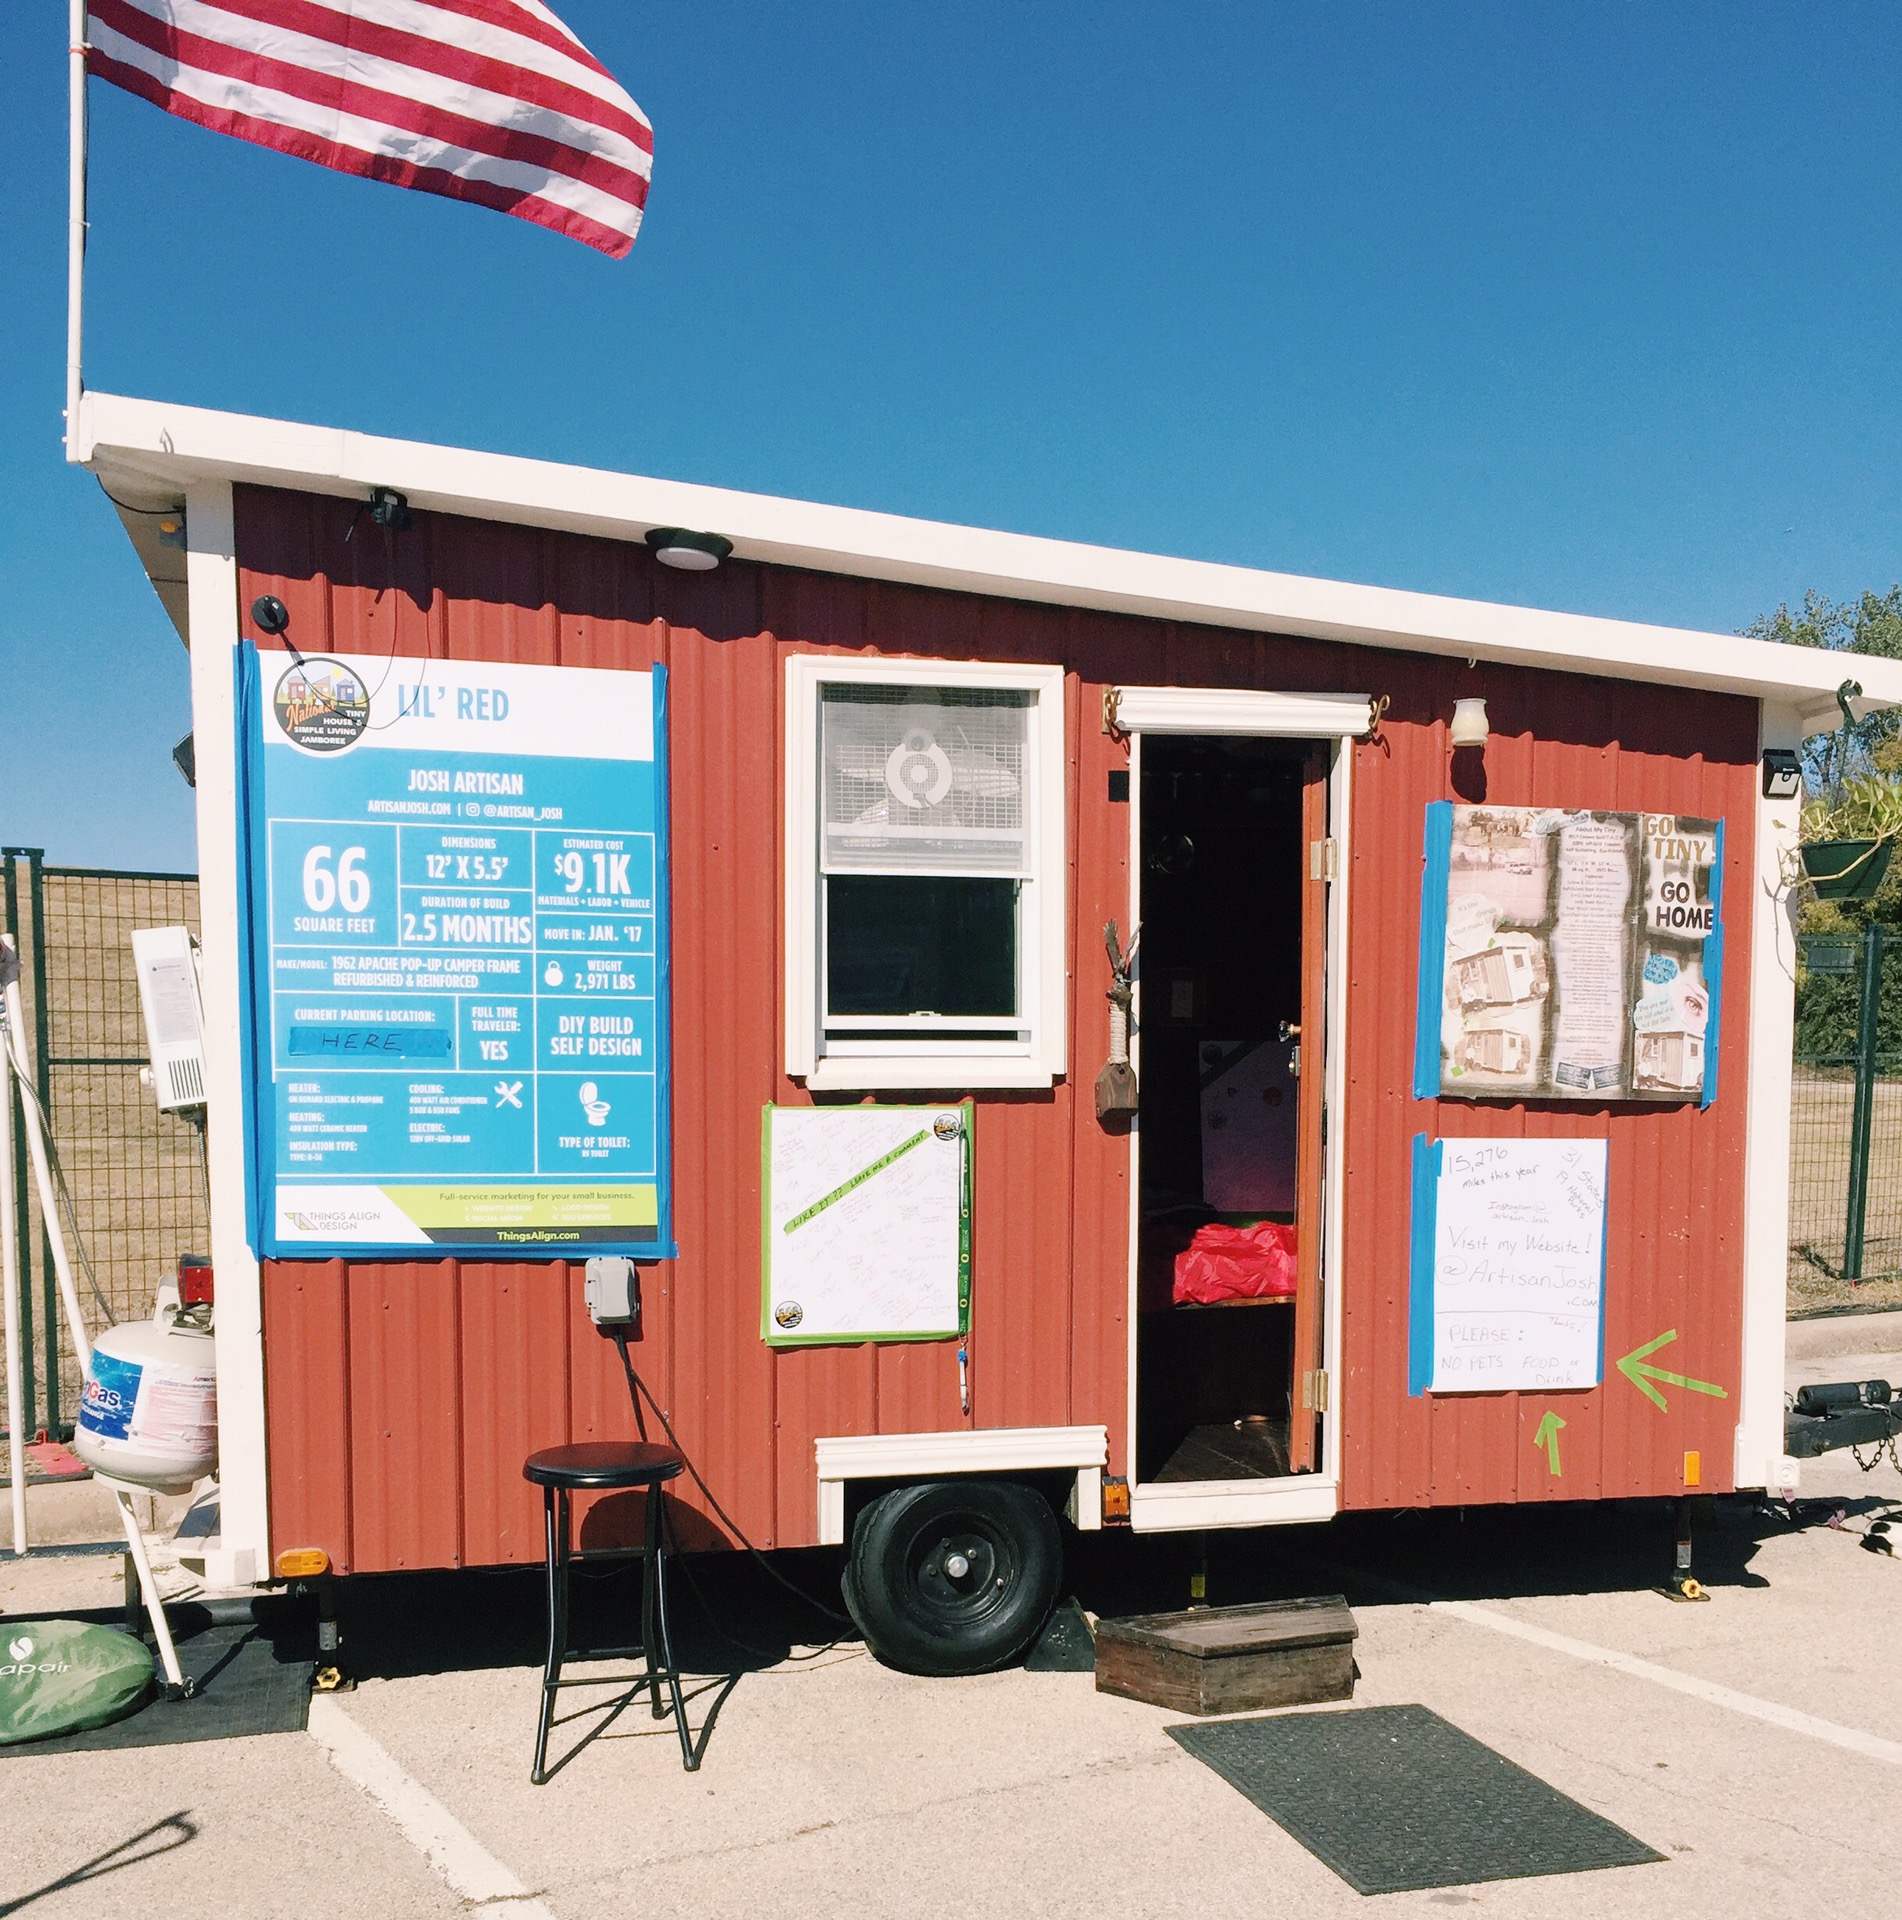
Lil Red was a lil cutie! 66 square feet – can you imagine?! I was super impressed by the functionality of this lil house. I wish I took inside pics!
Last but certainly not least – method to nomadness. Much love to Sheena, who did not kick me out of their house during my excessive fangirling over the HAMMOCK that they have attached to their house! Genius. Seriously amazing.
Not pictured but worthy of mention:
Kevin and Christy from lifetwogo are a couple of van lifers and were really lovely to talk to! They were so encouraging, and they noticed my Rosy shirt and let us gush for a solid five minutes. We loved looking at their map and hearing about their travels!
Samantha from GoneVananas answered a couple of pretty personal questions re: showering, and talked to us about composting toilets and poo for a good while – a true saint! It’s not every day you talk commodes with a complete stranger, but we are grateful for her tips!
We toured This Little Home Of Mine at Earth Day last year, at which point it was only a shell on top of a gooseneck trailer with wood walls and sharpie outlines of Brittnie’s layout. We were so pumped to see the interior now that she’s almost completely done! She was a total sweetheart, and we are super impressed with what she’s done with her place!
We had such an awesome time, and can’t wait for the next time we attend the Jamboree! Should be all shacked up in Rosy the Argosy by then!
Who else attended? I’d love to hear your takeaways!
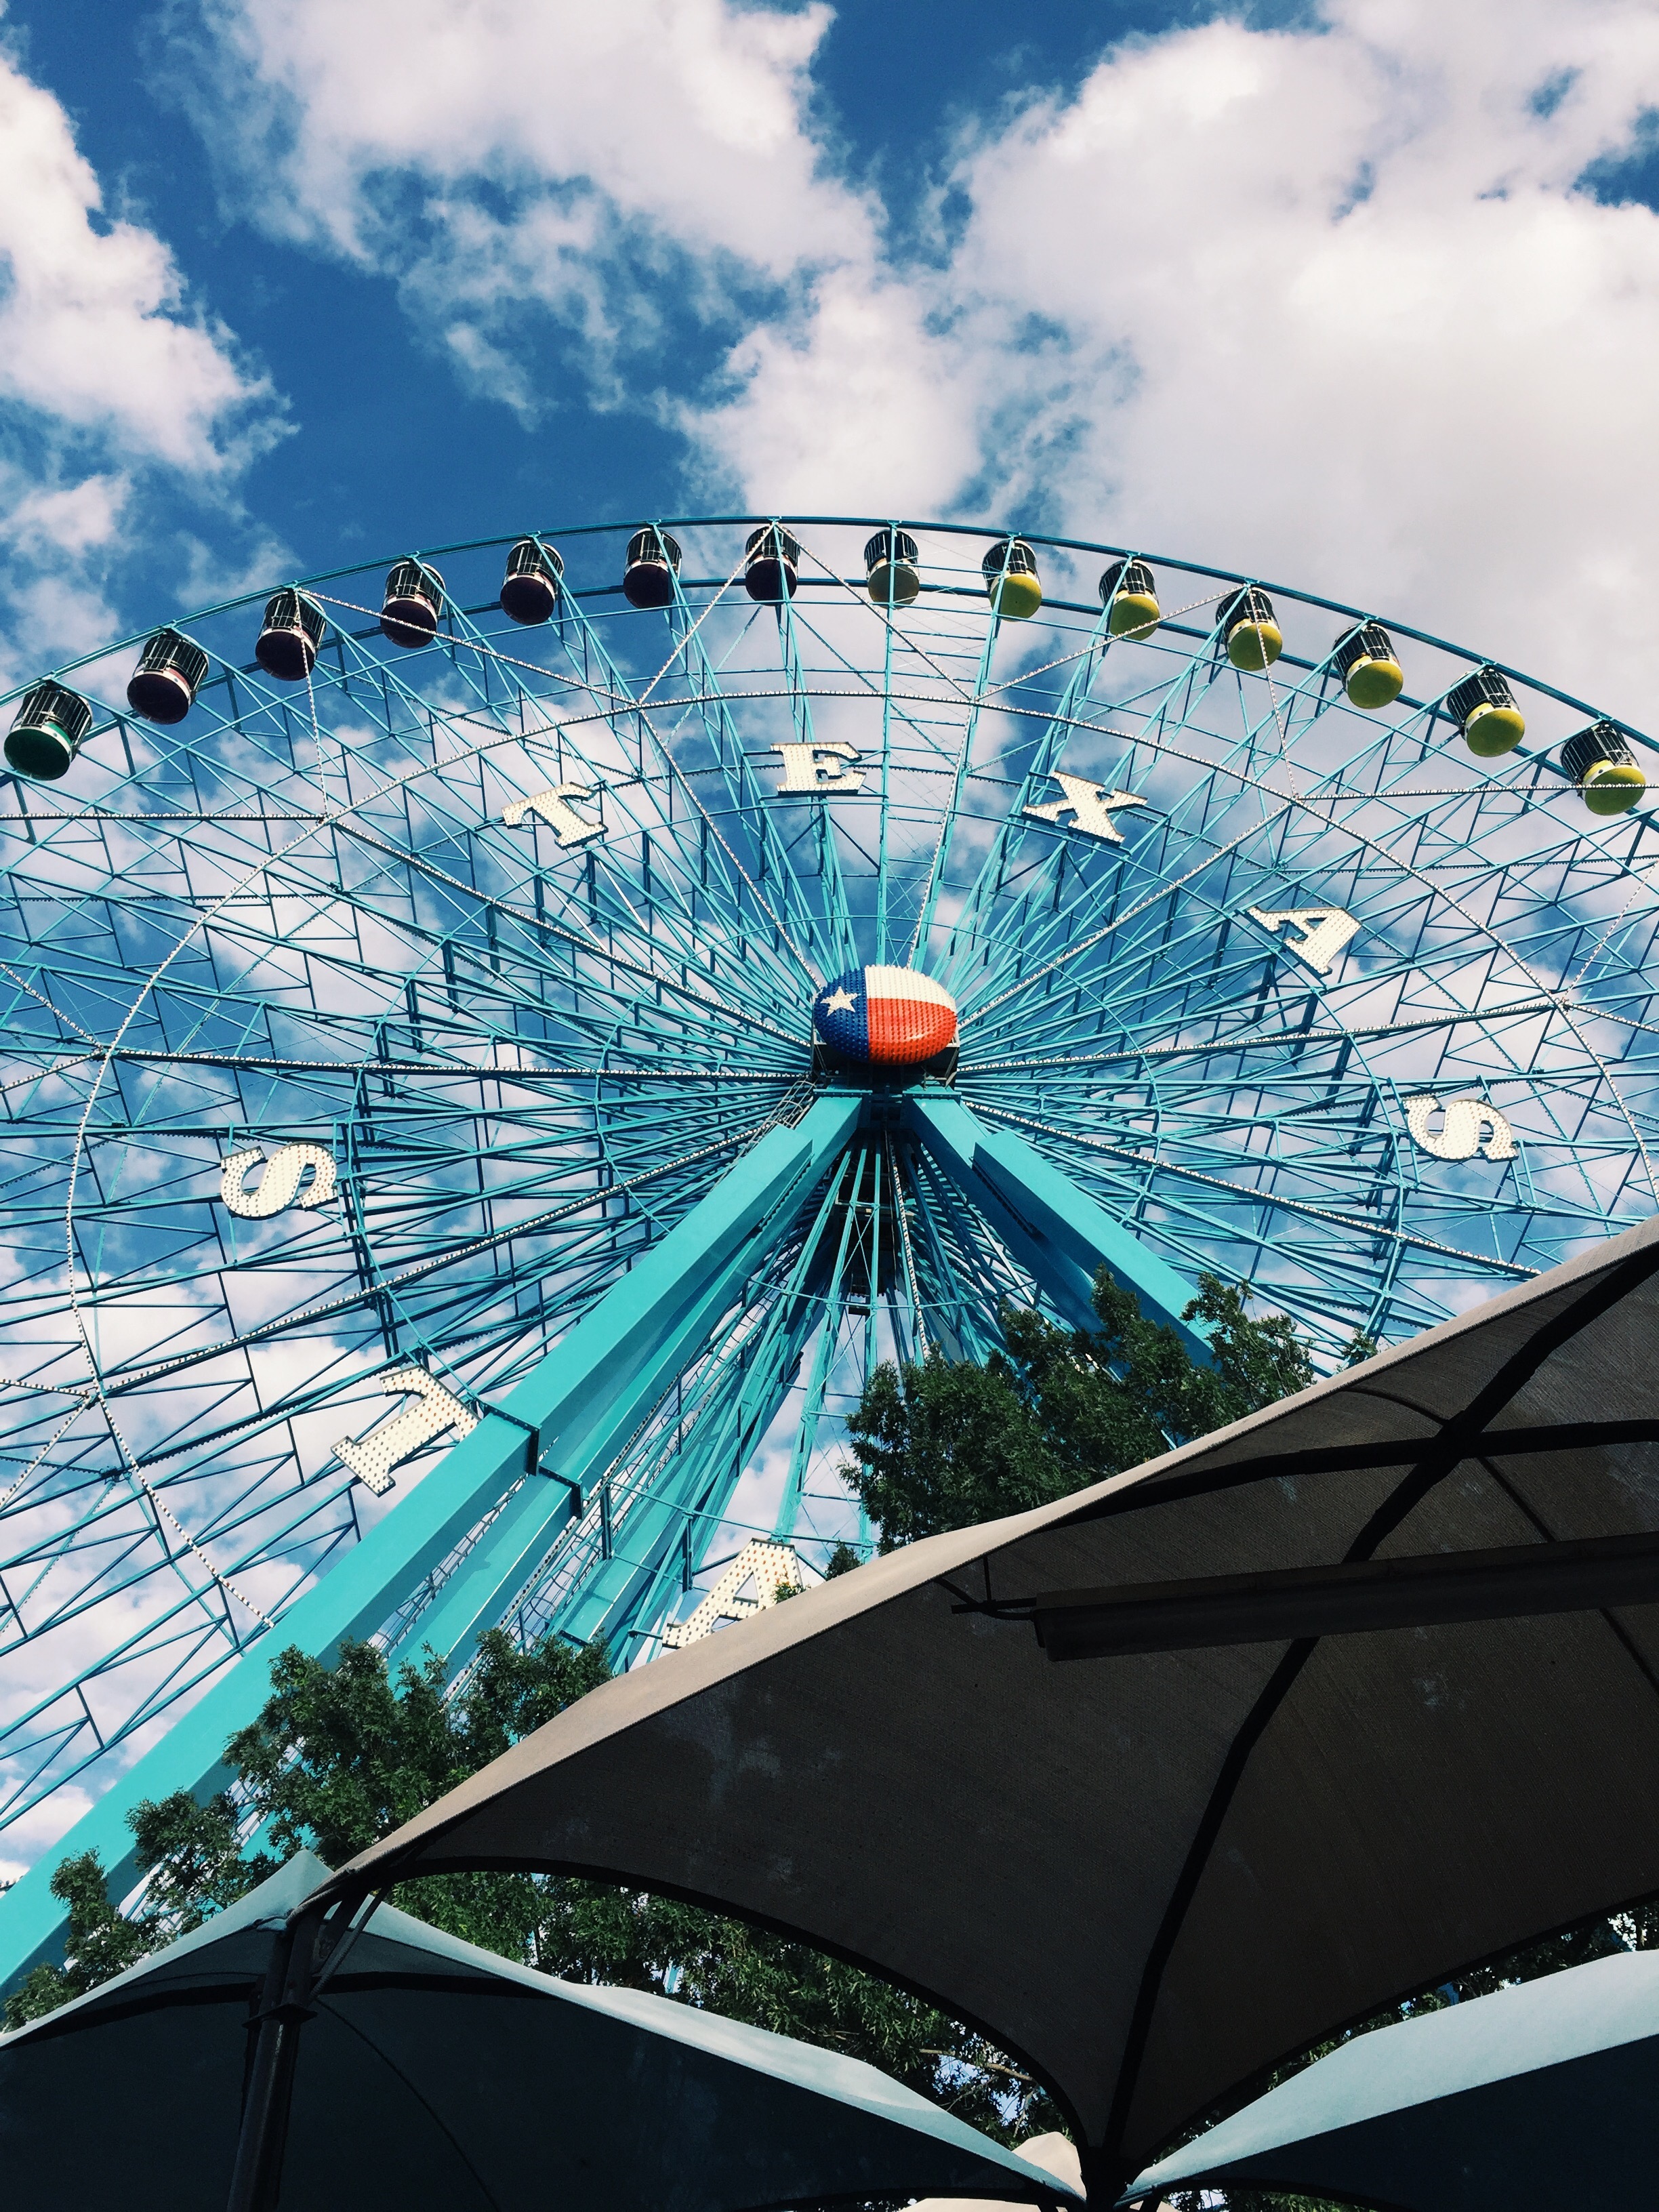
If you’re from Texas (or are Texas Transplants like Arnavick and me), you know that the state fair is kind of a big deal. I am a huge fair and festival junkie, and the State Fair of Texas is the mother of all fairs ‘round these parts. From food that shouldn’t be fried but is, to carnival rides, to auto shows, to the Midway carnival games, to Fletcher’s corn dogs, to one very massive ferris wheel and of course, Big Tex, the State Fair of Texas has something for everyone.
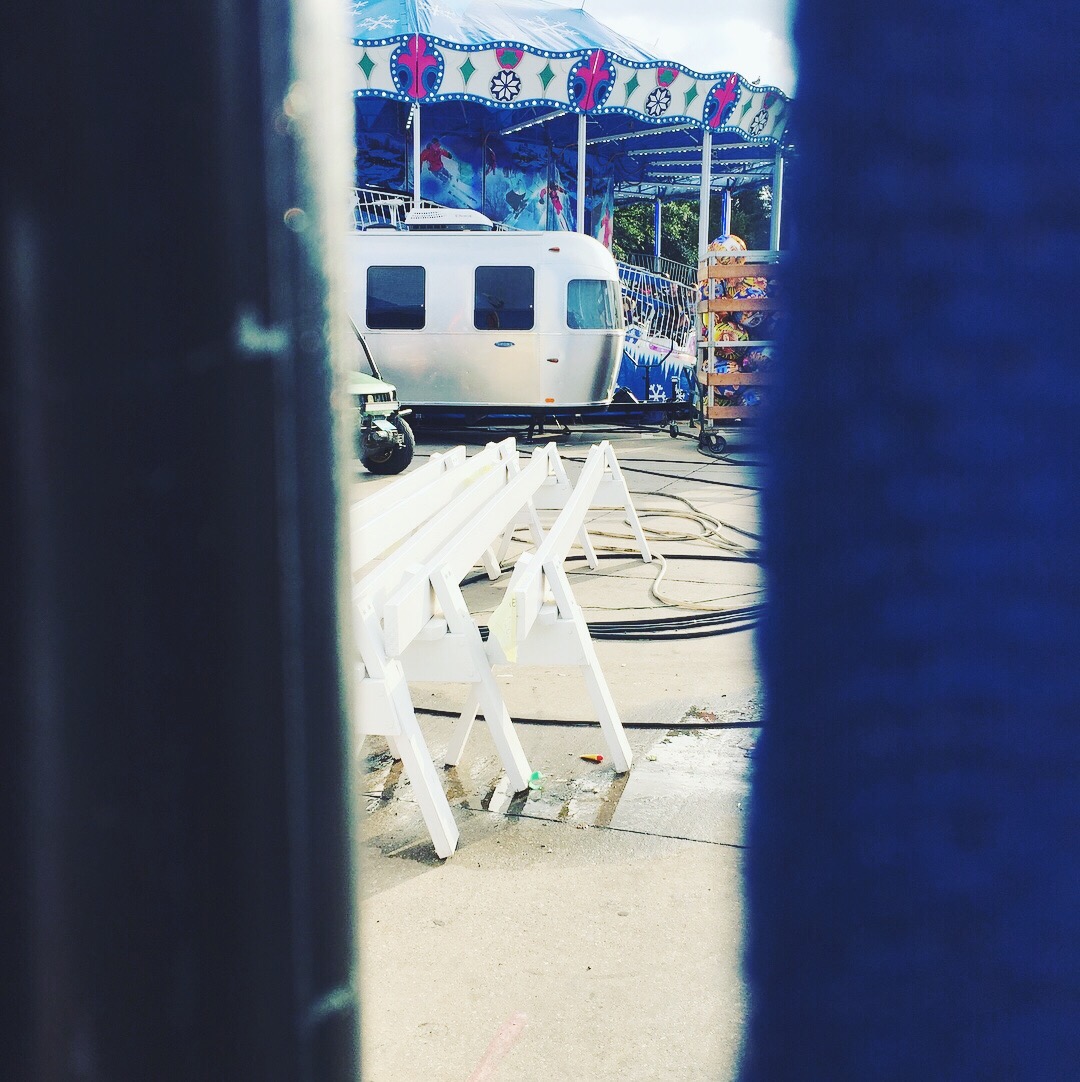
Arnavick’s sisters were in town with their daughters and a friend this weekend, and we had so much fun roaming around Fair Park with them! And we even saw three Airstreams and a Shasta trailer! #camperfriends
We tried the fried frito pie bites and the fajita fries, and both were pretty good! We of course rode the ferris wheel (the Texas Star), and Arnavick rode a few rides with his niece and sister, for which I happily held purses and spectated. I’m not a carnival ride person – I’ve ridden enough roller coasters in my life, thankyouverymuch. We also went into the green house, which was surprisingly cool temperature wise and not surprisingly cool because of all the greenery. The weather was sunny and in the high eighties, which is pretty nice this time of year for Texas.
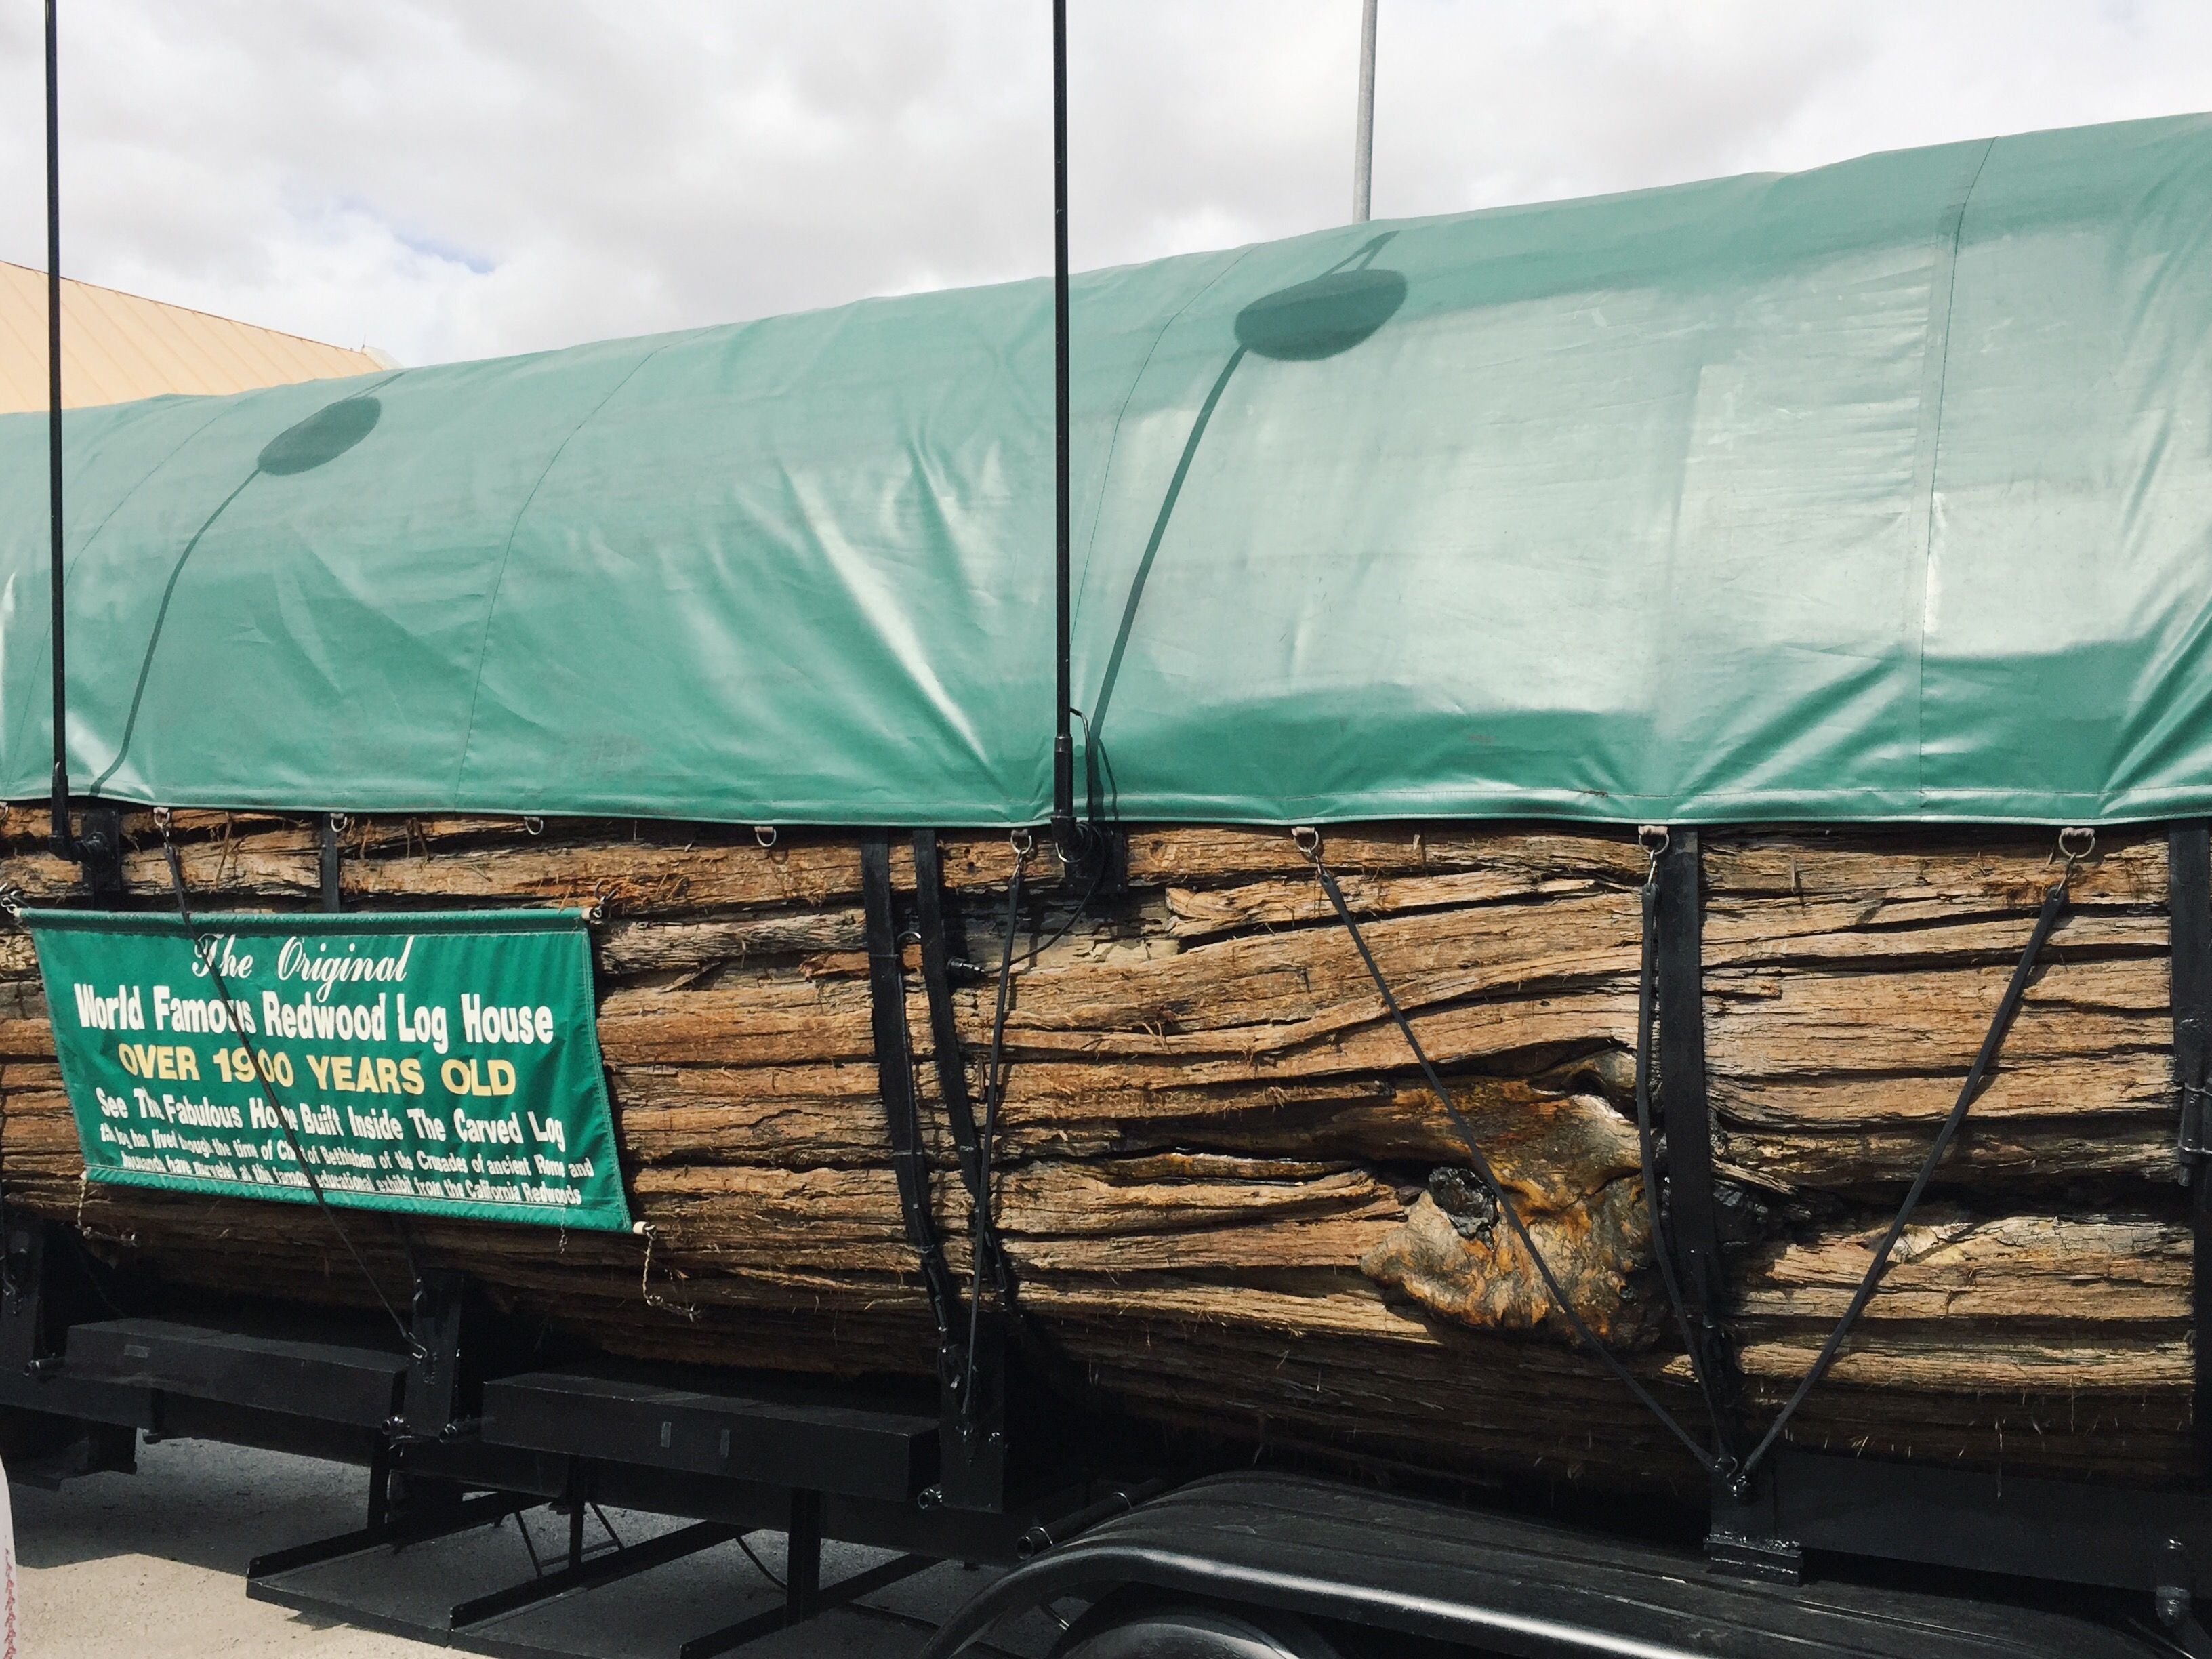
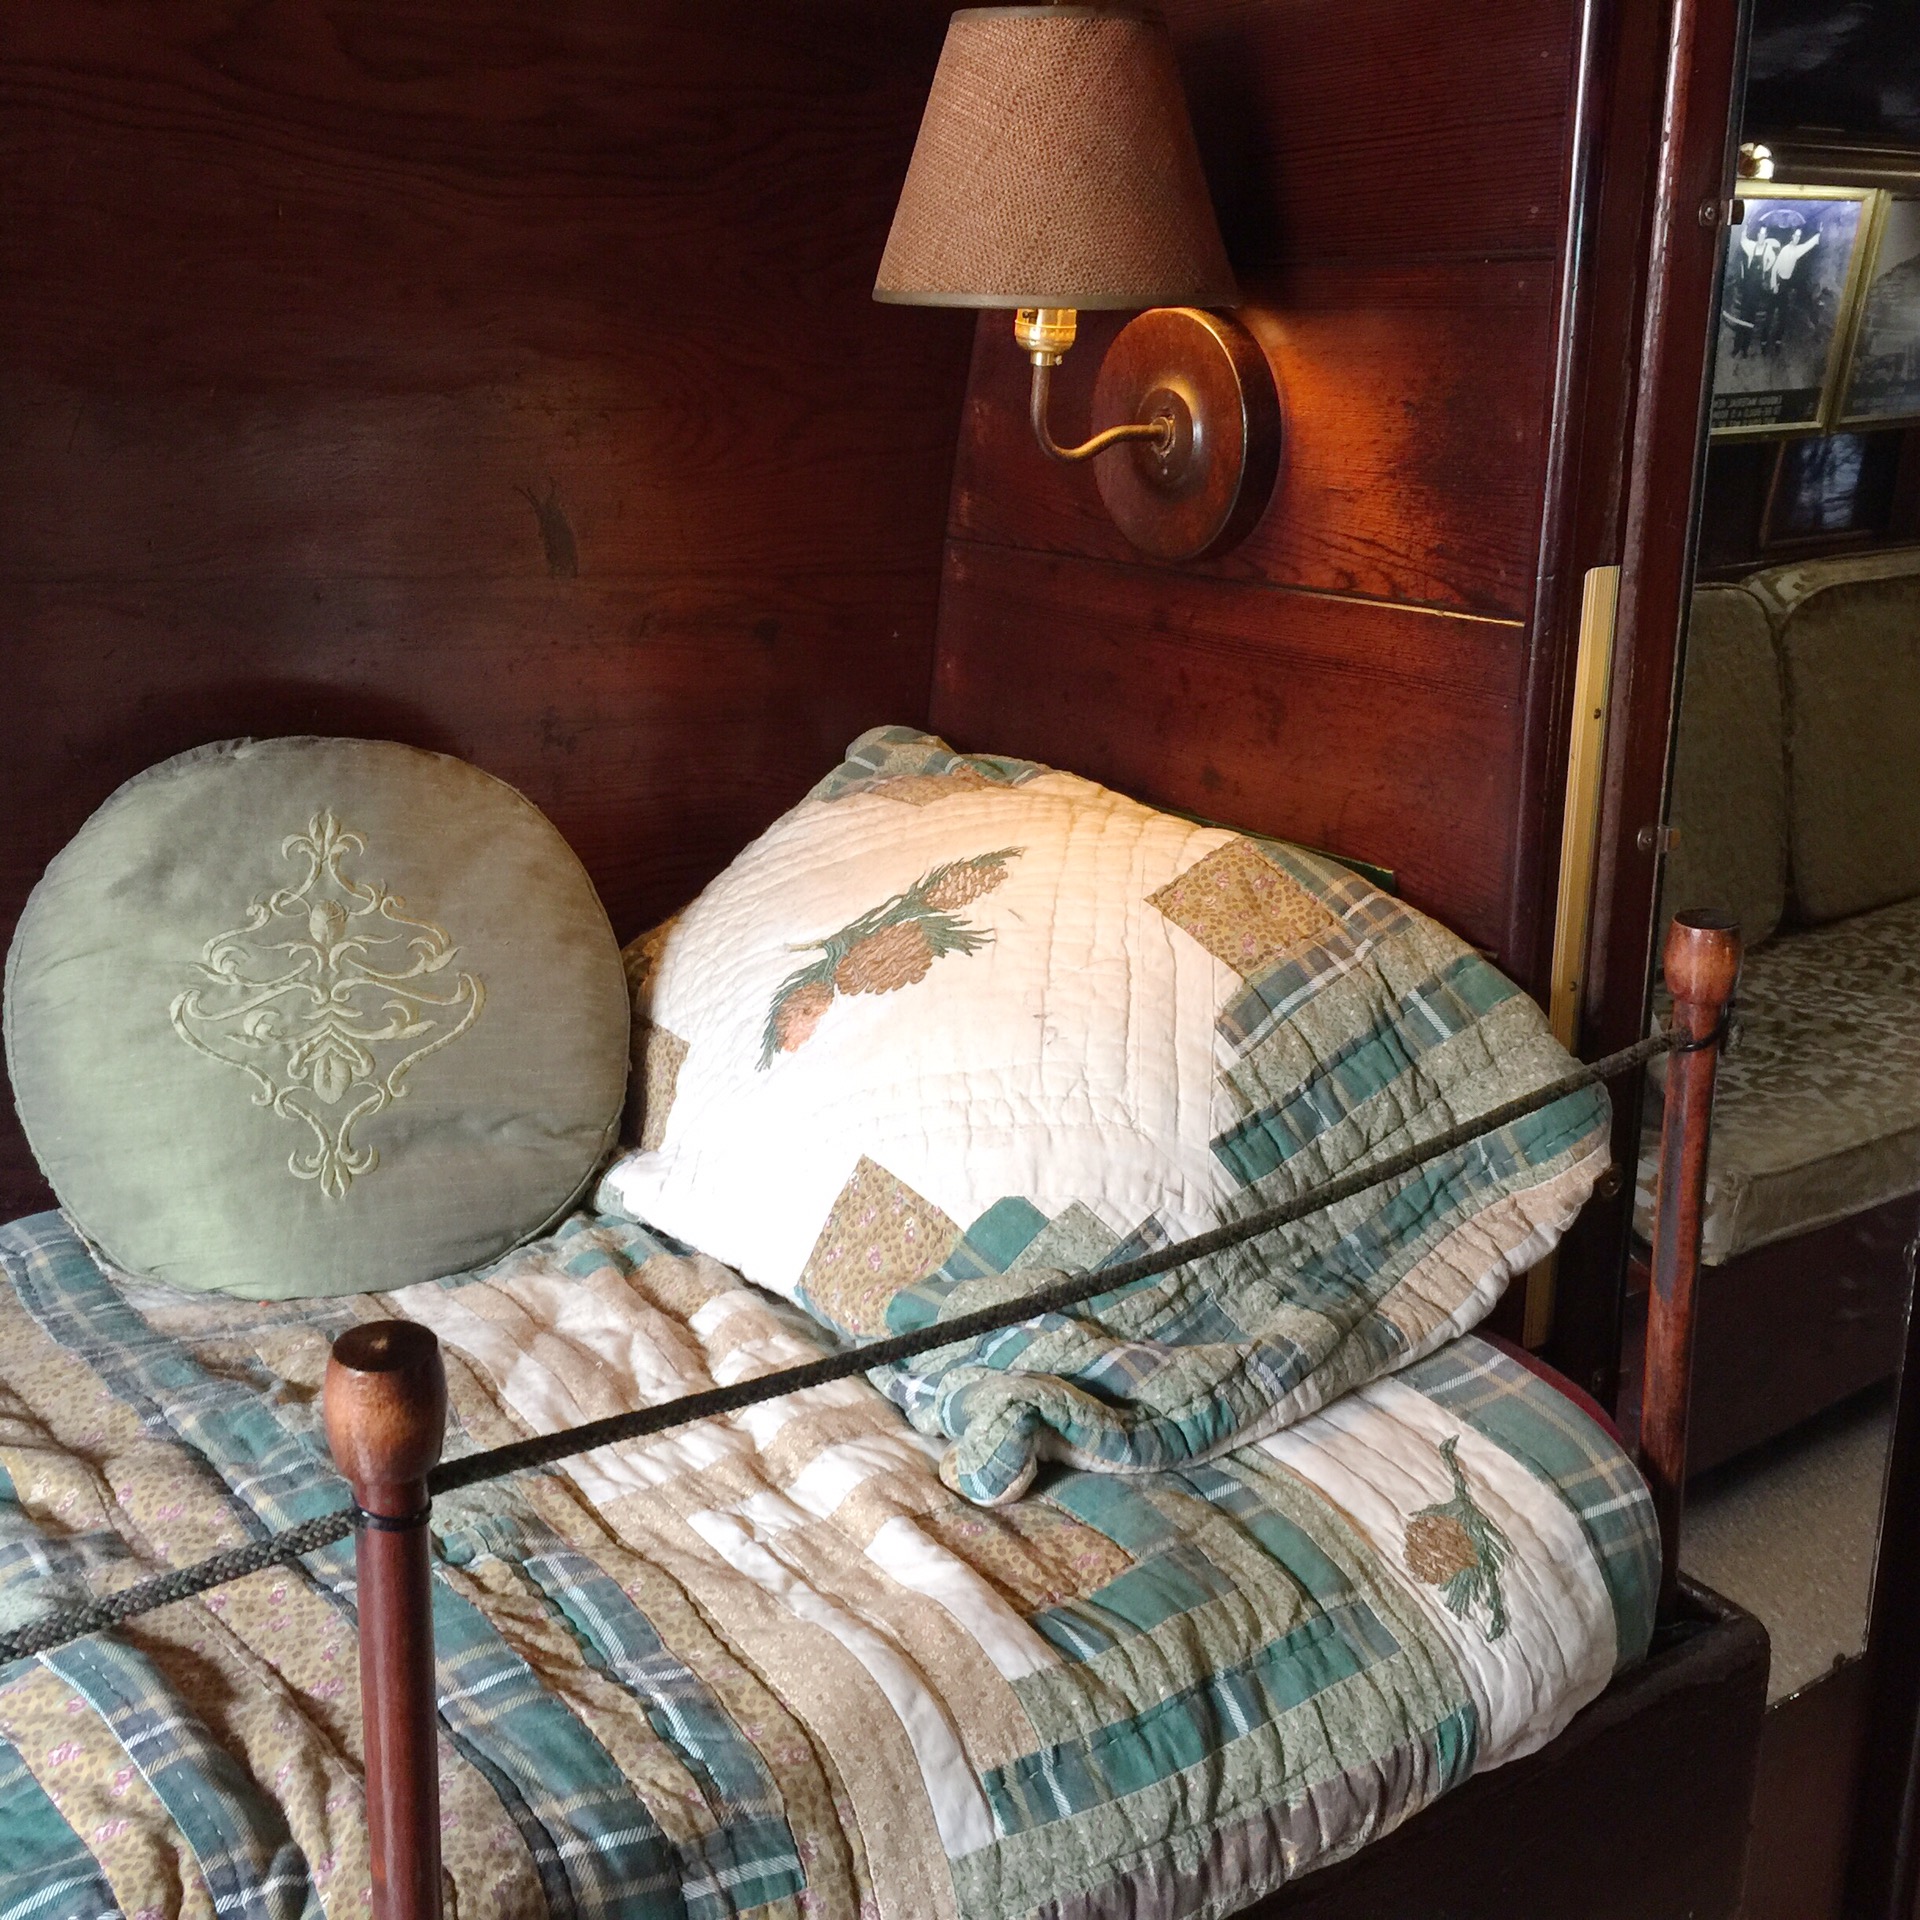
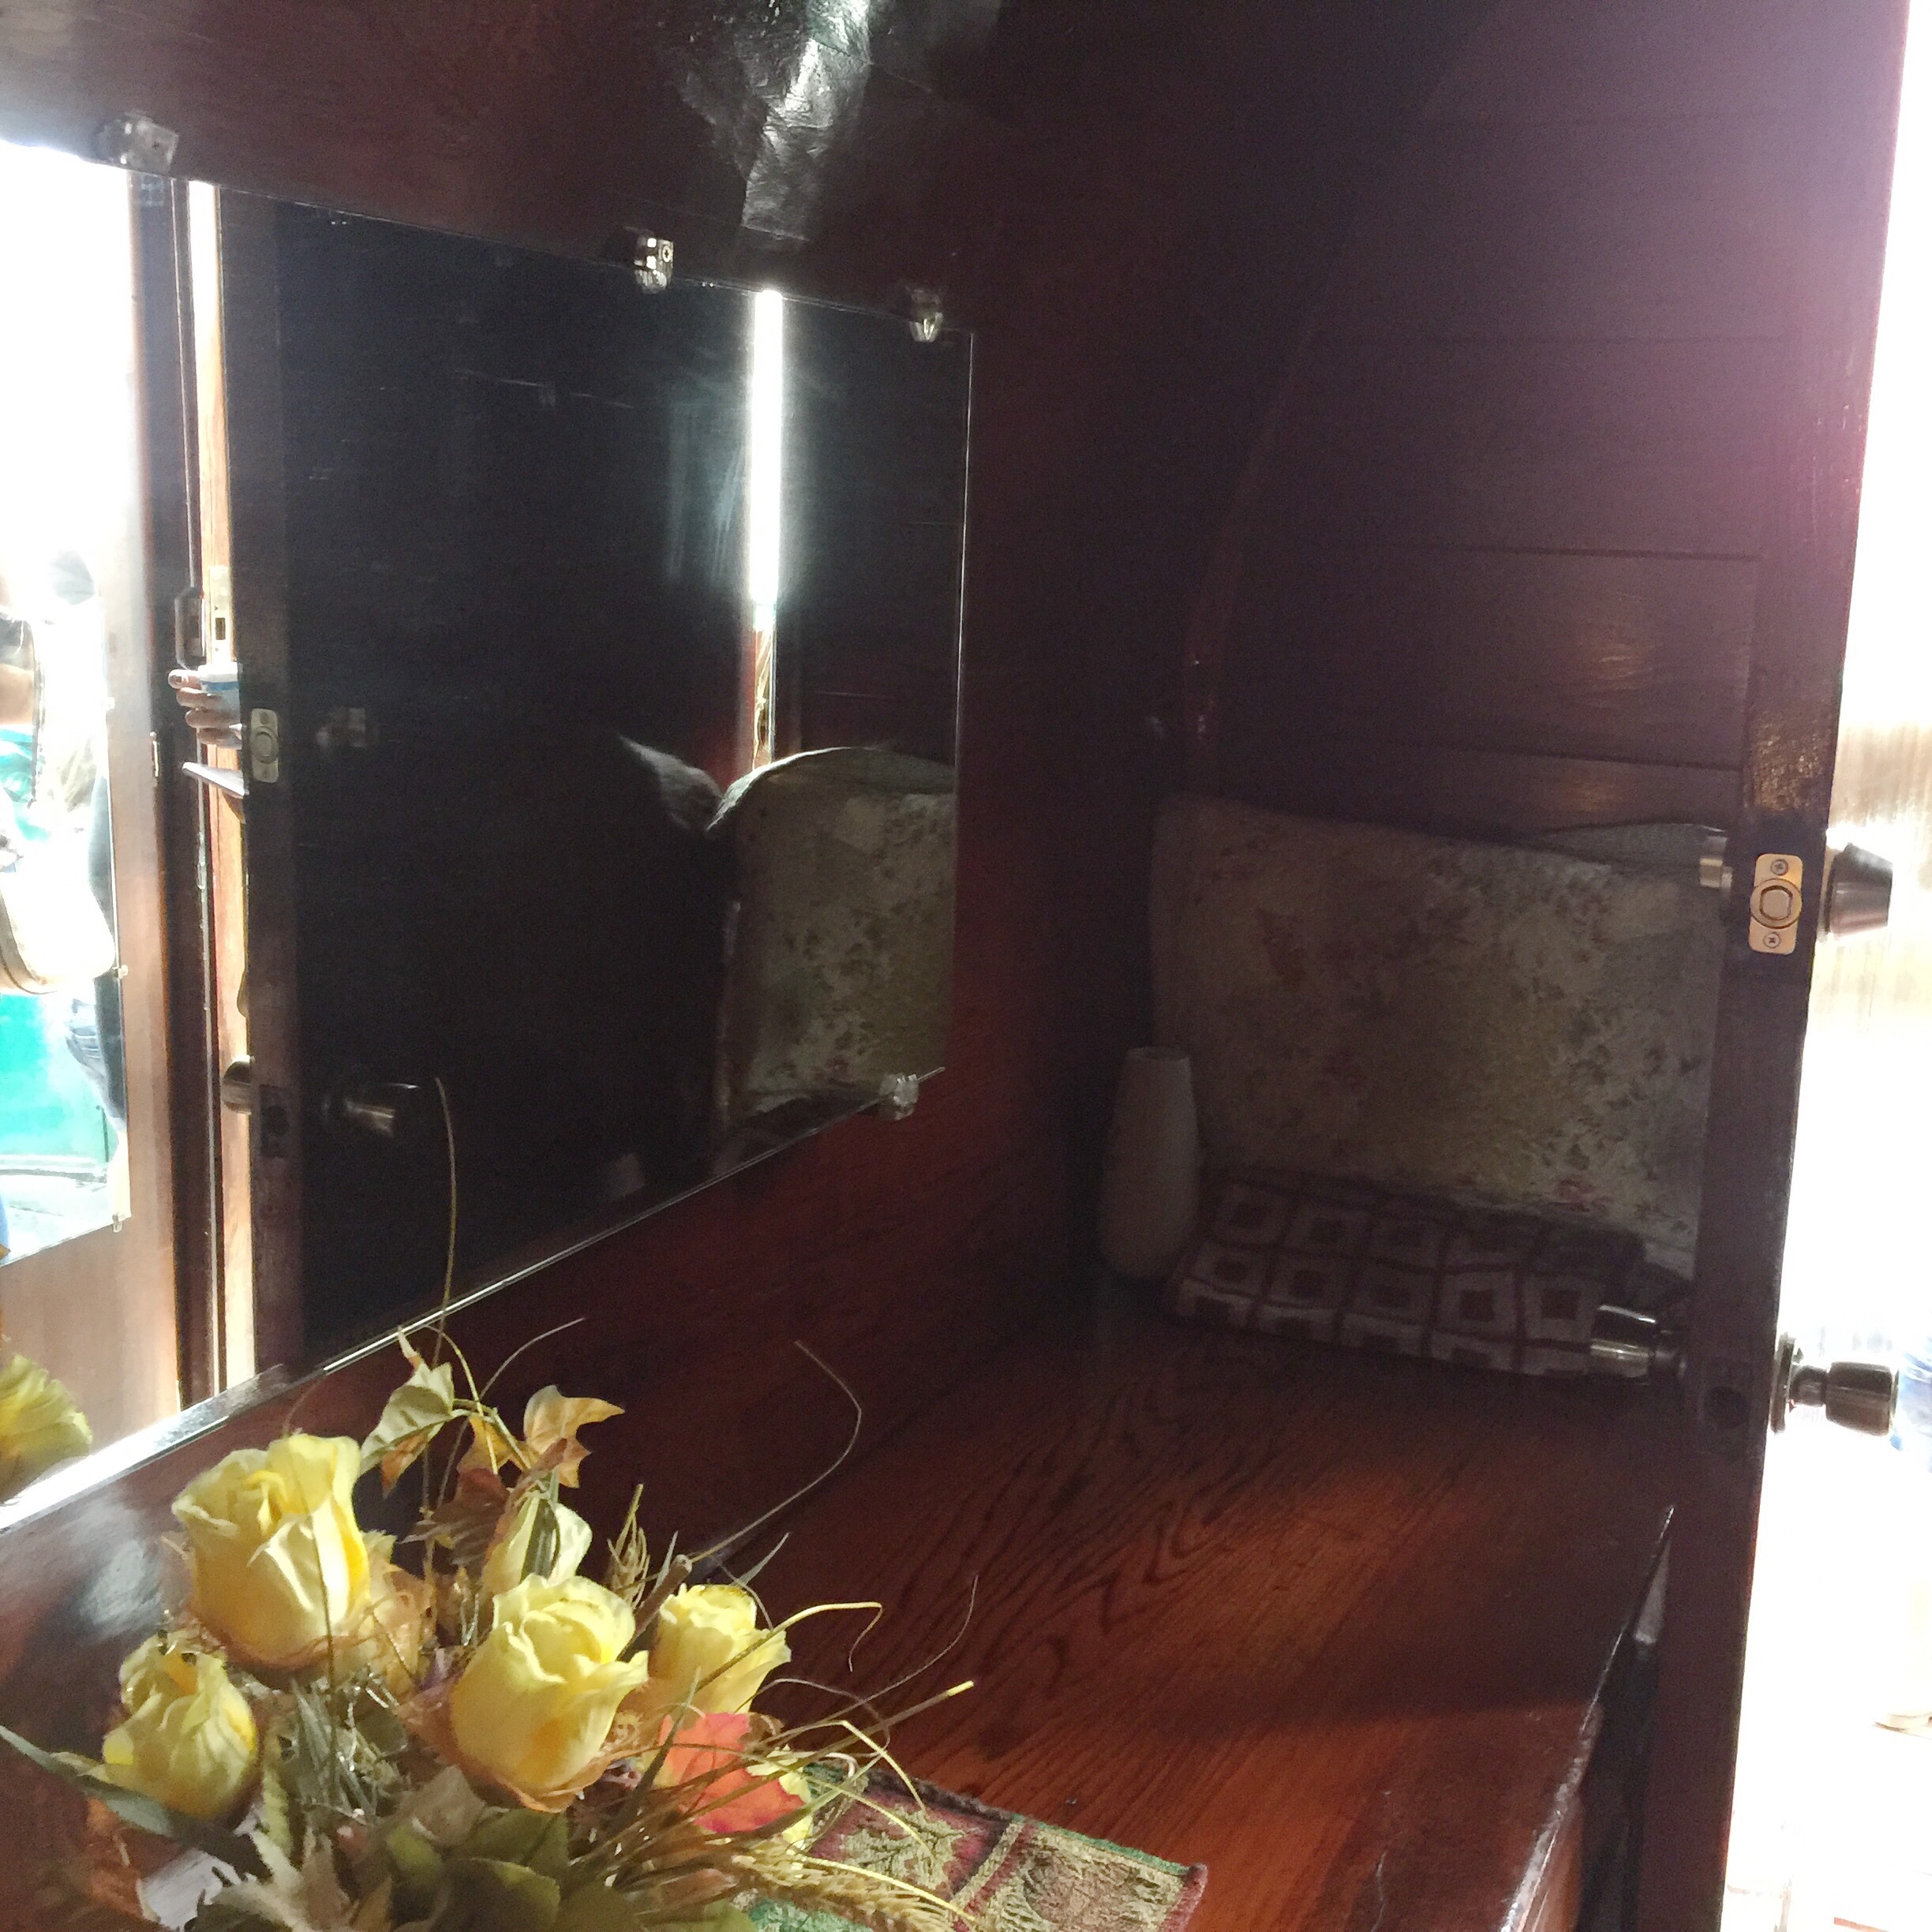
We also got to see the Redwood Log House, which is right up our alley, and gave our family a chance to see what size of house we’re going to be living in once Rosy the Argosy is done!
I didn’t get pics of everything, but here a a few highlights from the day:
Anyone else make it out to the fair in your state this year? What are some traditions that your state holds?
PS – if you haven’t had pineapple soft serve – stop what you’re doing and go get some! So good!
When people find out we’re remodeling a camper and plan to live in it, generally, we get two schools of response. Response A – people think we’re crazy hippies (they’re not totally wrong). Response 2 – they’re fascinated and ask tons of questions.
One that’s been challenging to answer is what it will look like when we’re done. Its a little tough to just ball all of our wild ideas into a compact little package of aesthetic explanation in one conversation. But I thought it would be fun to talk about it here, while we’re still in the midst of pulling Rosy apart. After all, the designing and decorating is where the real action is at, amiright?!
So here are some high-level representations and annotations of our ideal aesthetic:
*Painted white interior skin and walls. Don’t have a solid visual representation of this, but you get it, right?
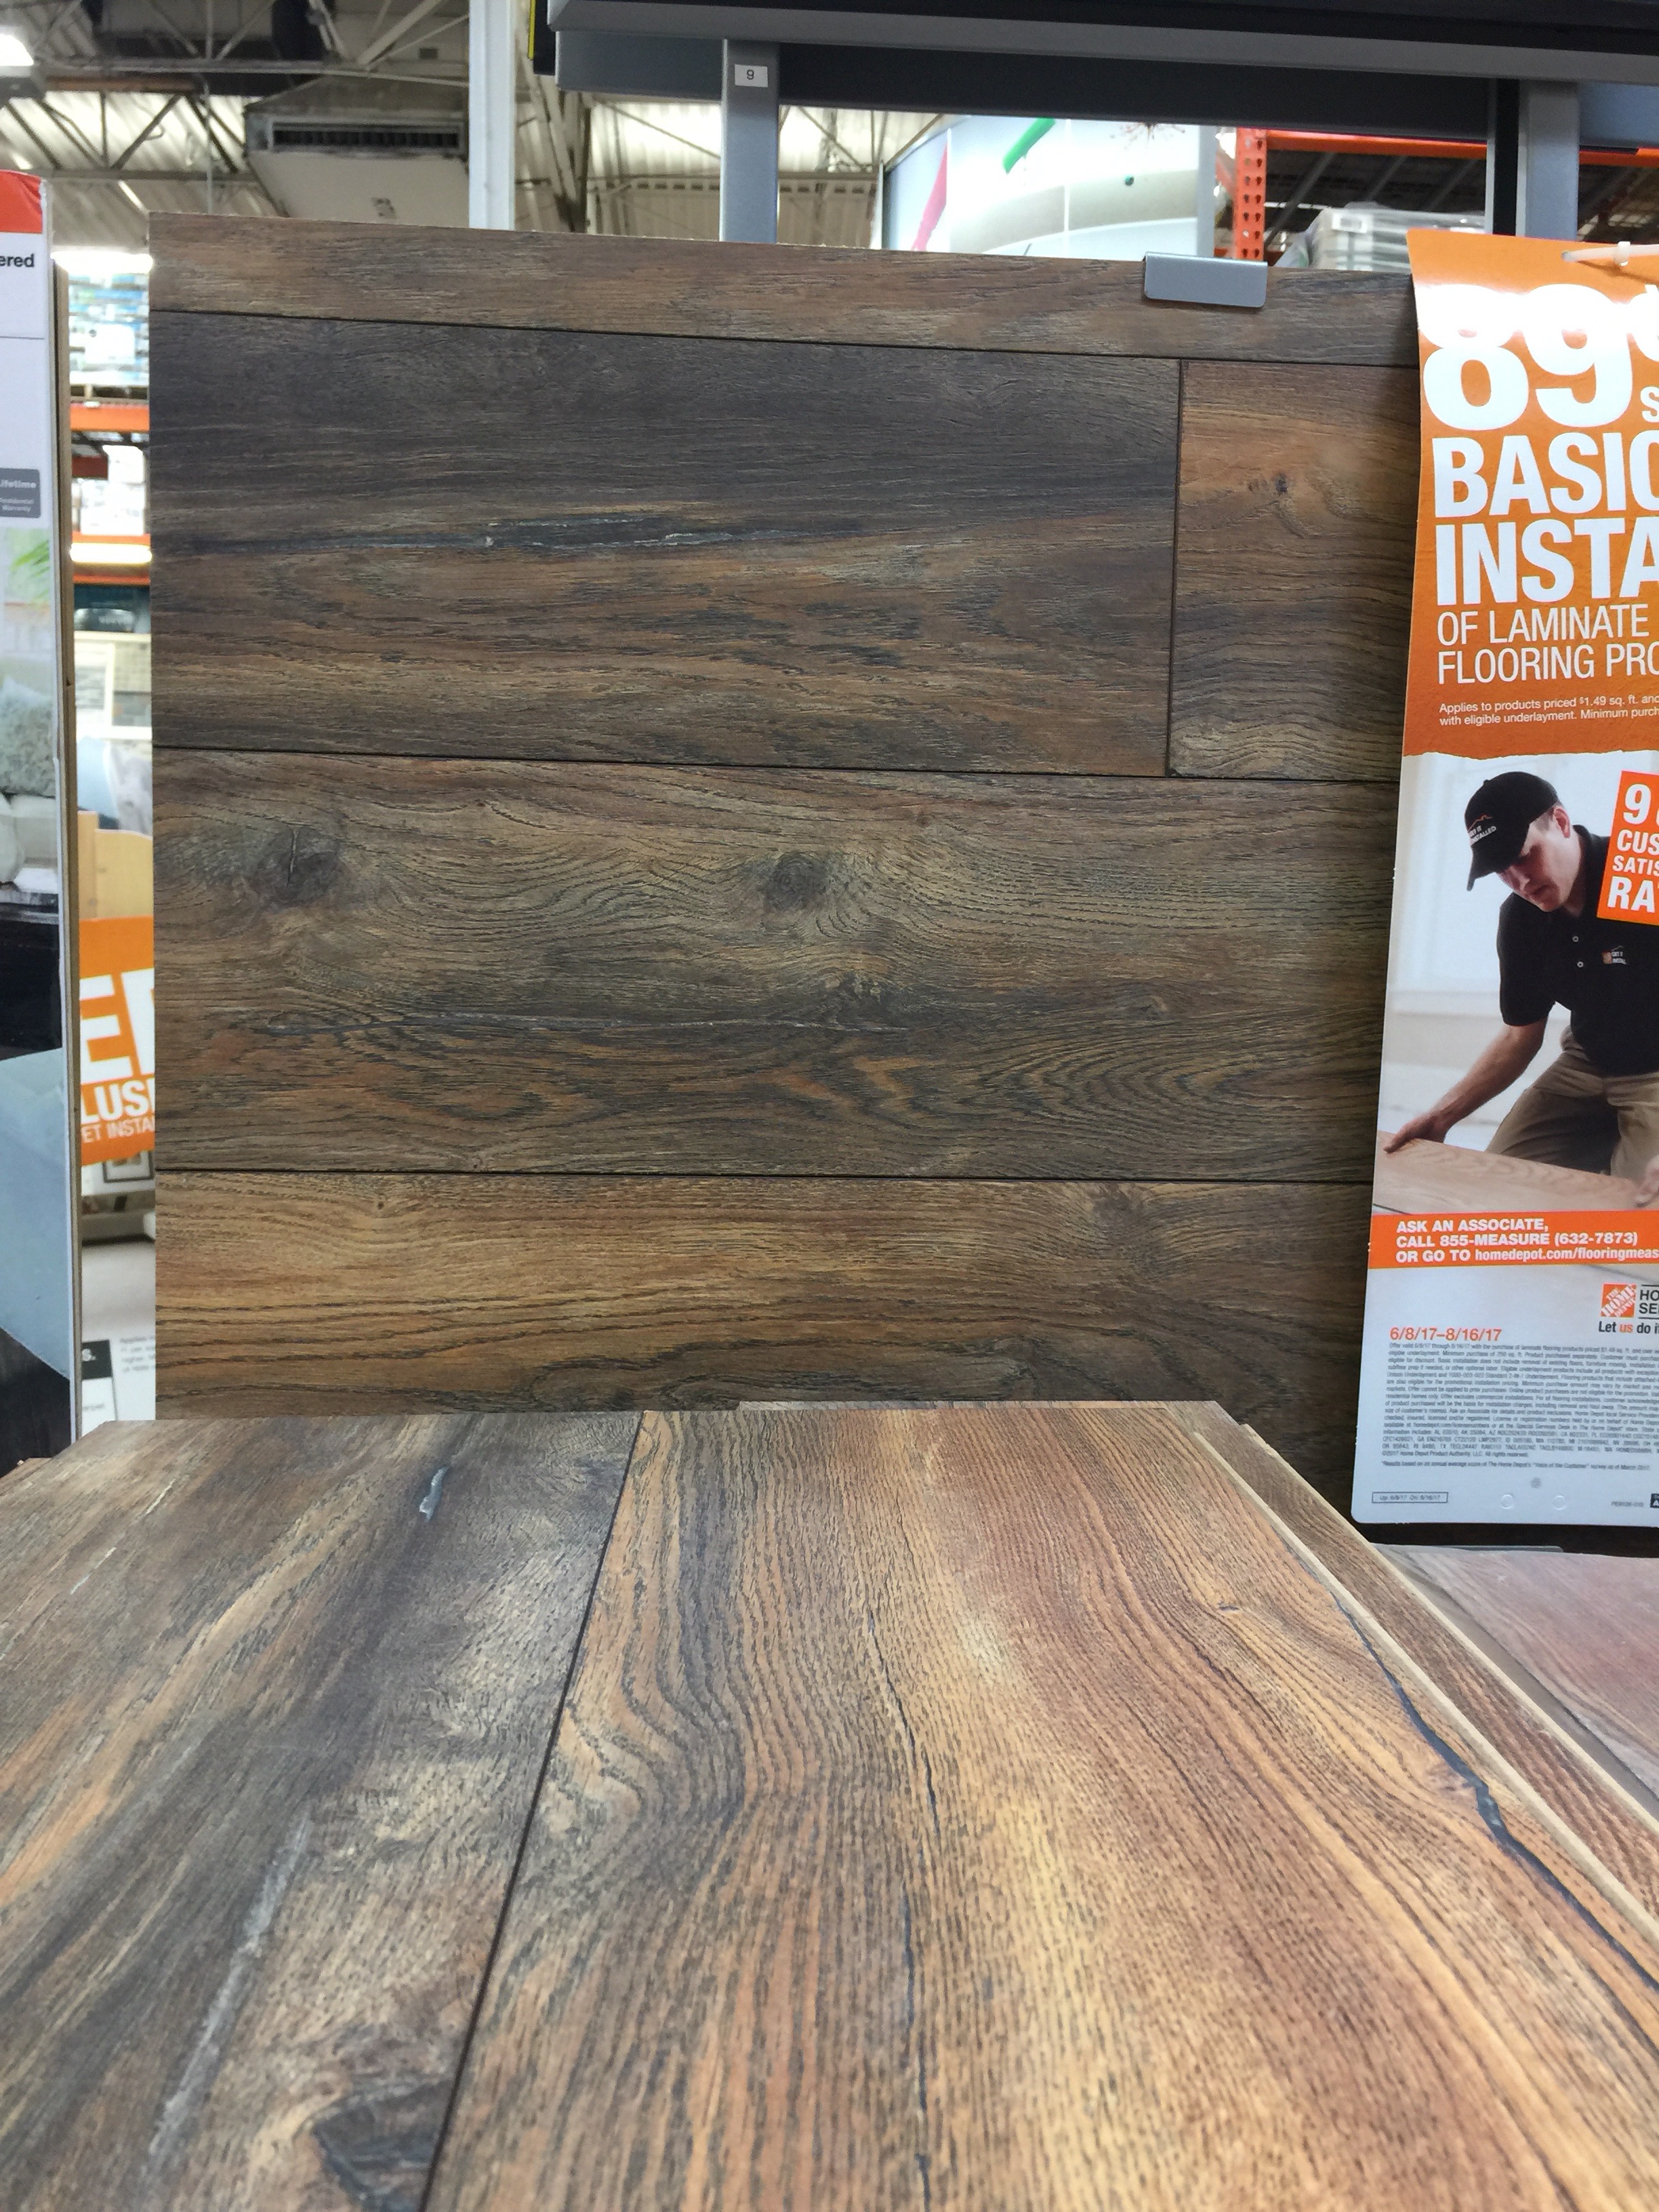
*Weathered/barnwood style flooring. The second one here is my favorite! I love the slight warm tones with the burnt grays.
*Counter and table surfaces will either be faux concrete or hardwood (undecided)!
*Pops of sage green, rose, peach and rose gold! Most of the metal in the camper is already rose gold (that was a freebie) and I’ve seen some pretty rad rose gold spray paint on the market.
*Black on white simplistic, linear graphic accents (like the cacti sheets I bought to turn into curtains).
*Plants. All the plants.
We are really going for a light and airy, minimalistic aesthetic, with well thought out storage, and multi-use zones.
We also got a lot of inspiration (and the decision to go with white walls) from following Mavis, Dunes, and Tin Can Homestead on insta.
Hopefully that gives whomever so reads this some sort of mental picture of how we plan on outfitting Rosy. Now if we could just pick a floor plan. I made some templates for us to draw out multiple layouts, which should help us get closer to nailing that down. DIY pun intended.
…and it got me wondering, “Do we really, truly, ABSOLUTELY neeeed an oven”? The Great Debate, I call this.
Let me back track a little bit. Once upon a time, three years ago, a girl moved into a quaint little apartment. The apartment was small and suited the girl’s few needs. Though this girl believes she has an eye for detail, she somehow completely missed the fact that this apartment did not have a MICROWAVE.
Obviously, the girl is me, and obviously, my first instinct was to panic, because who in the heck can live a normal life without a mickey to heat up her mac n’ cheese leftovers?!
Somehow, three years later, I’m still alive and breathing, even without the modern convenience of concentrated, high powered heat waves to zap my food into a palateable temperature. ‘Vick moved in two years ago, and has also survived sans-microwave, thank goodness. We both grew up with microwaves in our homes, so neither of us had done much reheating in an oven or on the stove before. Google has been our friend in these trying times.
So, now that we’ve brought ourselves current, let’s talk about this oven thing…
Ovens take up so much space! Our range is small, and yet it still seems to take over a lot of valuable real estate in the kitchen area. When you’re planning on living in 200 sq ft, space becomes such a precious commodity!
This isn’t a great angle (or a great photo at all for that matter), but hopefully this gives you a general idea of the size of it.
When I’m not letting chain restaurants do my cooking for me, I do a lot of cooking on the stove. Really, the only time I regularly use the oven is for heating/reheating pizza (because pizza is life). And the occasional batch of cookies. And it’s great for storing a Costco rotisserie chicken for about an hour if I’m not starving, but will want to eat soon, and still want it to be hot.
But, is all of that enough for us to take up so much precious space in our little abode? Can we live without pizza? Of course not, let me try again – are there other ways to make pizza? Would we be solid with just a space saving induction cooktop? If we can live without a microwave, certainly we could live without an oven, right?
So talk to me, campers. To oven, or not to oven? That is the question. What’s your setup like? What are the pros and cons? What do we do?!
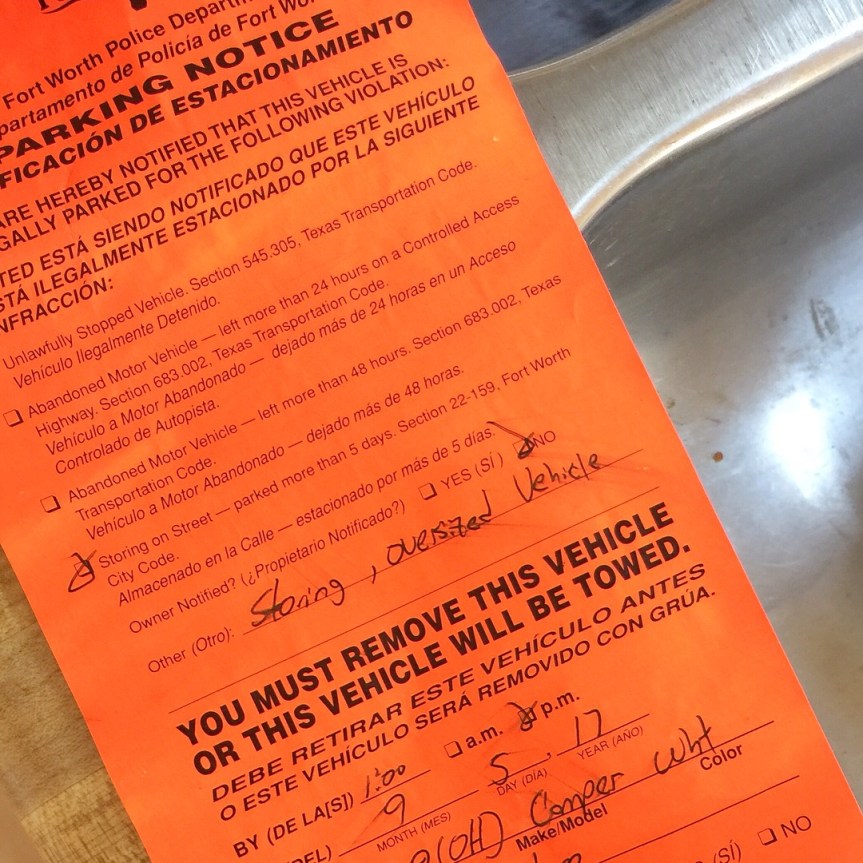
Our hearts sank. We were stopped in our tracks. The city gave Rosy the dreaded orange sticker, my friends.
We found out Saturday night that we had until 9/5 to move her, otherwise she’d be towed. We parked Rosy on a side street of our friend’s corner lot, and with about 100 ft of extension cords, have successfully worked on her in that spot thus far. The city had other thoughts about that.
We panicked for a little bit, but didn’t let the frenzy stop us from having our first brekkie in the camper (despite the reno mess, haha).
See, our original plan was to put her in Rob’s backyard, but it needed a little clearing first, and we just hadn’t gotten around to it. We were also unsure that she would fit through his gate.
Alas, the time had come to leave procrastination and reservation behind. Arnavick cleared the grass in the backyard, and he and Rob managed to get her back there with a few inches to spare. I’m told it took a 14-point turn! Haha!
I only wish I were there to see it, but I was at home doing homework – booooo. Hopefully Arnavick will tell the tale and post about it on here soon! Here she is in her new resting spot! We are so grateful to Rob and Nicole for opening their yard to us so we can get Rosy all fixed up!
If we’re gonna chronicle our renovation progress on Rosy the Argosy, we must start with the obligatory “before” tour, yes? Follow me…
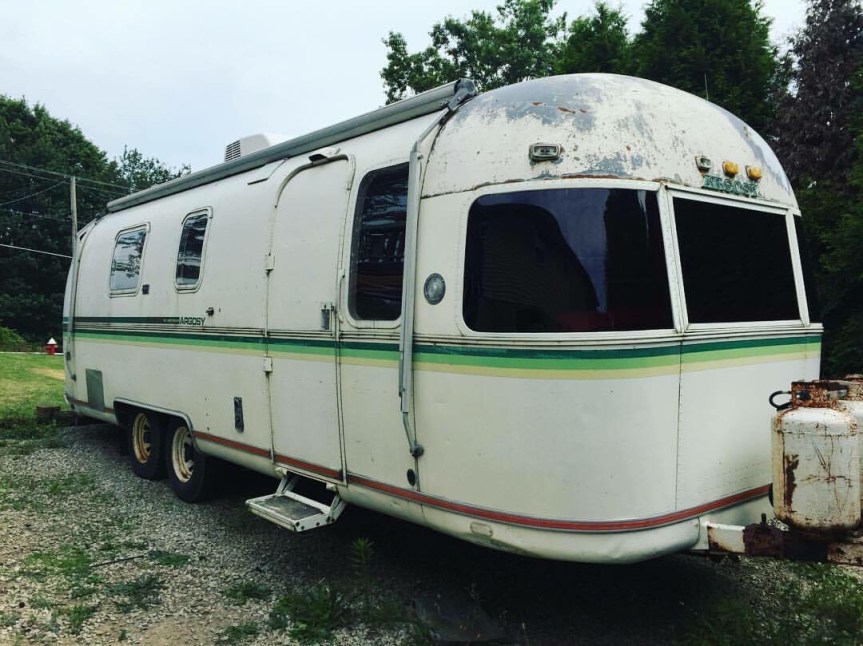
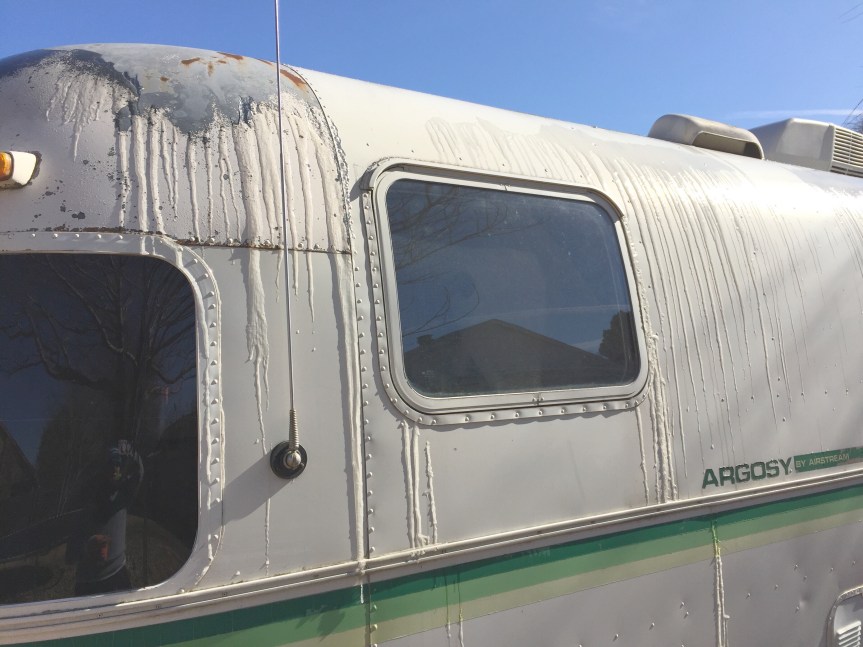
Rosy is a 1979 model Airstream Argosy. She is 27′ long. The thing about the Argosy models that’s different than other Airstreams is that their exterior is white, not the shiny silver most people think of when they hear “Airstream”. Ours is the first Argosy I’ve ever seen with green stripes on the outside. I’ve only ever seen orange or blue striping. We are going to do our darnedest to preserve that striping! If it doesn’t make it through the reno and a vigorous exterior cleaning, we’ll replace it with an exact replica. We love the retro look it gives her! She’s a little rusty on the outside in some spots, but we plan on brushing/sanding/sandblasting and re-painting the rough parts.
We have yet to open our awning, but we’re told that the canvas is trashed. Sad face. The good news is, we can buy a custom awning to match the green stripes. The bad news is, it’s an expensive fix. We’ll post on that when the time comes.
Shall we go inside?
(we are the bottom layout in above)
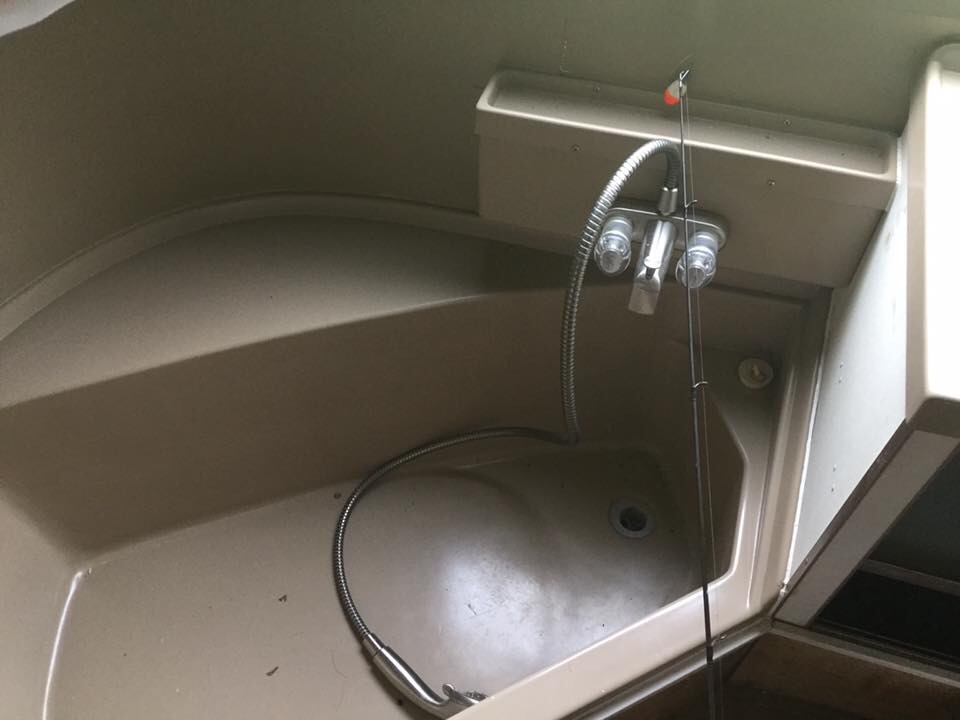
Rosy’s plumbing and electric work are intact – impressive for a gal her age! She’s outfitted with a seating area, fold out dining table, kitchen with 4-burner gas stove and oven, twin beds, a back bath with a commode, sink and bath tub, three storage closets, and overhead storage cabinets throughout.
We’re keeping the bath and kitchen where they’re located but replacing the breaking, aging plastic and particle board with new, high quality materials. The twin beds will be pulled and replaced with a murphy-style full or queen bed and storage cabinets. The dining and seating area will also remain in the same spot, but will be updated with newer, better materials and a style that is uniquely #teamjamavick.
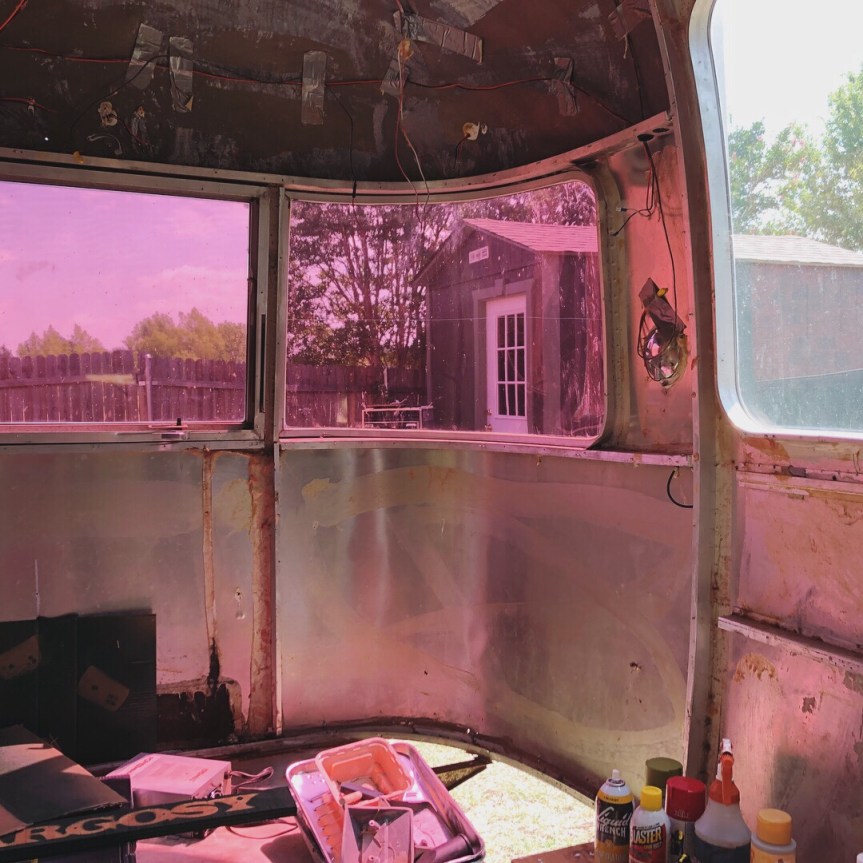
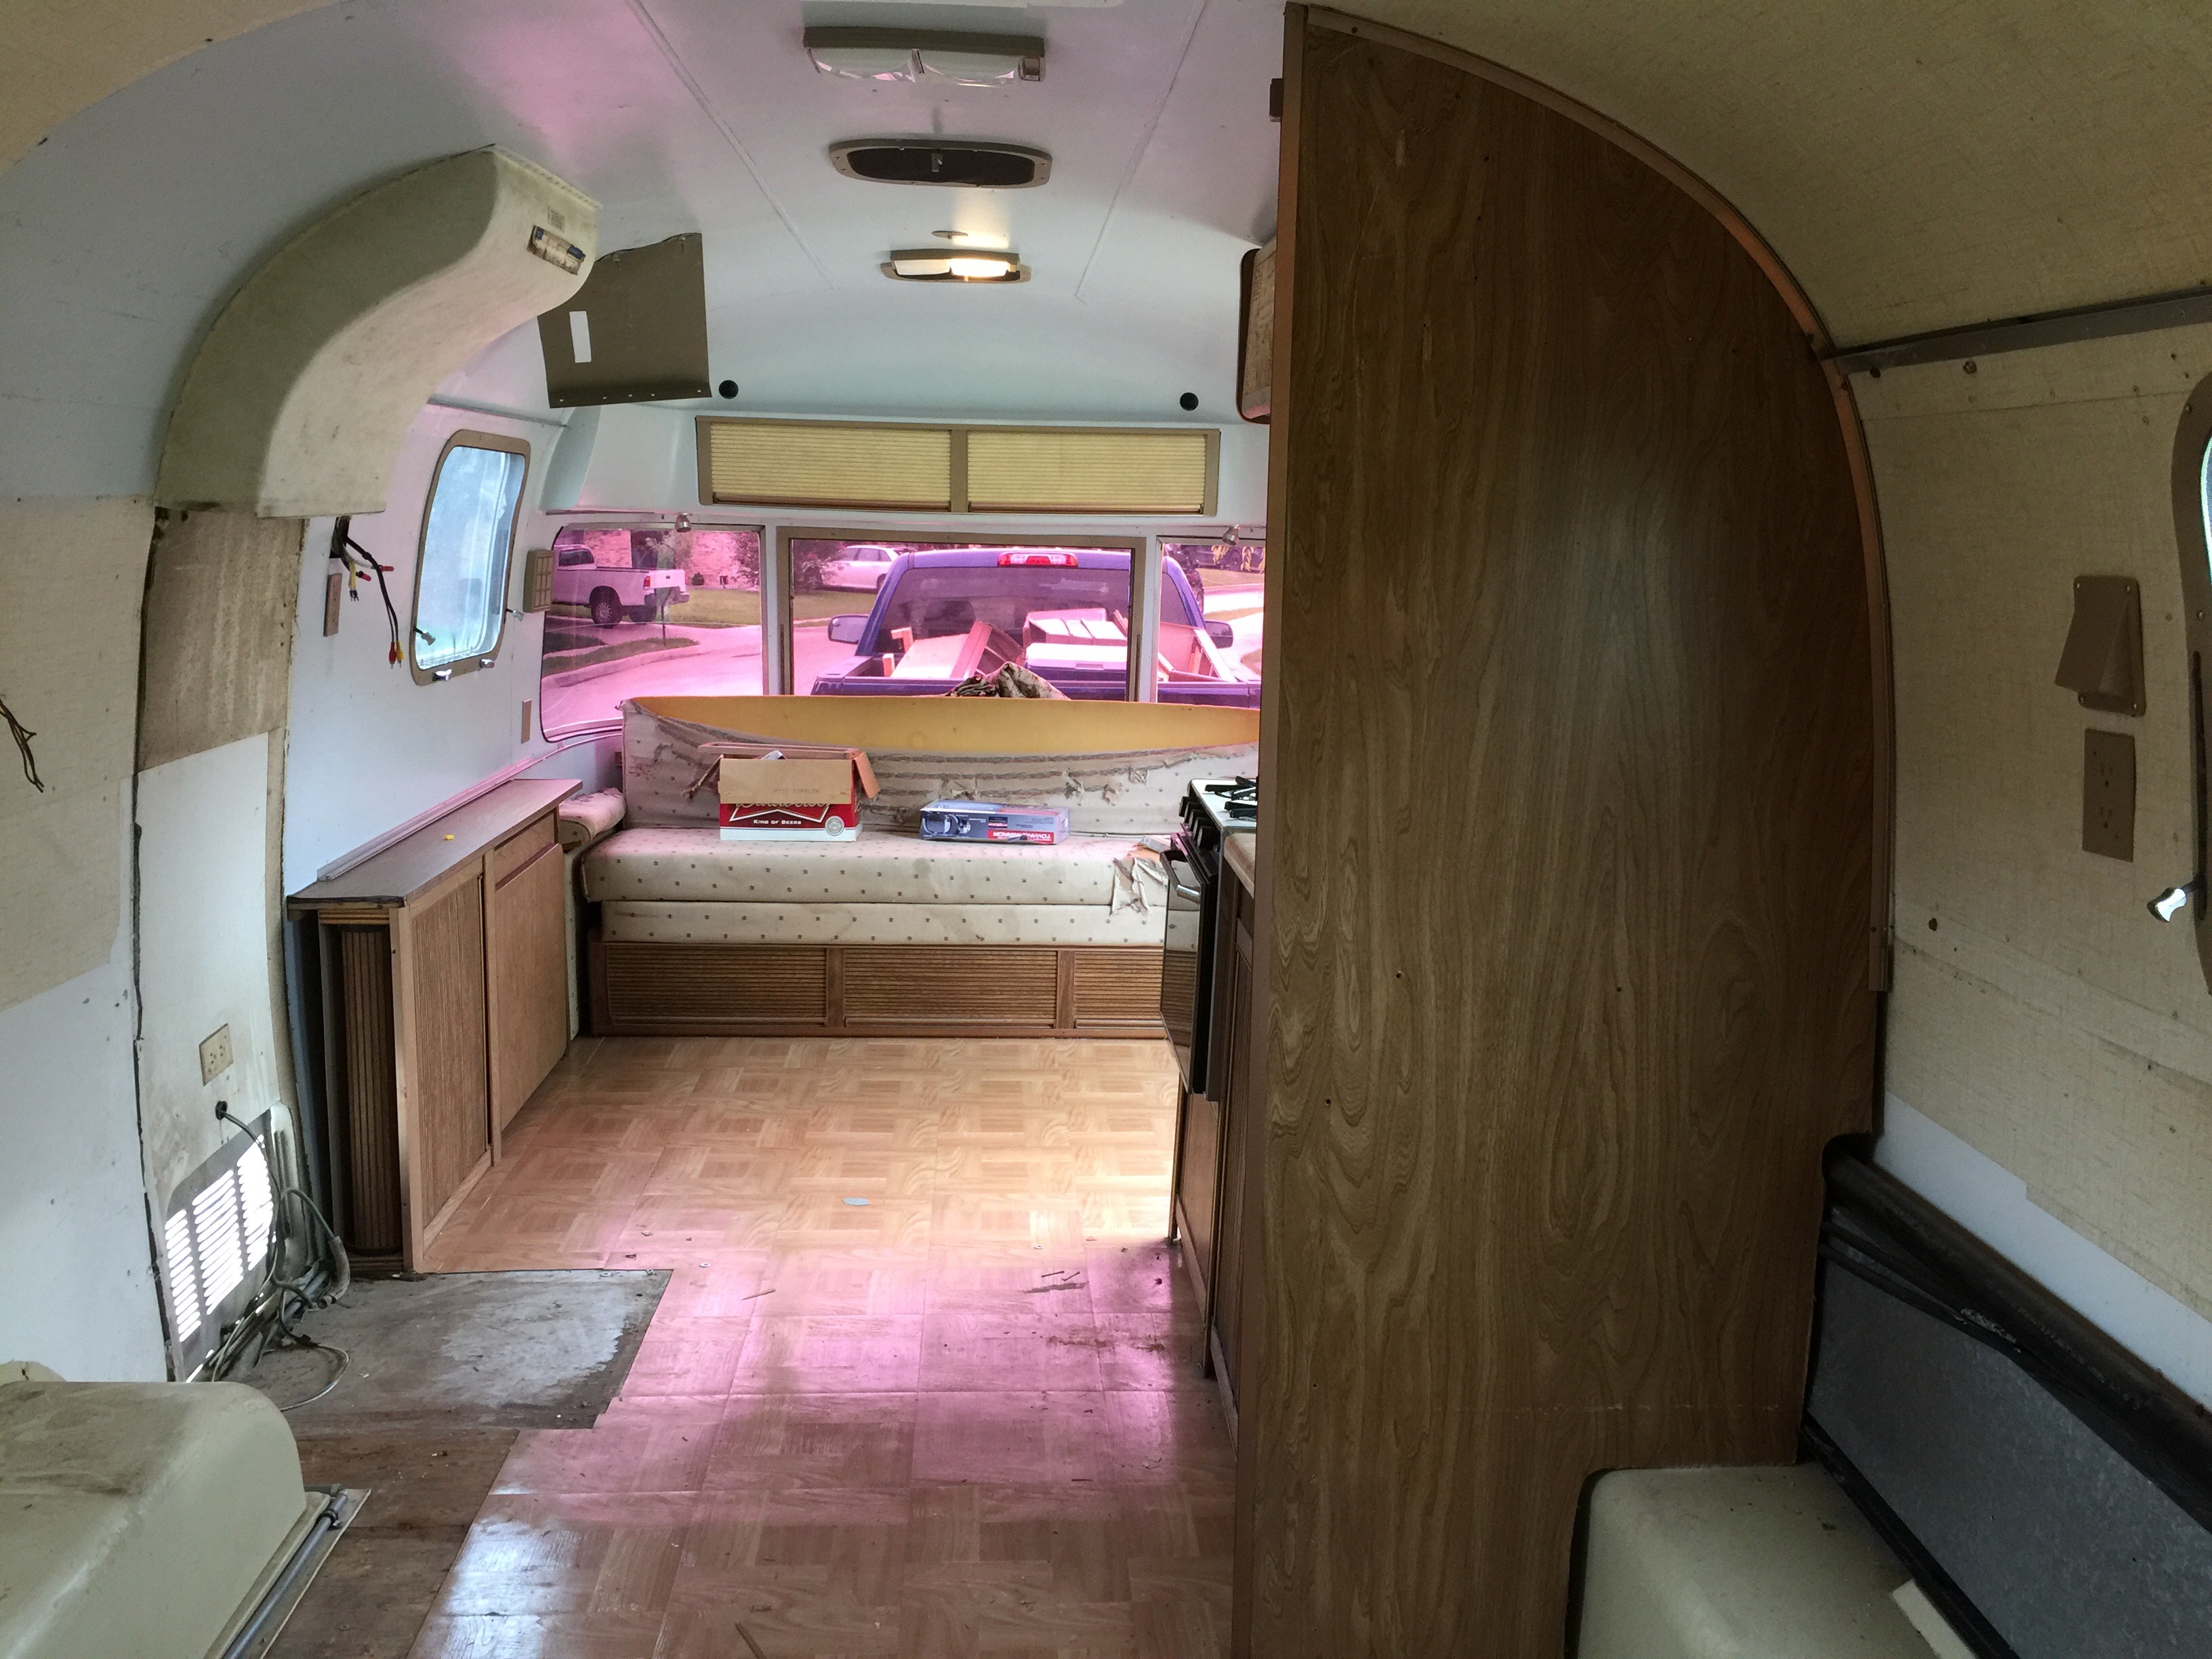
Perhaps our favorite feature (and part of how we chose her name) is her rose colored glasses!
Her previous owner tinted the wrap-around windows in front! We love the ROSY shadows the tint casts in the dining “room”! It’s weird, and we’re keeping it.
We have TONS to do before getting Rosy live-in ready, and we’ll post the ups, downs, ins, and outs as we go!