
Last weekend was productive! Arnavick arrived home the prior Wednesday from a week-long visit with his folks in Colorado to celebrate his neice’s birthday. I couldn’t go because I’m in school and had a test with no make up opportunity – such a bummer! BUT since he’s back home and we did NOT have a torrential downpour for the first time in weeks, we got thangs done on this trailer!
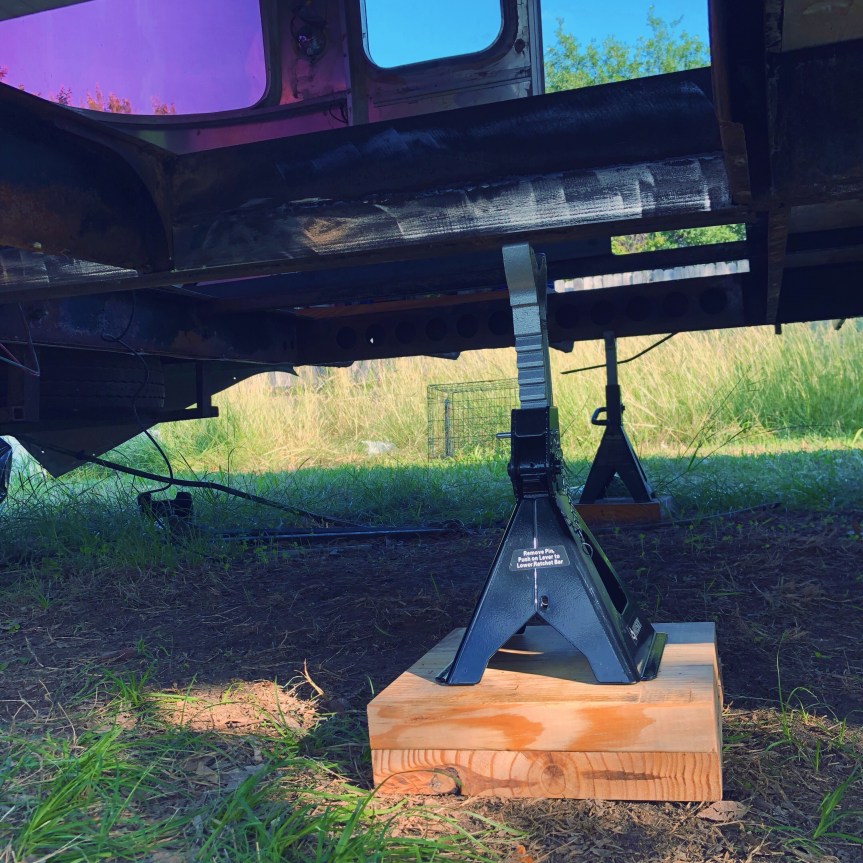
We have Rosy the Argosy on four jacks right now, but husband dearest wanted to add two more for more stability (she’s a big girl, after all) while we work on welding the bad spots on the frame. It’s important to have the trailer sitting level on jack stands. If it’s even just a liiitle uneven at any point, the welds we’re doing will render the frame permanently distorted, which could cause stress and safety issues later on. So your girl made some jack stand platforms, since we have her in a yard where the soil is a little soft. The wood platform helps with support and stability, and because of the height of our platforms, we get a little extra space for when we’re working on the underside of the trailer. You want your jacks on a flat, hard surface, not pliable dirt/grass.
There are many options out there for platforms that you can buy. Some people also use cinderblocks or bricks depending on the size or weight of their trailer and the stability of the ground underneath. We had ours on bricks at one point and they broke, so we switched to wood. This DIY version is budget friendly, and pretty easy to complete. Even someone who is power-tool-shy can do the job with a little confidence and the right safety gear. I thought to post it in case any power tool newbie comes across this – it’s a great little beginner project!
We use these jack stands, which drove us to our choice of board width – their bases are 8″ wide. If your jack stand bases are wider, make sure you get a wider board. You want at least 1″ overhang of platform around the entire base of the jack stand, ours has 2″.
So let’s dive in – here’s how I made two jack stand platforms in a matter of 10ish minutes.
Tools:
*Drill
*Spade drill bits (size will be relative to your screws, I used 3/4″)
*Saw
*Safety glasses
*Work gloves
Materials:
*One 8′ x 1′ x 2″ unfinished pine board
*Ten 1 5/8″ wood screws
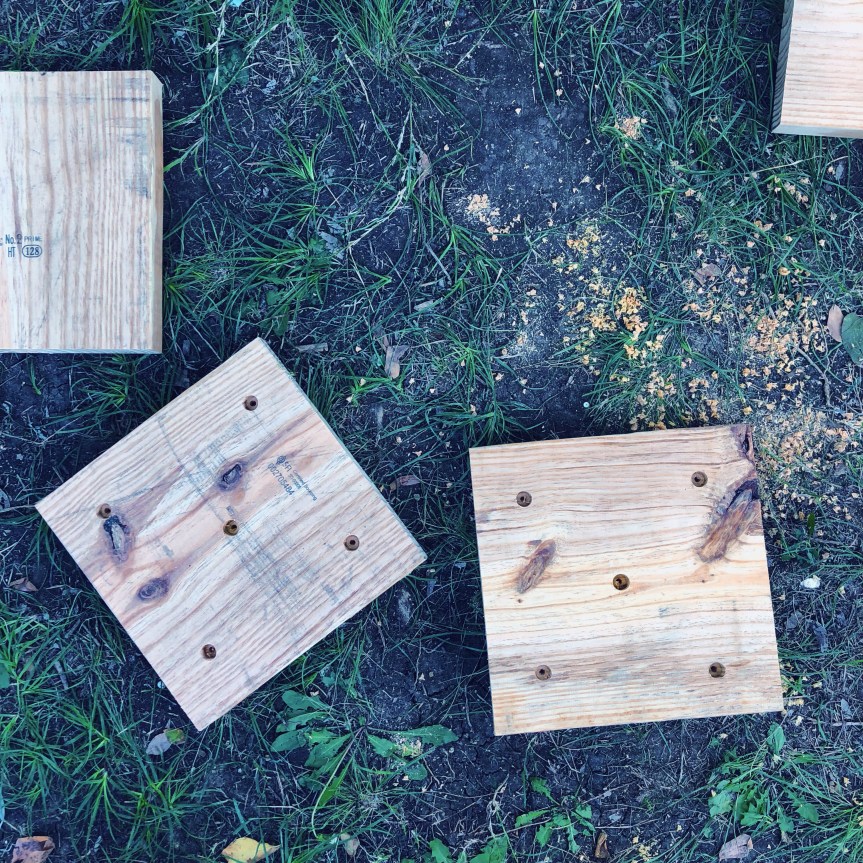
Step 1: cut your board into four square pieces.
If you don’t own a saw (table, compound miter, jig, hand, whatever), you can have your board cut at whichever store you bought it from. Most places don’t charge for the first cut, and then charge 25c or so for each subsequent cut. The pieces need to be exactly square, so make sure you measure the width of the board first, and then mark out the length based on that measurement. If you didn’t already know, the measurements on the tags at your hardware/lumber supply are never exact. Our board was marketed at 1′ wide but was actually 11 3/4″, so that’s how I measured my length. I measured one length at a time between cuts, since you lose a little wood with each cut. If you were to measure all at once and then do all the cuts in a row, each square would be slightly smaller than the original.
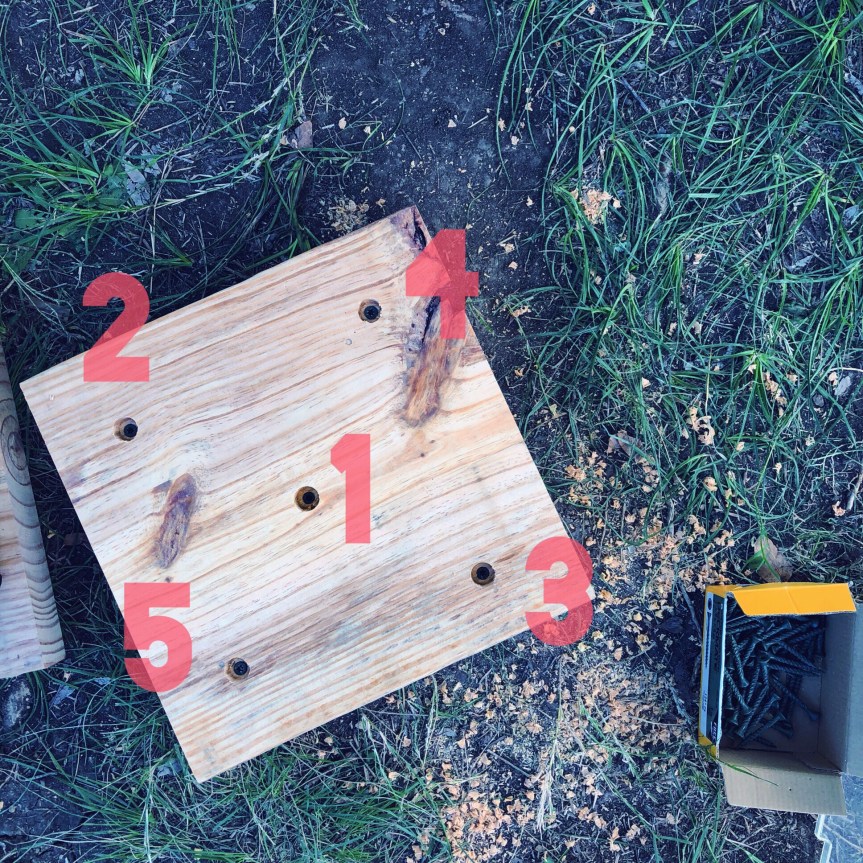
Step 2: drill holes for screws in each top board.
To drill the holes for the screws you’ll need a spade drill bit. This will allow you to recess the screws into the wood, which stops your jack stands or the ground from scratching, or damaging the screws (depending on whether you lay your platform screw side up or down when it’s done).
You should use a spade bit that is relative to the size of your screws. I used a 3/4″ bit which made my holes about twice the width of my screw heads. Drill five holes in the board – one in the center and one a couple of inches in from each corner. Just like on dice. My holes are about halfway through my top board, so about an inch deep.

Step 3: screw boards together.
When you put your two boards together, you should cross the wood grain (this is where being exactly square comes into play). So if your bottom board is laying with the grain horizontal, lay the top board down with the grain vertical. This adds to the tensile strength of the platform.

Holding your boards steady with a gloved hand, insert the first screw in the middle hole of the board. Screw the corners in an X pattern. For example, screw the top left, then the bottom right, then top right, then bottom left.
Step 4: get jacked up!
Your platforms are ready to use! We laid ours on the ground screw side down, in a spot where the trailer really needed extra support. Bonus points when you find the chihuahua in the below pic.

Now we can weld our frame damage away with the peace of mind that our trailer is evenly supported with six three-ton jack stands. It’s a great feeling!
If you’re a beginner and looking to jump into DIY, or if you don’t feel like shelling out scratch for a fancy jack stand platform, I hope this post proves useful! Happy lifting!


