I’m a few days late, but here I am with the February progress report! It’ll be short and sweet, because LORT we are busy. Feb is awful in Texas because WEATHER, and it’s also busy busy because it’s my birth month, and my amazing nephew’s birth month, and it’s short. So between family time and work and school schedules, and working on the Rosy, I dunno how we had time to breathe… But breathe and work and study and party and renovate, we did… and here’s where we’re at on the whole reno process…
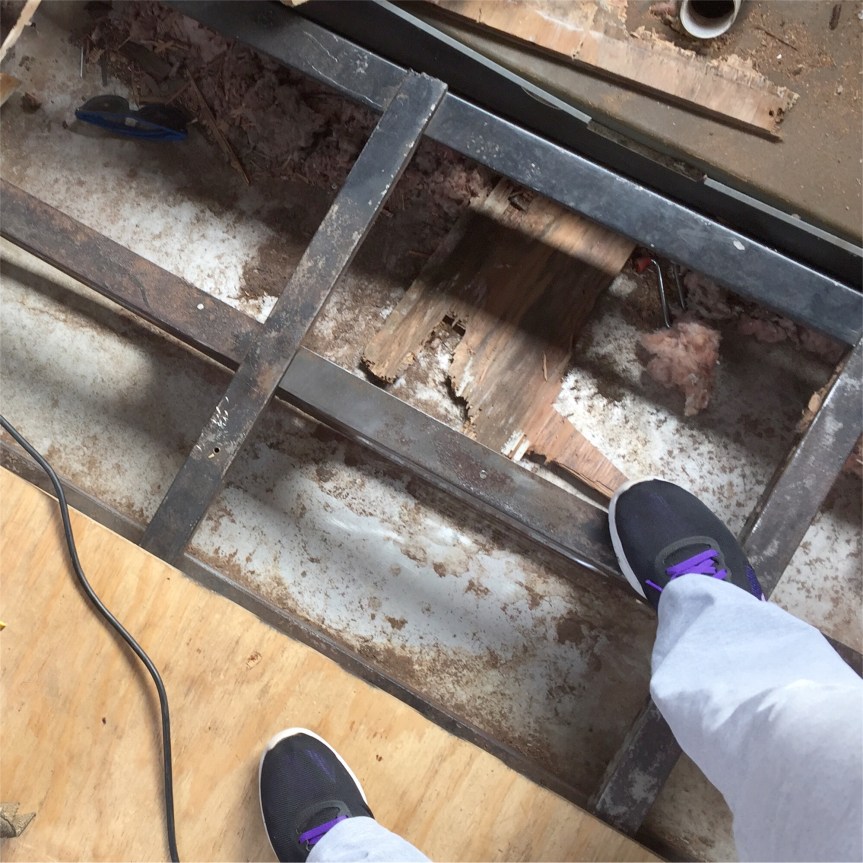
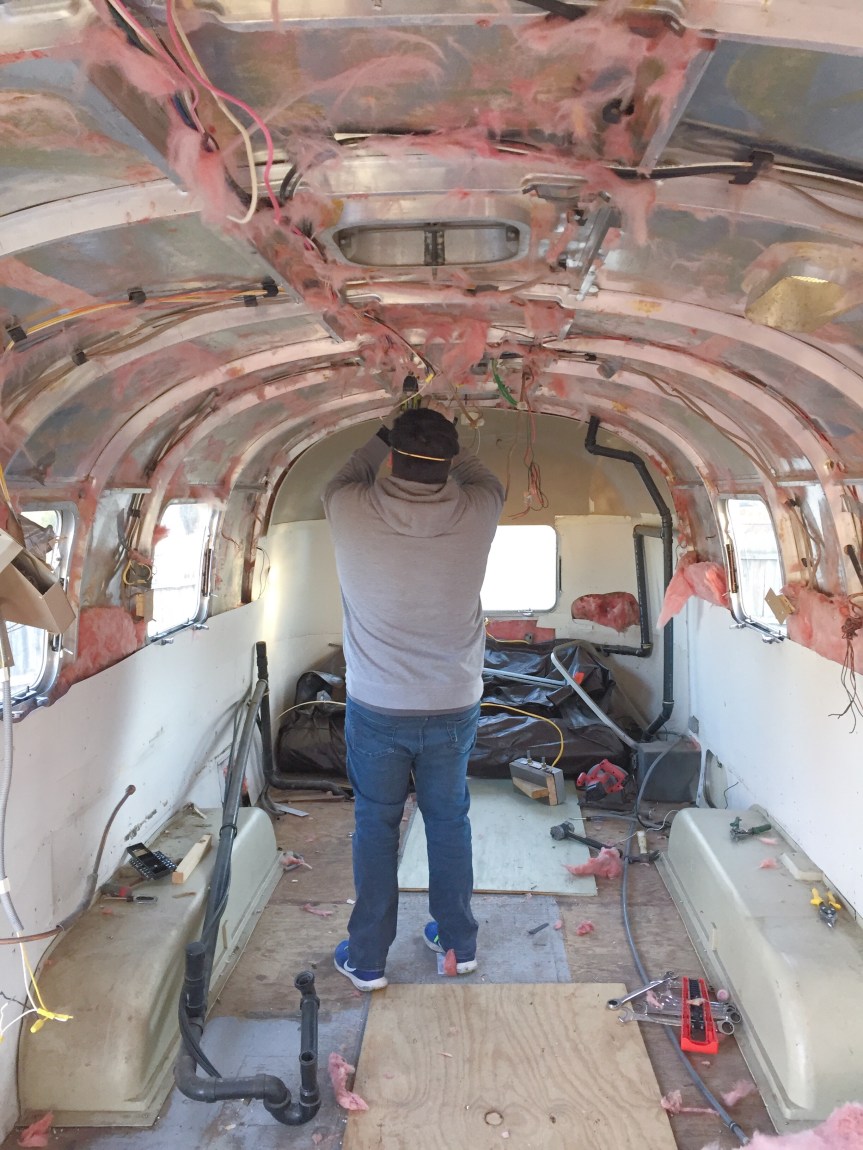
Basically, the current status is that we’ve got frame exposed, interior skins out, insulation gone, and a mess EVERYWHERE. We only have March to get this gal ready to sleep in without danger (more on that later), but thanks to some touching generosity of our friends we have a place to crash if sleeping in Rosy is still a health hazard come April 1. Here she is in her icky glory.
It feels like we’ve worked on her a ton with no visual difference. Okay, slight visual difference. I’ll be so glad to put all of this rust brushing and muck cleaning behind us! Today we’re going to make a first attempt at using POR15 to cover the rust on the frame and protect it from damage. Neither of us have used this product before but I’ve done a lot of research over the last week or so and have gotten some good advice from some of our little renovation village. Fingers crossed it goes well!
This is our last month in the apartment. I’ve paid the final rent payment, which felt really, REALLY good. We have just a few weeks to get Rosy what I call “minimally livable”. We define minimally livable as subfloor in, new insulation in, new interior skins in, and said skins painted. If we can get that far along, we’ll toss our mattress in the subfloor and “rough it” (if you can call it that) while we continue on with construction. If we can’t get that far along, we have a back up plan consisting of our very kind and generous friends’ guest room on the same property where we keep the camper. The hardest part in all of this has been packing.
We procrastinated too much, and have now put ourselves in a really tight spot. I work around 52 hours a week between my full time job and freelance work, and I go to school two nights each week for a total of about five hours. Vick pulls long hours in a warehouse all week. We are TIRED in our free time. At this point we are donating or trashing everything we are sure we don’t want, and we’re boxing up everything we do want or are unsure of. It’s hard to say what we’ll need until we’re in the thick of living the lifestyle, so we’ll just pull stuff from storage as the need comes up, which will help us determine what else we can get rid of. Well, we’re off to go do all the things! Happy camping, everyone!
January has been a tough month for measurable progress. It’s been cold (like, for Texas, anyway). So cold, that we iced up one day!
I’ve been taking care of some wedding stuff, and some work stuff, and some school stuff, and I had some friends in town this weekend… And hanging with them was much more fun than donning a respirator mask and safety goggles to sweat and play in the rust. I’m feeling a little down right now because we haven’t made the progress that I thought we would have by now. The last two times we’ve been out to the trailer, we arrived several hours behind schedule, and hit what felt like a hundred roadblocks that prevented us from reaching our end goal for the day. Trailer reno is hard, dudes. But… I’m gonna throw down a little progress report, in the hopes that it will lift my spirits, and bring into my focus all of the accomplishments we’ve achieved since my last update. Let’s get started, shall we?
So, the last time I shared our progress, it was really short blurb with a lot of pics. And reviewing that post just now as I prep to write out today’s post, I can see that we have in fact gotten a TON done. We are still far off from being able to even hang out in the trailer for too long without respirators on, but we’re getting there.
A month ago, we still had interior skins. We had just started taking them down. Boy, that feels like a lifetime ago.
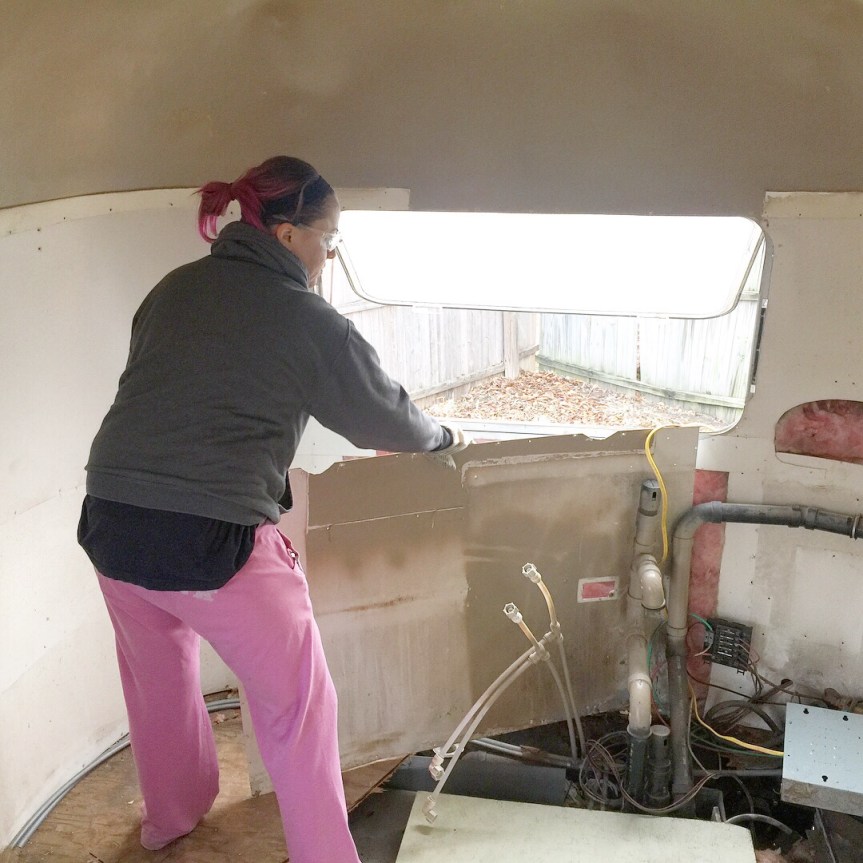
Since then we’ve popped out at least a couple hundred or so rivets, and away went the interior skins.
We started by taking the cover of the AC unit down and removing all of the light fixtures so we could take down the ceiling. It was all one long skinny strip of metal skin, which was pretty satisfying to pull down. It was also a little nerve-wracking because, well, that’s it. Once you start pulling those puppies down, you’re full on committed to redoing your insulation and skins. Say bye bye to painting that 70s era vinyl wallpapered (??) metal and let ‘er rip, potato chip!
After that, we then worked our way down the sides, leaving the end caps for last.
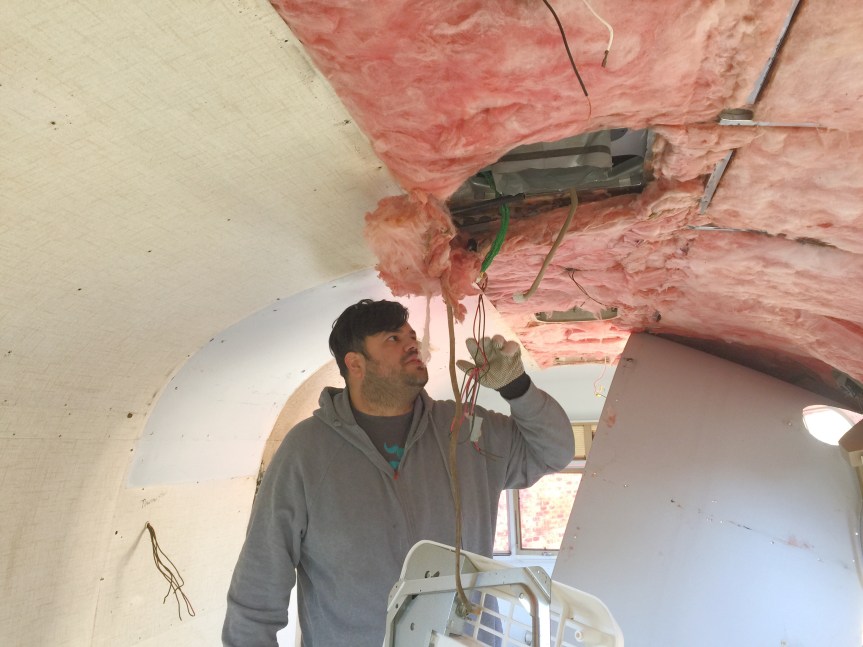
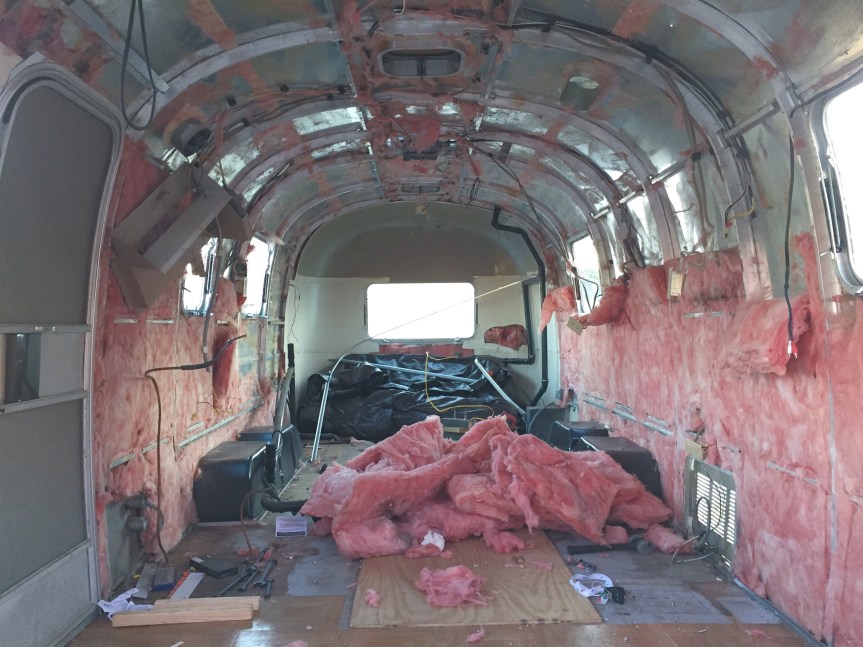
Then we started to pull out the ol pink stuff…
We had several sessions of pulling this stuff down, and going home incredibly itchy – ugh – despite taking precautions to keep it off of our skin. Super annoying!
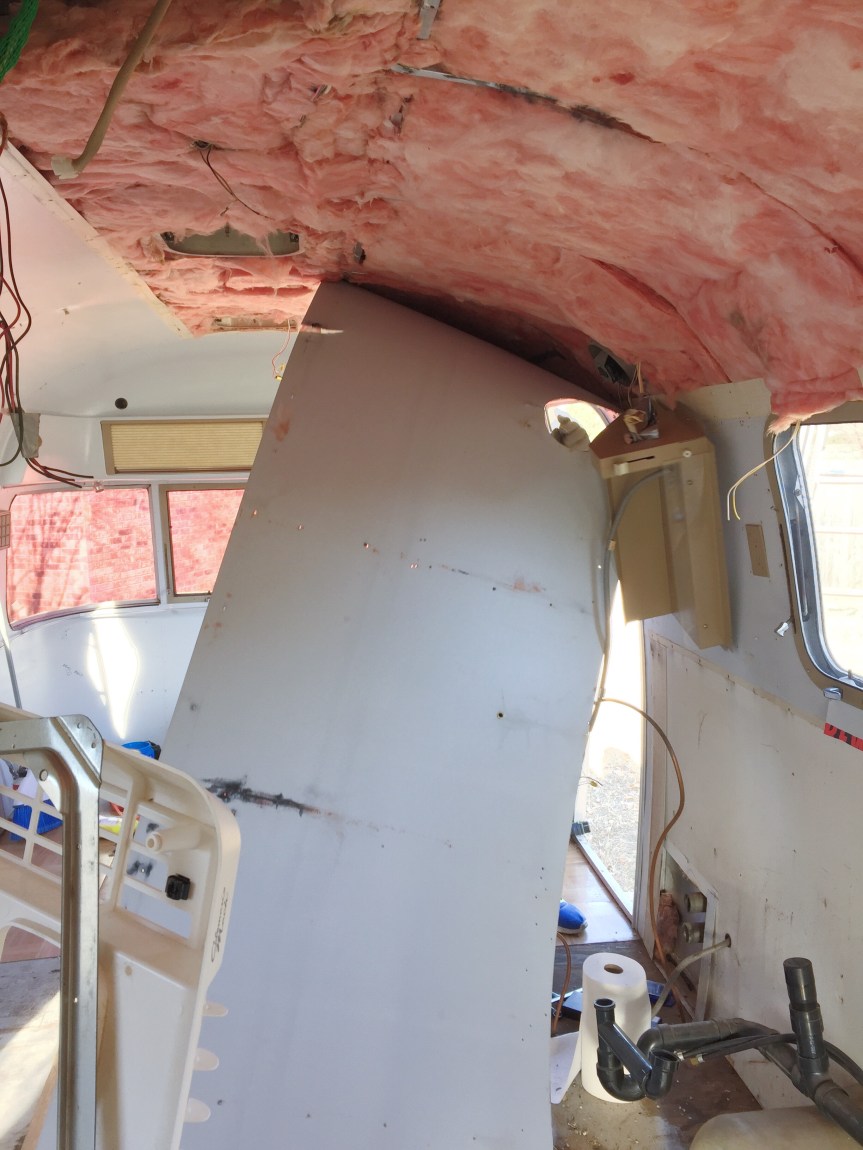
The end caps were a little scary to take off. Not because it was difficult, it wasn’t. It was just the same as taking off all the other skins… But taking the end caps off and trashing them meant that we for certain were going to have to make new ones at some point, on our own, and have to account for that beautiful, dreaded, iconic, amazing, terrifying Airstream curve. If I haven’t already mentioned it, Vick and I met in remedial math class. We-no-likey-the-maths. But we did what we do, sucked it up and pulled them off, and vowed to figure that out when we got there. Thankfully, we’re not “there” just yet.
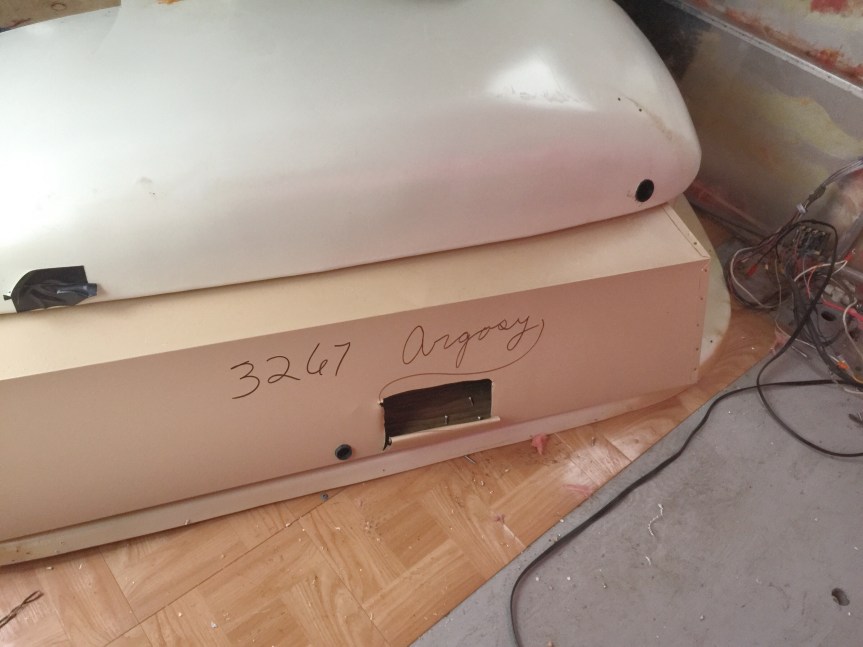
The back side of our front interior endcap had 3267 Argosy written on it in permanent marker. I’m not sure what that means, but it’s cool to think that the last time anyone laid eyes on that was probably in the 70s at the factory. I’ll have to google it one of these days to see what I can find… unless anyone reading this knows what it means? Help a sister out!
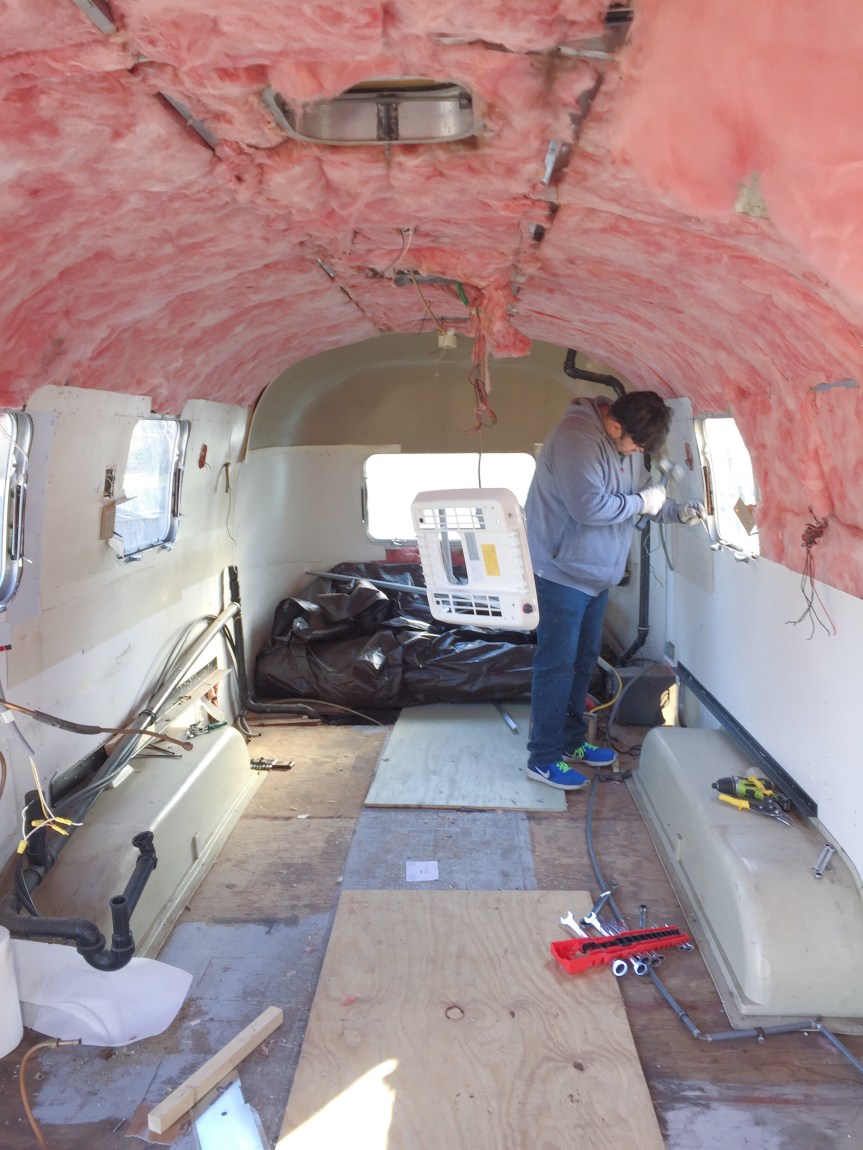
Once all of the interior skins were done, we were left with a big pile of scraps, tons of bags of the pink stuff, and a lot of little particles to shop vac up.
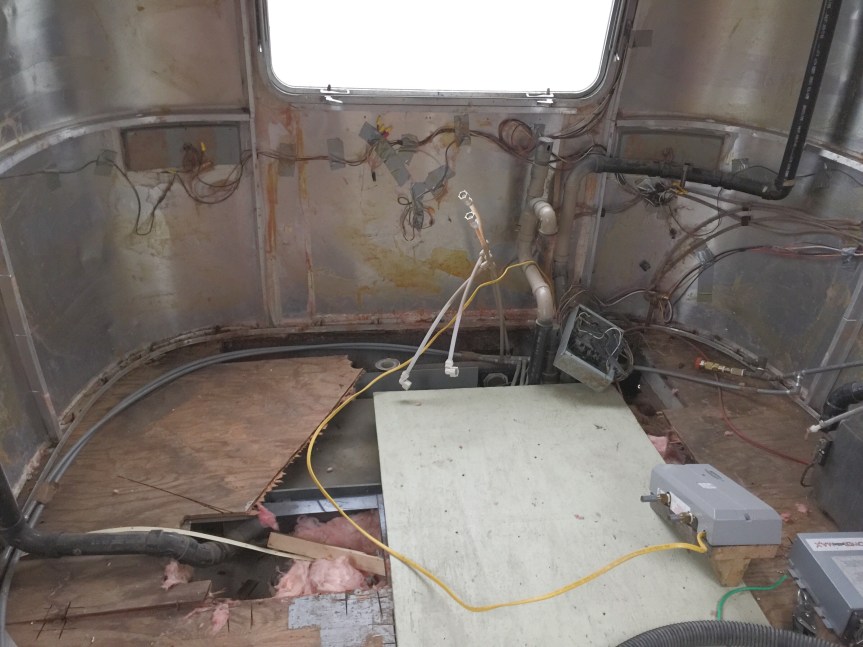
At that point we were ready to get going on the floor. We had already cut up a small section of it over the gray tank several weeks ago and realized that it’d be better to remove all of the skins first, since the subfloor is bolted in behind them in several places.
We’ve since gotten up most of the floor, with a circular saw, vise grips, a lot of muscle, and a lot of determination. Let me use this opportunity to say – I had several moments while removing the skins where I stopped to say to myself: “Why are we doing this? The insulation isn’t so bad and the electrical works. Is this really necessary?”. Seeing what we had under our floor had me vehemently answering YES YES YES.
Definite evidence of rodents, moisture, and other general nastiness. GROSSGROSSGROSSGROSS.
Had we just said “eh, it’s probably okay” and painted over it with no investigation, we would never truly know what we were living on top of, which would have been a nasty cesspool of icky.
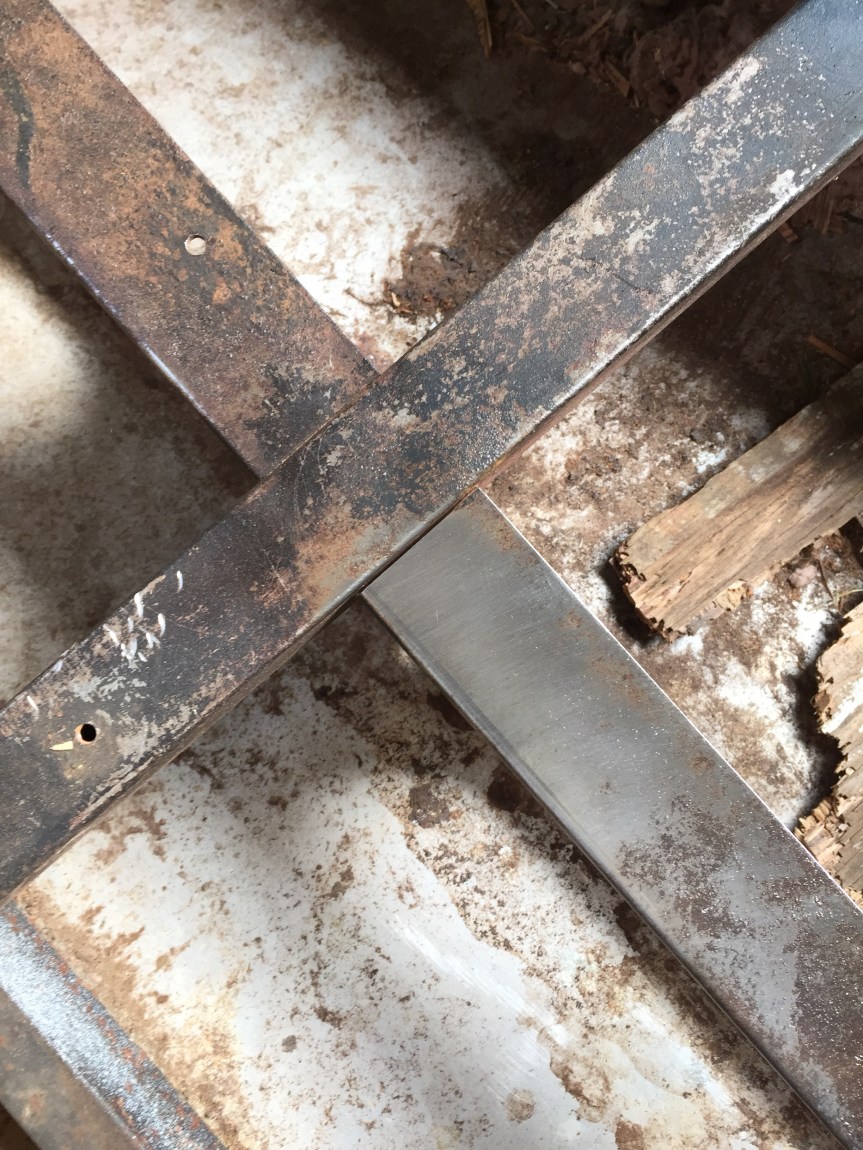
Right now, we have a makeshift plywood “floor” so we’re not walking around on the frame, which needs a few minor welds and a LOT of rust removal and POR-15 (not necessarily in that order).
We still have about a third of the floor to take off, but we’re handling all the stuff in the c-channel and the bolts on the frame first. We’ve been twisting the bolts out with vise grips, which seems to work well enough and not take too terribly long.
Folks keep suggesting an angle grinder, which I know will also do the trick, but I wonder how careful you have to be to protect the frame, opposed to just using a little muscle to pull them out with the vise grips? Anyone have an opinion? Put it in the comments!
My lease is up in 61 days. The tentative plan is to get her as far along as we can so we can move in April 1st. Bare minimum, we need the insulation done and the interior skins up, and the sub down and sealed, and the interior fully painted, and only then we are willing to move in and sleep on our mattress on the floor while we finish up the rest. By April, Texas is warm enough that we won’t have the cold to worry about, and hey, with all that rent and utility money freed up, we just might get a lot done in a relatively short amount of time to get her road ready faster! A girl can Airstream Dream, right? Right now, here’s how she looks (with the mess cleaned up for the pic, of course):
Anyone else out there feeling the reno blues? That feeling that everything takes forever plus a day, and that you’re running way behind? We can do this, right?! Camper People Power! ✊🏽
When people find out we’re remodeling a camper and plan to live in it, generally, we get two schools of response. Response A – people think we’re crazy hippies (they’re not totally wrong). Response 2 – they’re fascinated and ask tons of questions.
One that’s been challenging to answer is what it will look like when we’re done. Its a little tough to just ball all of our wild ideas into a compact little package of aesthetic explanation in one conversation. But I thought it would be fun to talk about it here, while we’re still in the midst of pulling Rosy apart. After all, the designing and decorating is where the real action is at, amiright?!
So here are some high-level representations and annotations of our ideal aesthetic:
*Painted white interior skin and walls. Don’t have a solid visual representation of this, but you get it, right?
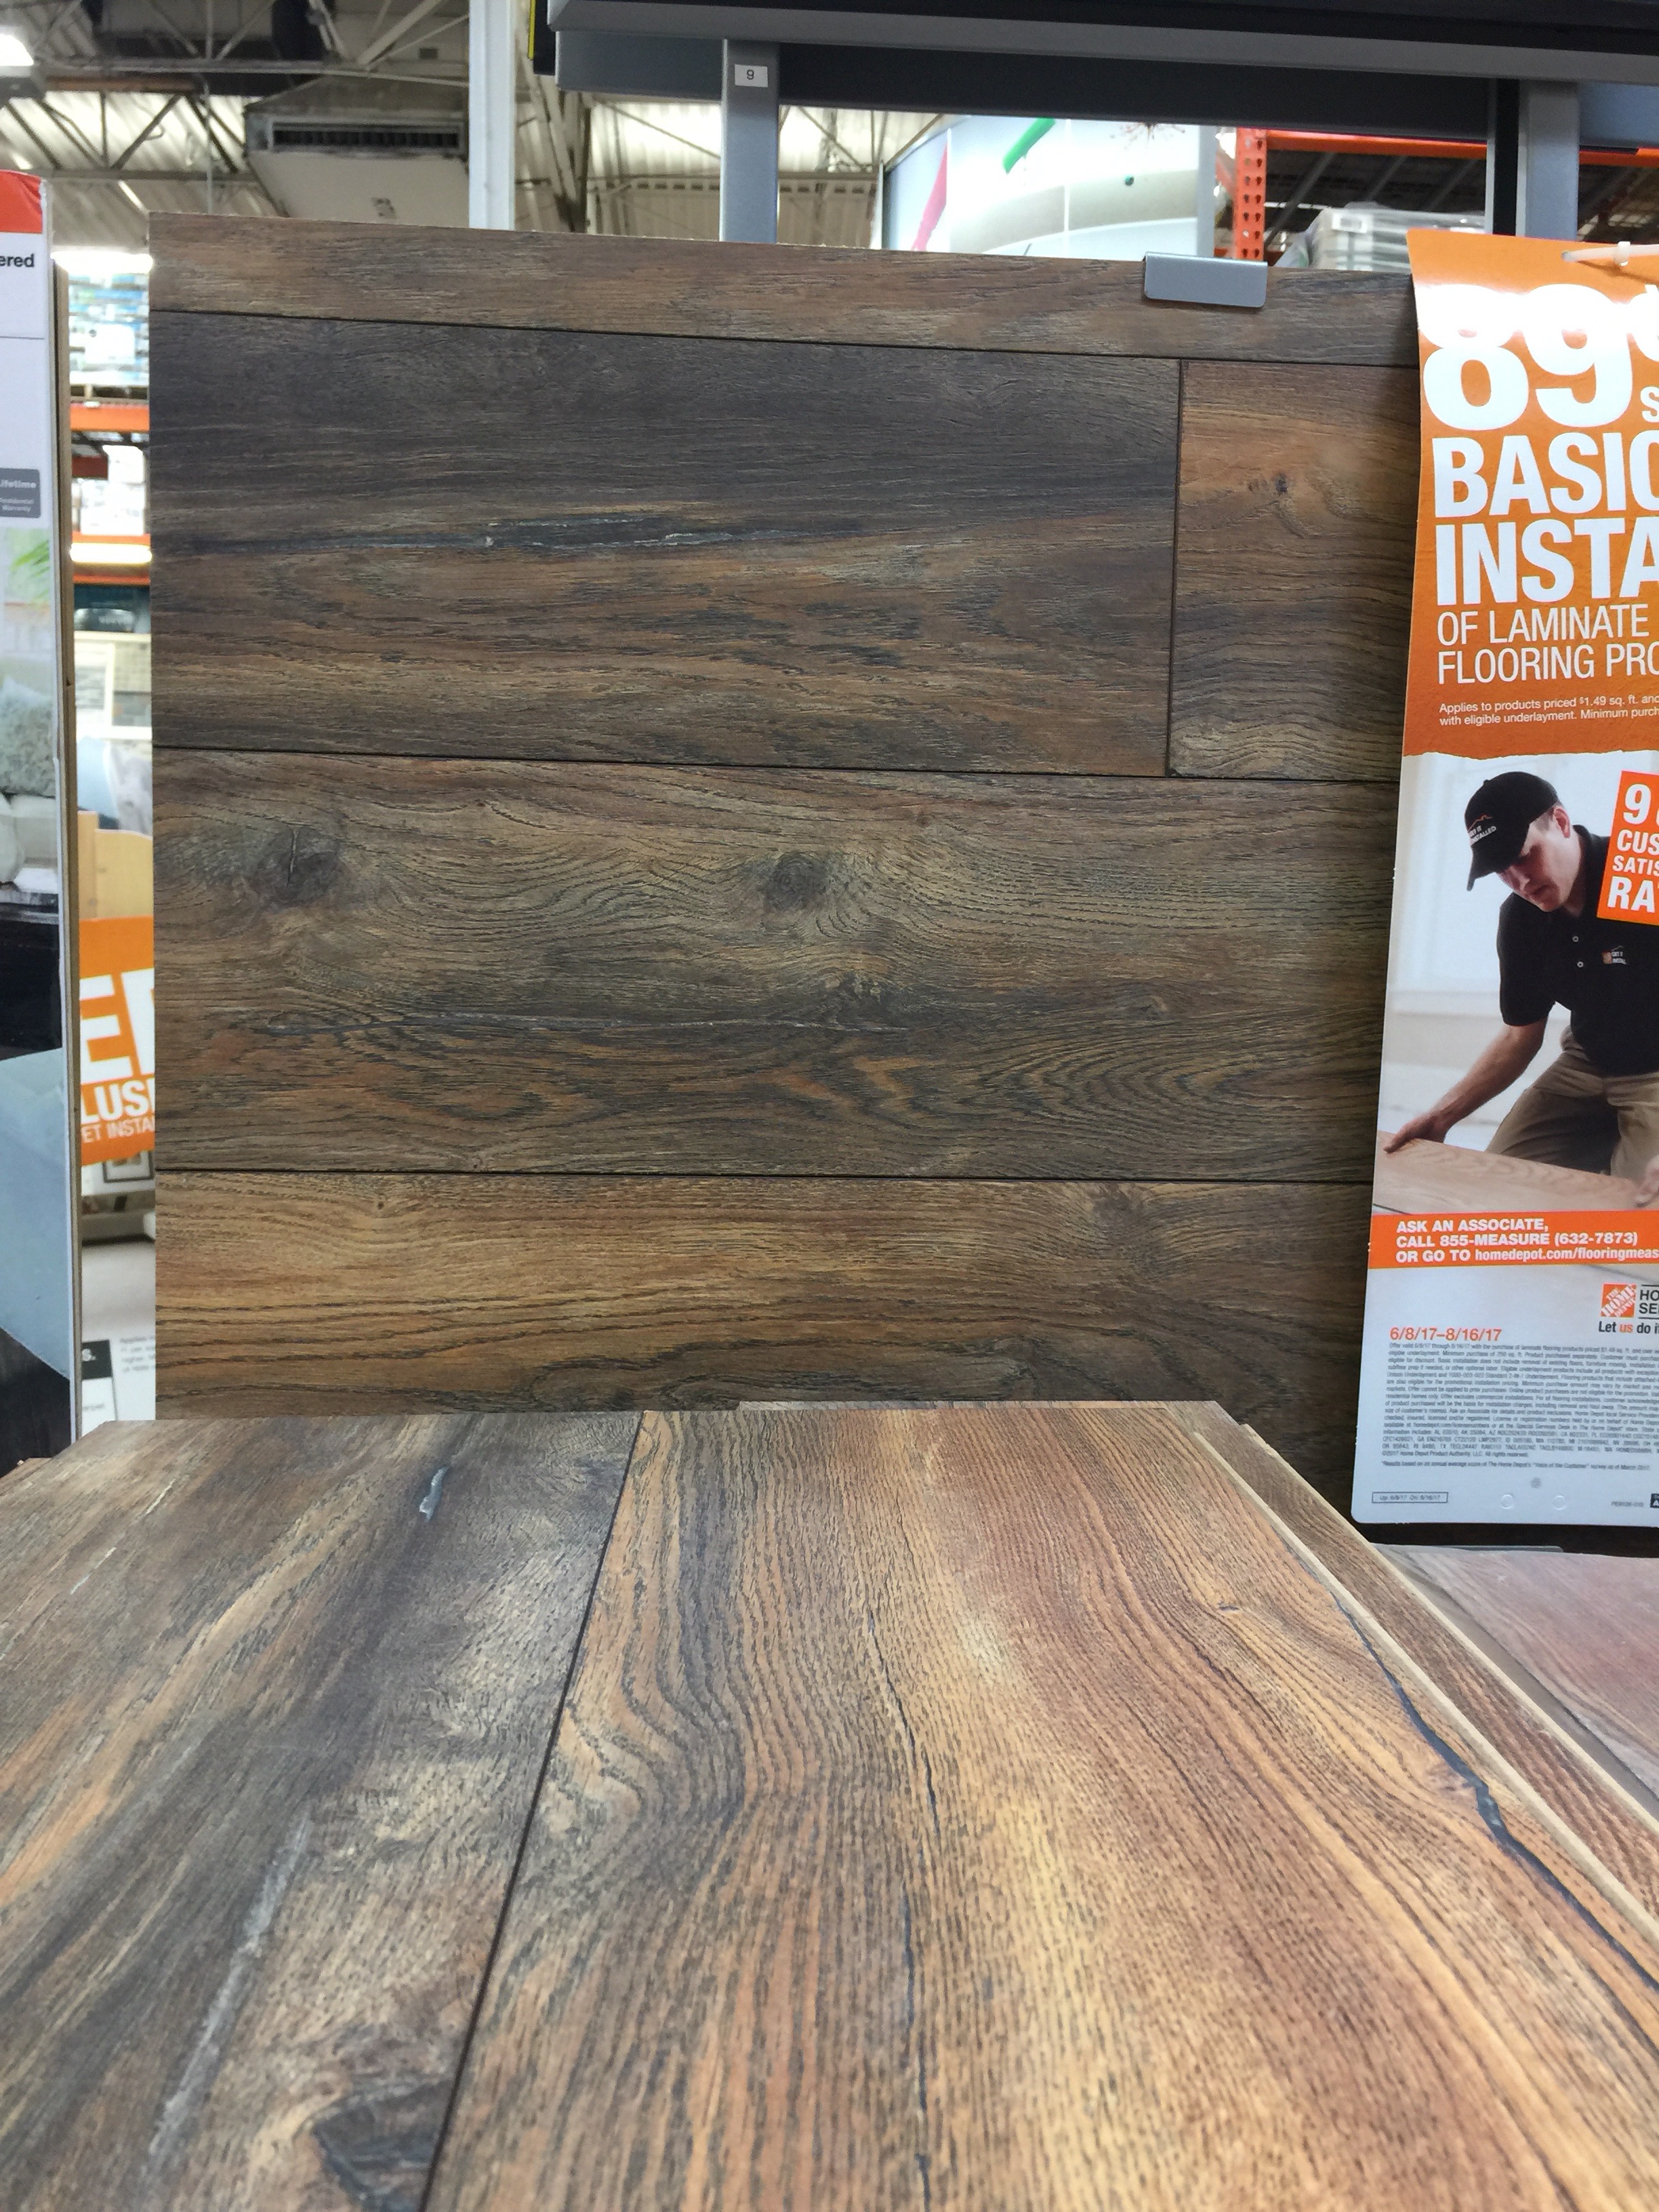
*Weathered/barnwood style flooring. The second one here is my favorite! I love the slight warm tones with the burnt grays.
*Counter and table surfaces will either be faux concrete or hardwood (undecided)!
*Pops of sage green, rose, peach and rose gold! Most of the metal in the camper is already rose gold (that was a freebie) and I’ve seen some pretty rad rose gold spray paint on the market.
*Black on white simplistic, linear graphic accents (like the cacti sheets I bought to turn into curtains).
*Plants. All the plants.
We are really going for a light and airy, minimalistic aesthetic, with well thought out storage, and multi-use zones.
We also got a lot of inspiration (and the decision to go with white walls) from following Mavis, Dunes, and Tin Can Homestead on insta.
Hopefully that gives whomever so reads this some sort of mental picture of how we plan on outfitting Rosy. Now if we could just pick a floor plan. I made some templates for us to draw out multiple layouts, which should help us get closer to nailing that down. DIY pun intended.
…and it got me wondering, “Do we really, truly, ABSOLUTELY neeeed an oven”? The Great Debate, I call this.
Let me back track a little bit. Once upon a time, three years ago, a girl moved into a quaint little apartment. The apartment was small and suited the girl’s few needs. Though this girl believes she has an eye for detail, she somehow completely missed the fact that this apartment did not have a MICROWAVE.
Obviously, the girl is me, and obviously, my first instinct was to panic, because who in the heck can live a normal life without a mickey to heat up her mac n’ cheese leftovers?!
Somehow, three years later, I’m still alive and breathing, even without the modern convenience of concentrated, high powered heat waves to zap my food into a palateable temperature. ‘Vick moved in two years ago, and has also survived sans-microwave, thank goodness. We both grew up with microwaves in our homes, so neither of us had done much reheating in an oven or on the stove before. Google has been our friend in these trying times.
So, now that we’ve brought ourselves current, let’s talk about this oven thing…
Ovens take up so much space! Our range is small, and yet it still seems to take over a lot of valuable real estate in the kitchen area. When you’re planning on living in 200 sq ft, space becomes such a precious commodity!
This isn’t a great angle (or a great photo at all for that matter), but hopefully this gives you a general idea of the size of it.
When I’m not letting chain restaurants do my cooking for me, I do a lot of cooking on the stove. Really, the only time I regularly use the oven is for heating/reheating pizza (because pizza is life). And the occasional batch of cookies. And it’s great for storing a Costco rotisserie chicken for about an hour if I’m not starving, but will want to eat soon, and still want it to be hot.
But, is all of that enough for us to take up so much precious space in our little abode? Can we live without pizza? Of course not, let me try again – are there other ways to make pizza? Would we be solid with just a space saving induction cooktop? If we can live without a microwave, certainly we could live without an oven, right?
So talk to me, campers. To oven, or not to oven? That is the question. What’s your setup like? What are the pros and cons? What do we do?!
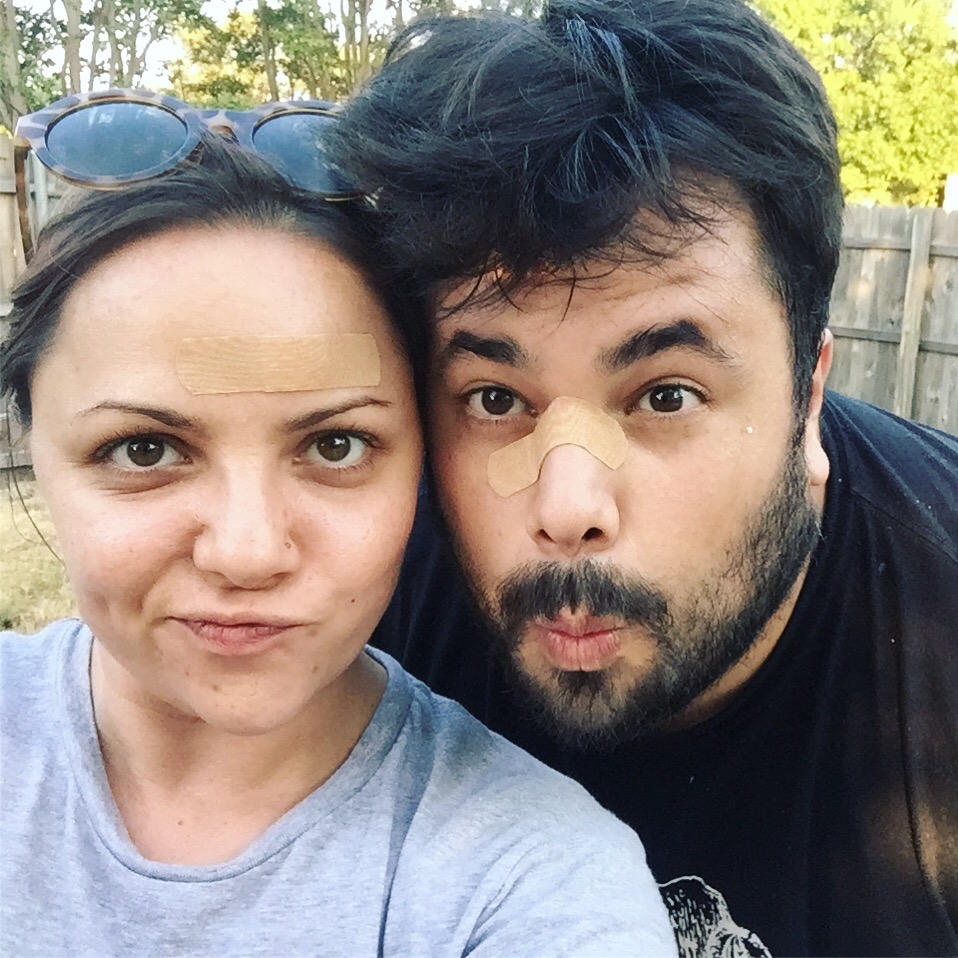
‘Vick and I are experiencing very sore muscles (and each a very minor facial injury) this week.
We got a lot done last Saturday! Funny thing is, the camper still looks pretty much the same as it did when we got there – the mess just keeps getting rearranged.
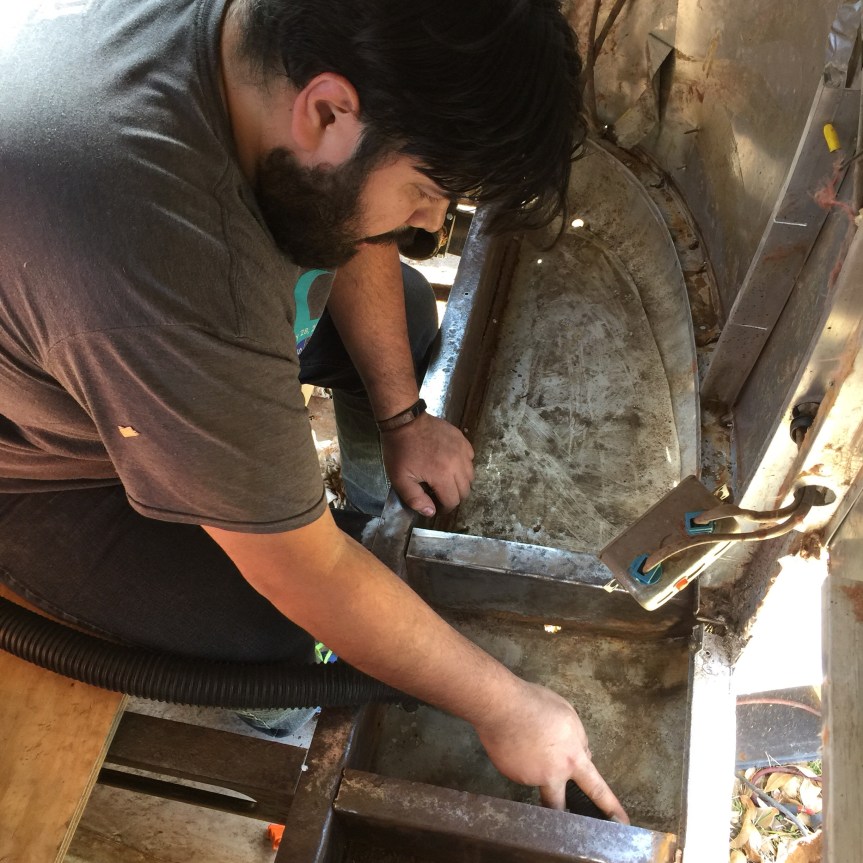
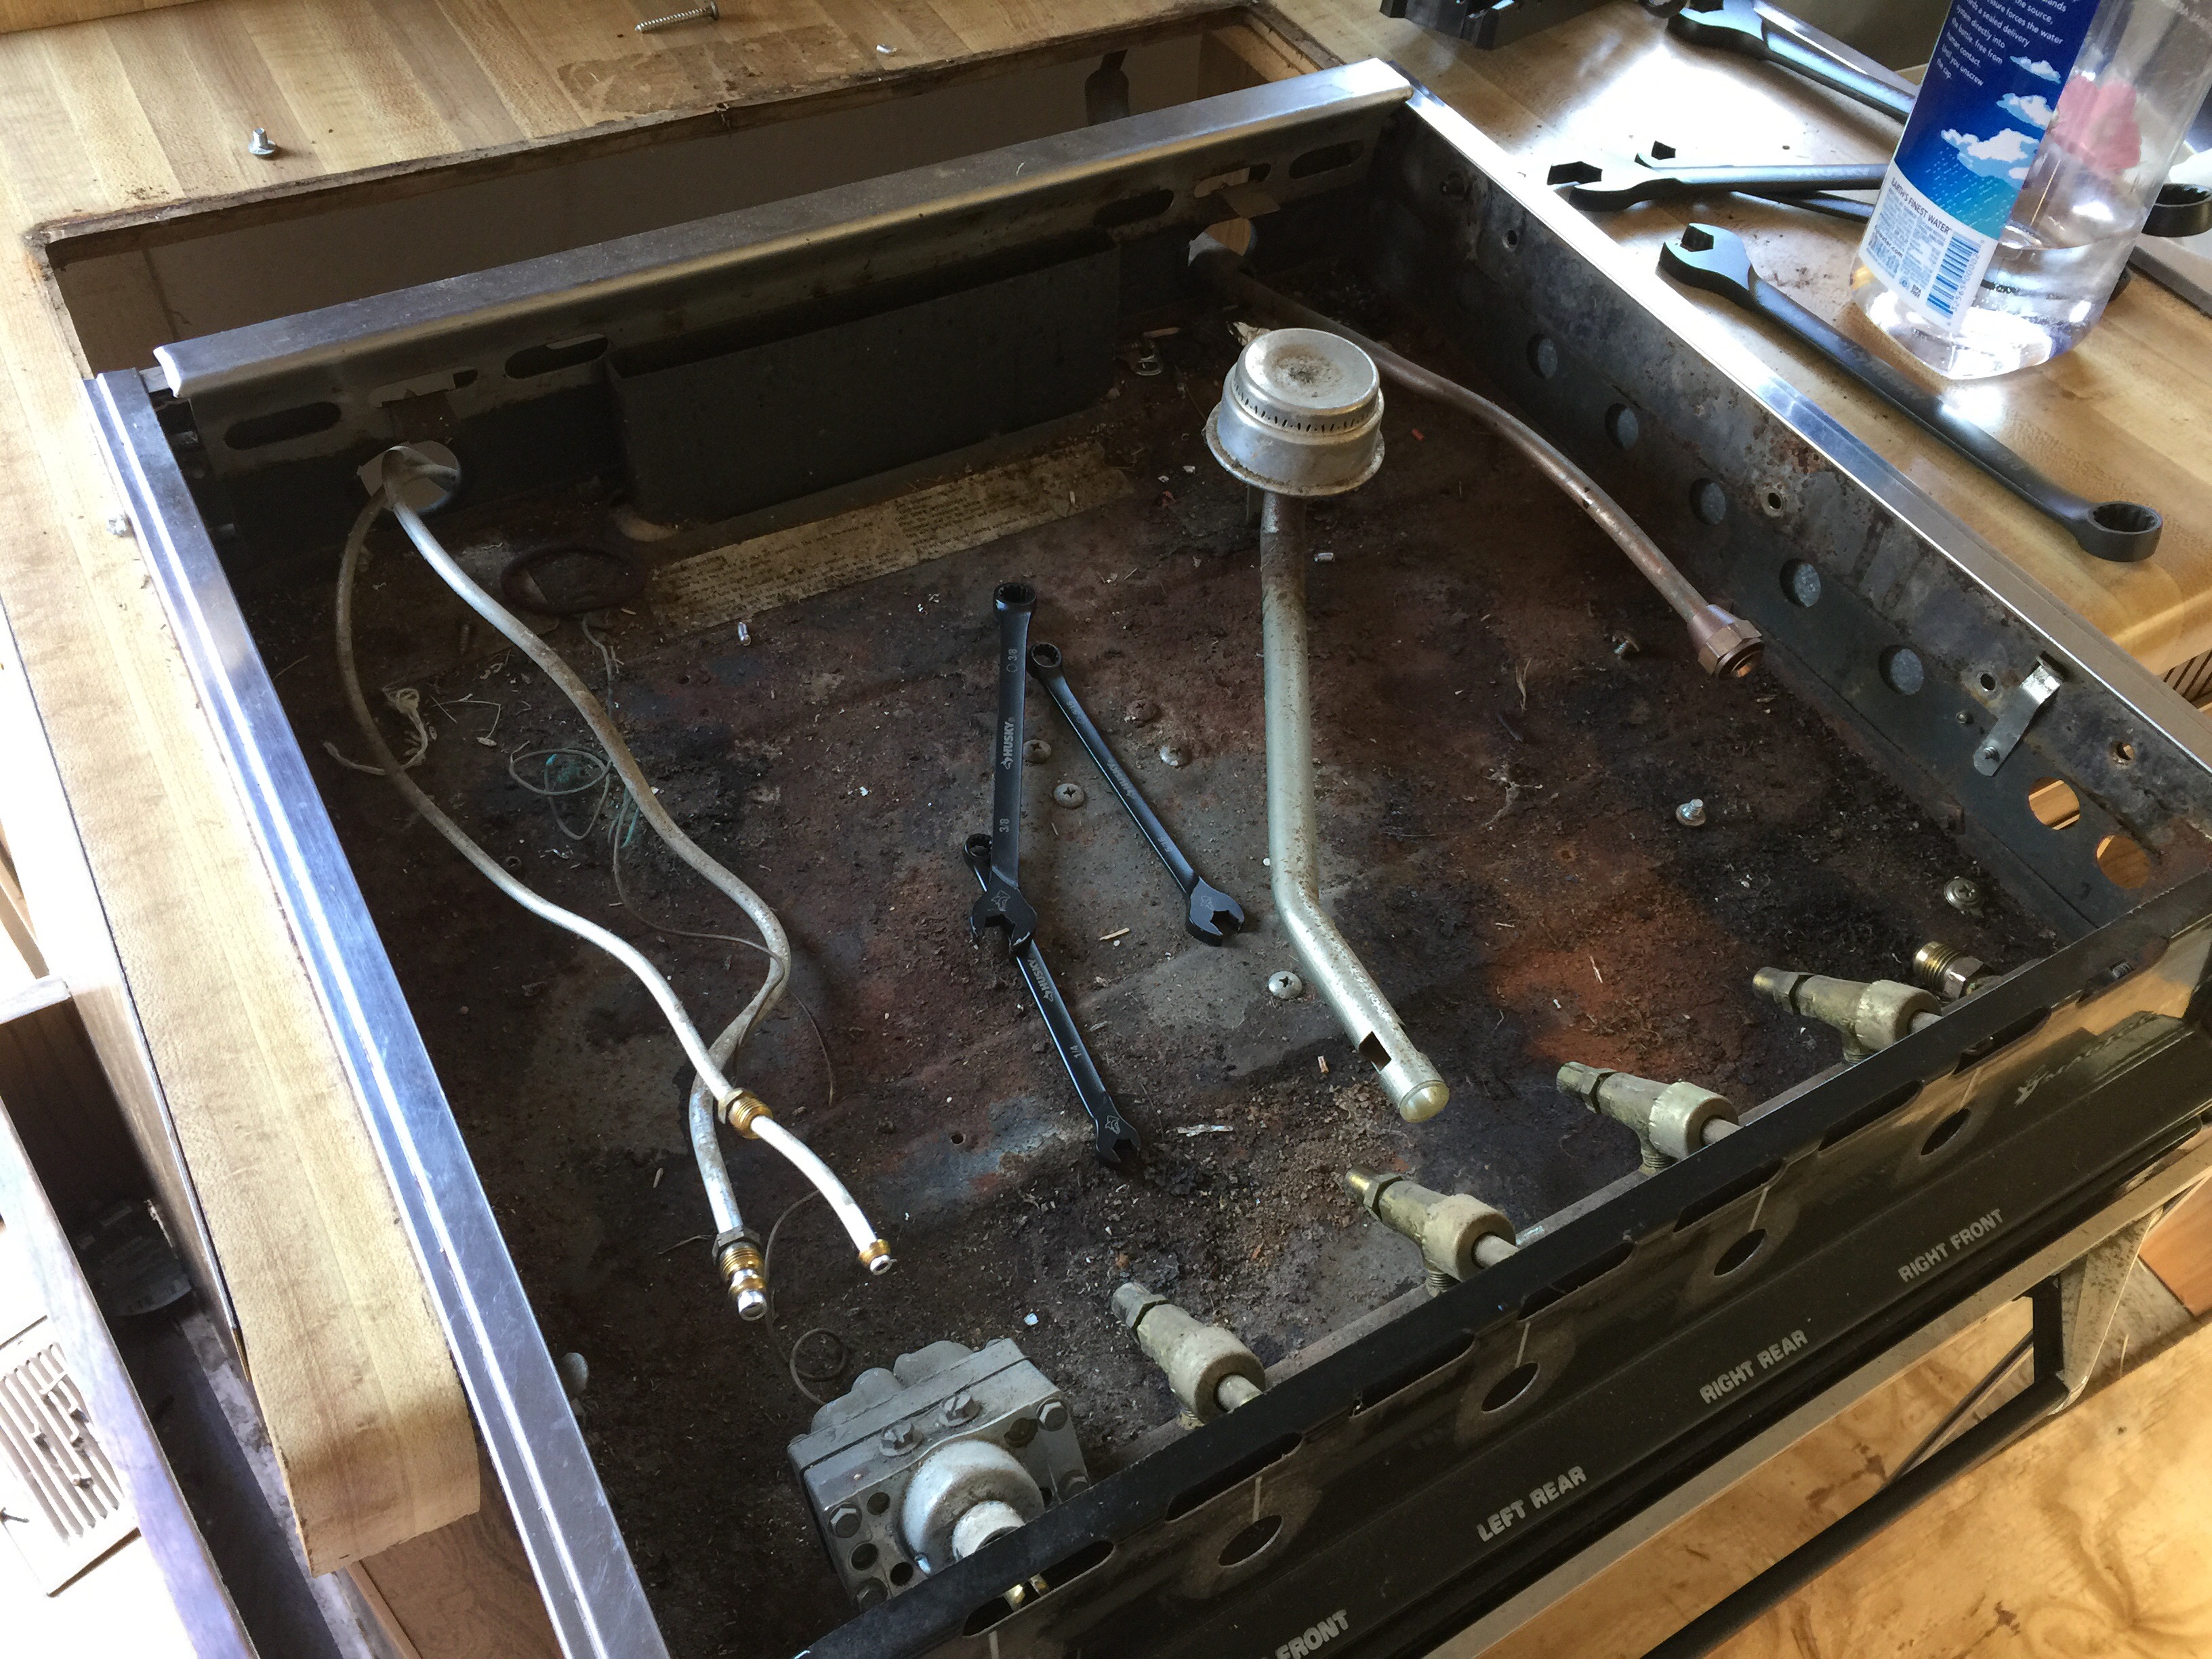
We have been sweating the kitchen removal – which is hilarious, because, in our camper, the kitchen is literally one lower cabinet and one upper cabinet, each about 5’ wide. It’s just the wires and the plumbing and the gas lines… oh my! It’s so much to deal with, and could be dangerous if done incorrectly.
We (loose “we”… Arnavick was most of the muscle here) managed to get it done with one very long break and a trip to the hardware store. Having the right size wrench makes a world of difference when disconnecting gas lines for the stove/oven.
Pretty much everything in this camper is riveted into the interior skin, so to get the cabinet out, we used a tack puller, hammer, and elbow grease to pop all the rivets out.
Then there were the gas lines. Of the approximate 40 wrenches we have, we didn’t have a single on that fit the nut that was holding the gas line to the stove. No adjustable wrench either. That’s when we hit the wall.
Arnavick wasn’t feeling good, and we were both hungry, so we went home. After some lunch, though, we both got a second wind and decided to run by the hardware store for the right size wrench (as well as an adjustable one for good measure).
We also picked up a strap wrench, which came in handy for loosening the slip nuts connecting the sink drains to the pipes.
A few turns of a wrench later, and the gas lines and pipes were disconnected – voila!
That made it easy peasy to pull the stove and the cabinet out! No more kitchen! It looks pretty much the same, but it was a check mark next to a to-do, and we’re satisfied by that! So here it is, an anticlimactic before and after of pre- and post-kitchen removal!
With Kitchen:
Without Kitchen:
Anyone else have reservations removing the kitchen like we did? What got you through it?
Arnavick got really brave last weekend and decided to pull open our awning!
When we bought Rosy, her prior owner told us the canvas was trashed. We were expecting a rotted, nasty mess.
You guys, LOOK AT THIS AWNING RIGHT HERE!
It’s in pretty darn good shape compared to the image we had in mind. And the colors! The colors match our beloved exterior striping! Swoon!
So, there IS a little problem… well, two little problems.
One, there’s some gunk at the very top of the awning. We will have to give it a good washing to see whether it’s just gunk, or if the canvas is rotting. I’ve never wished so hard for something to be gunk.
Two, the thread came out of the seam that’s right by the door, causing a hole. I can sew really well, but I don’t know how to go about fixing this problem. I don’t want to take the awning off, and I am not confident in my sewing when I have to raise my hands over my head to do so. The great news is, the fabric there is intact.
I was thinking to possibly just gorilla glue the seam back together? Is that crazy?
I love an impromptu sister date! If ever there were a best sister award, mine would certainly receive it. We’re incredibly close, sometimes to the point of annoying our family with giggle fits and inside jokes. She’s the absolute greatest!
So when she threw out an invite to meet her at Target after work, I. WAS. THERE. I love catching up with her, and seeing my sweet nephew!
Target and I have a longstanding friendship (we see each other, like, all the time), which can get pricey if you’re not careful. I’ve even posted before about my trick for taking it easy on my wallet – my red sticker rule. If I focus my attention on clearance for non-essentials, my bank account doesn’t seem so anemic.
So when I saw that these sheets, these super cute cacti sheets, these sheets that I’ve commented on EVERY TIME I see them, were on clearance – I was all about it!
One clearance bedding cartwheel discount, one red card discount, and a $10 bill later, and I was on my way home with the cutest little cacti fabric you ever did see!
Sooo, I really want to use this for curtains in miss Rosy the Argosy! The sheets are white, so I’ll need to pair it with a thicker fabric backing for more privacy – wouldn’t a bright cactus green to match her exterior stripes be just perfect?! I’m trying to come up with a way that we can do two-layered curtains that we can use independently. As in, have the privacy curtain, but then also the option to use just the cacti curtain if we want some light to come thru in the daytime, but don’t want folks seeing in (like if I’m in my p-jams or something). More on that if/when I get it figured out.
It’ll be quite a while before I get working on curtains, we still have tons to do! But in all the hard demo work, it was nice to pick up something that’ll eventually be used for the decorating portion of the reno! I love the hard work of pulling things apart and rebuilding, but prettying her up will be so fun!
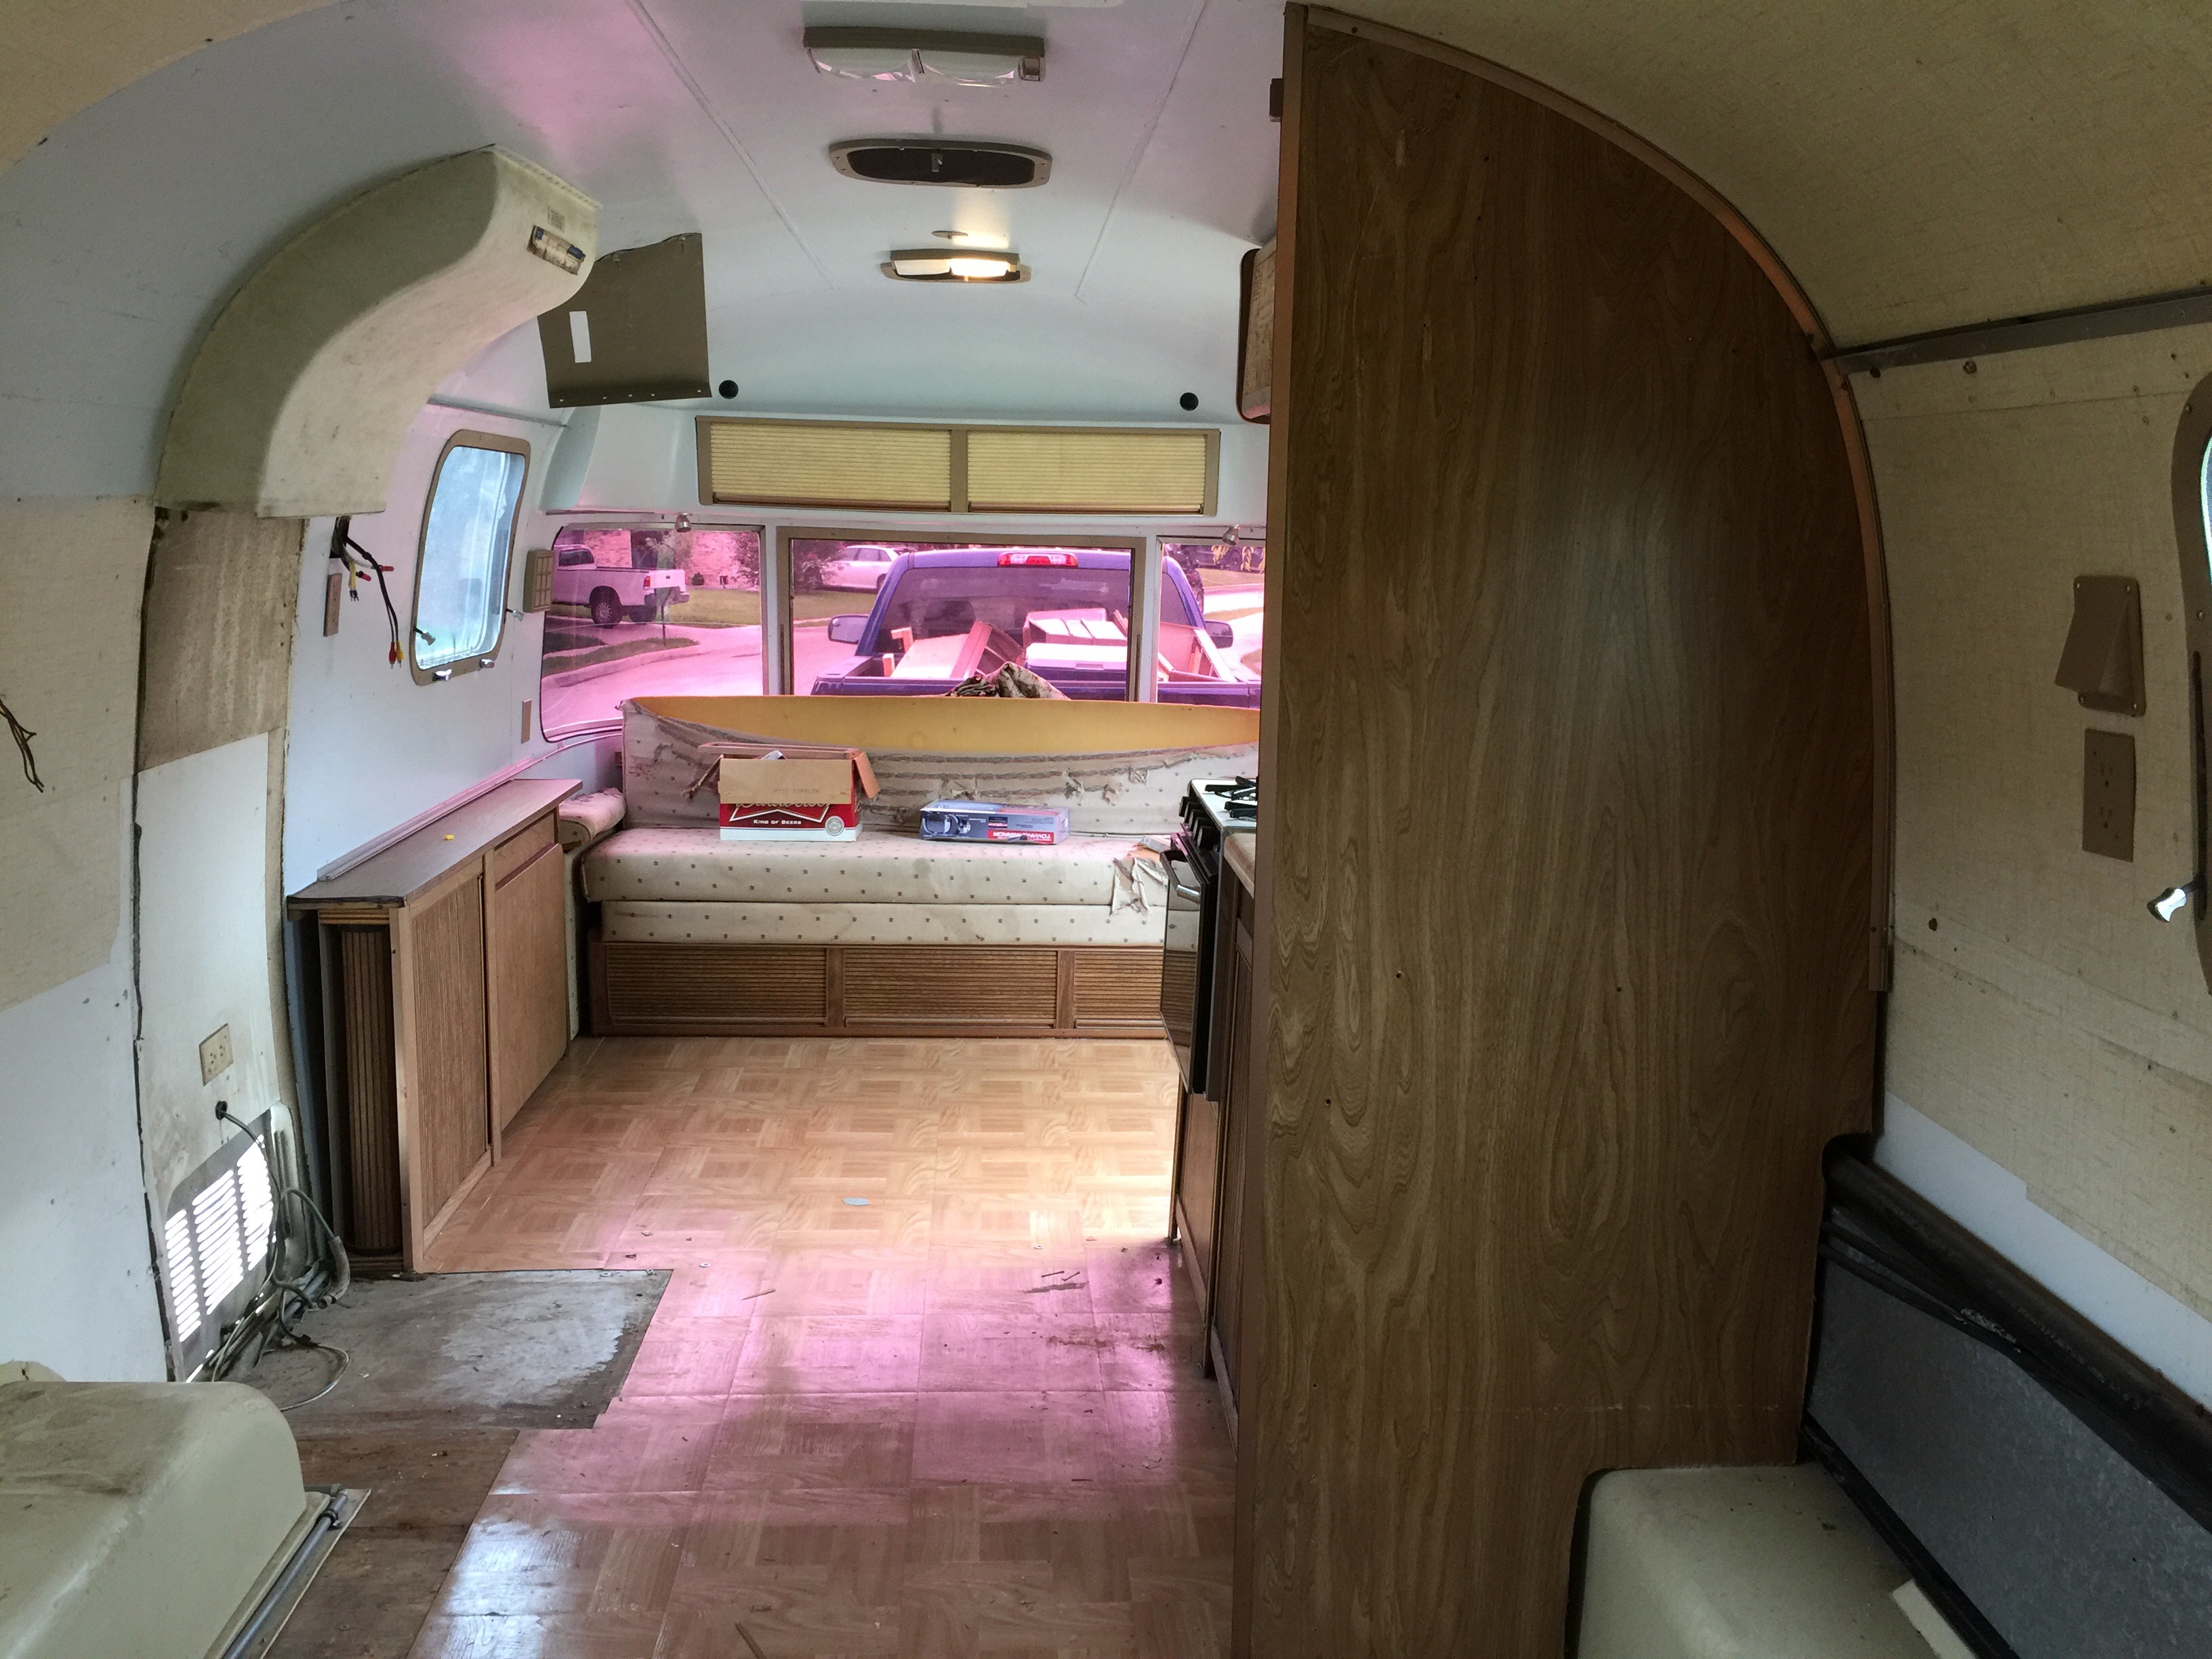
If we’re gonna chronicle our renovation progress on Rosy the Argosy, we must start with the obligatory “before” tour, yes? Follow me…
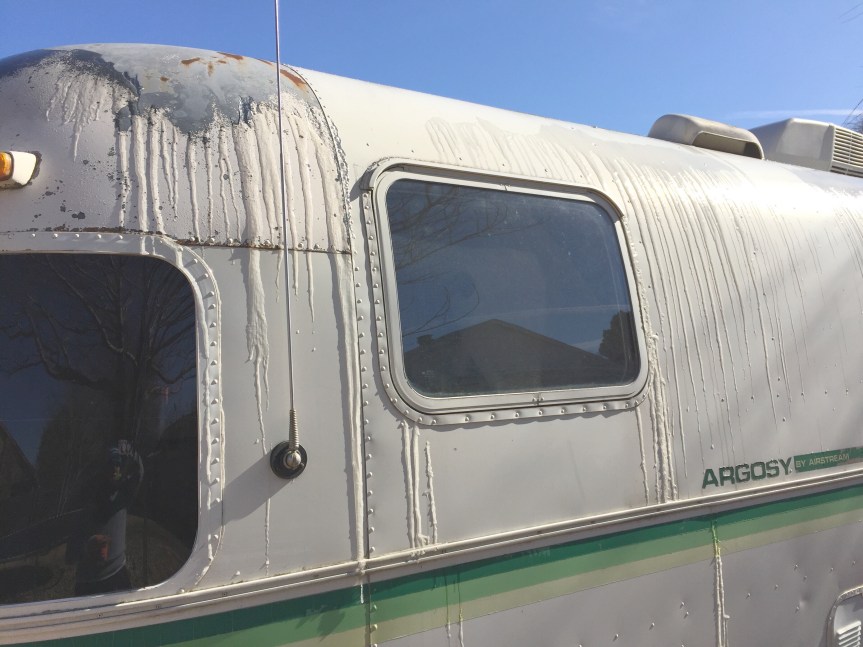
Rosy is a 1979 model Airstream Argosy. She is 27′ long. The thing about the Argosy models that’s different than other Airstreams is that their exterior is white, not the shiny silver most people think of when they hear “Airstream”. Ours is the first Argosy I’ve ever seen with green stripes on the outside. I’ve only ever seen orange or blue striping. We are going to do our darnedest to preserve that striping! If it doesn’t make it through the reno and a vigorous exterior cleaning, we’ll replace it with an exact replica. We love the retro look it gives her! She’s a little rusty on the outside in some spots, but we plan on brushing/sanding/sandblasting and re-painting the rough parts.
We have yet to open our awning, but we’re told that the canvas is trashed. Sad face. The good news is, we can buy a custom awning to match the green stripes. The bad news is, it’s an expensive fix. We’ll post on that when the time comes.
Shall we go inside?
(we are the bottom layout in above)
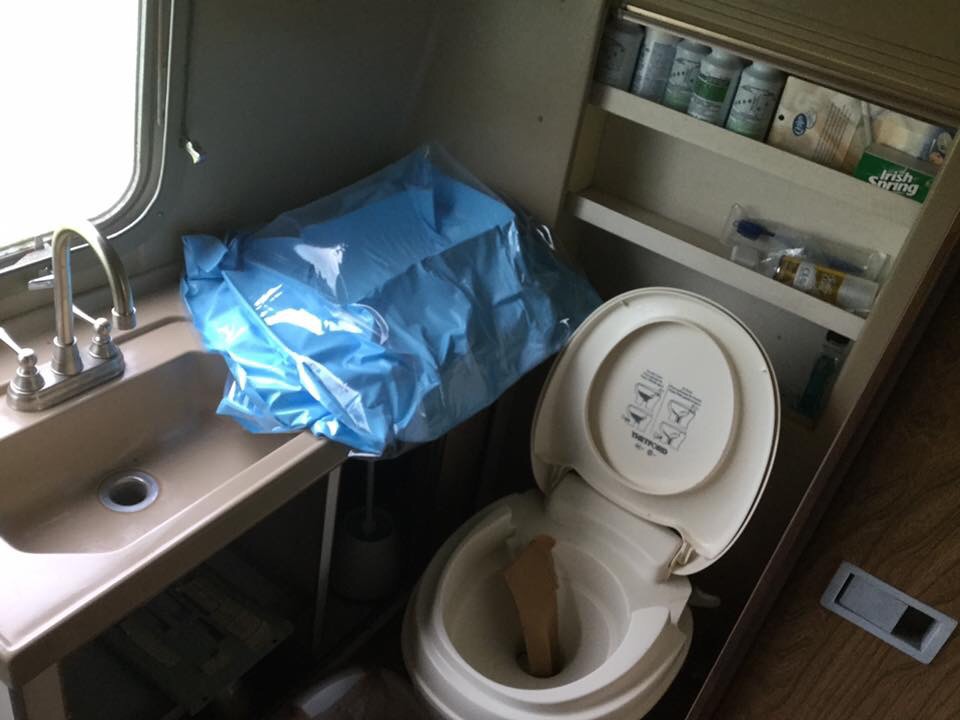
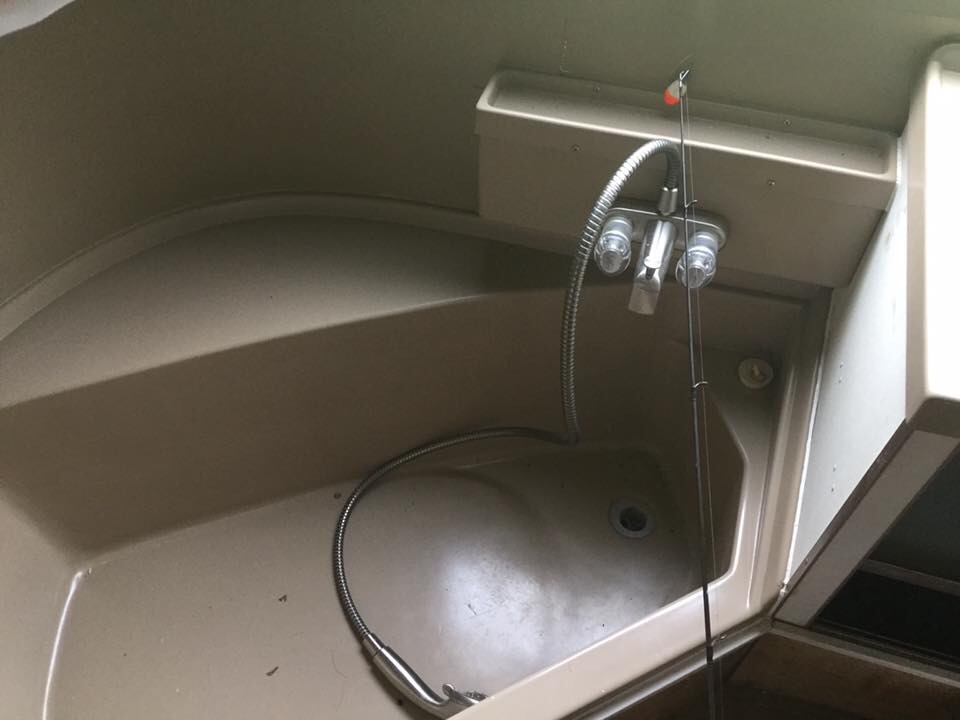
Rosy’s plumbing and electric work are intact – impressive for a gal her age! She’s outfitted with a seating area, fold out dining table, kitchen with 4-burner gas stove and oven, twin beds, a back bath with a commode, sink and bath tub, three storage closets, and overhead storage cabinets throughout.
We’re keeping the bath and kitchen where they’re located but replacing the breaking, aging plastic and particle board with new, high quality materials. The twin beds will be pulled and replaced with a murphy-style full or queen bed and storage cabinets. The dining and seating area will also remain in the same spot, but will be updated with newer, better materials and a style that is uniquely #teamjamavick.
Perhaps our favorite feature (and part of how we chose her name) is her rose colored glasses!
Her previous owner tinted the wrap-around windows in front! We love the ROSY shadows the tint casts in the dining “room”! It’s weird, and we’re keeping it.
We have TONS to do before getting Rosy live-in ready, and we’ll post the ups, downs, ins, and outs as we go!
Oh hai! This is the first post on the #teamjamavick blog! You are probably here either because you’re family, or a bored friend of ours, but either way we are THANKFUL. FOR. YOU! We are busy people (work, school, camper reno, wedding planning, etc, so on, so forth, blah blah blah) but our goal with this blog is to post more detailed accounts of our on-goings than the blurbs we put on social media, if nothing else so that Arnavick and I have a virtual scrapbook of our journey together! If someone ends up getting value or inspiration from what we post here, well then we’re doing our diligence to contribute to our fellow humans.
A non-exhaustive list of what you might stumble across on this blog: